
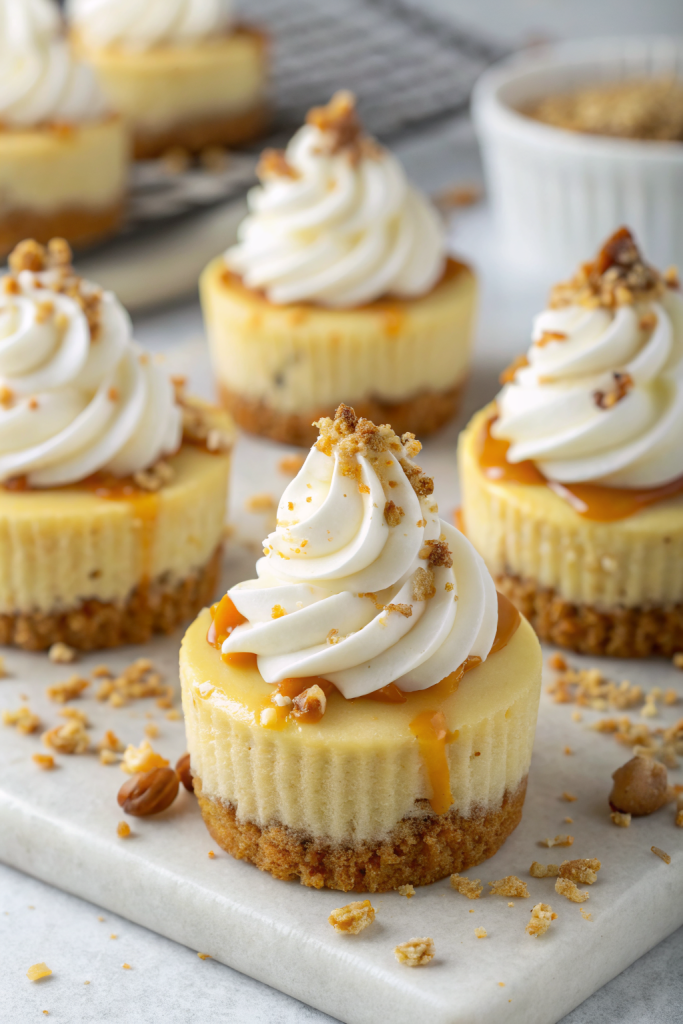
Apple Crisp Mini Cheesecakes Recipe tastes like a cozy fall dessert mash-up: creamy vanilla cheesecake, cinnamon apples, and a buttery oat crumble all in one handheld bite. It works perfectly for busy home bakers who want a showy dessert in about 1 hour total, including bake and cool time. I tested these on my neighbors during football Sunday, and not a single one survived the halftime show.
Why Apple Crisp Mini Cheesecakes Recipe Is Worth It
You get all the flavor of apple crisp and cheesecake without committing to a giant springform pan. The mini size bakes faster, chills quicker, and serves easily for parties, potlucks, or weeknight dessert cravings.
The layers stay neat and defined: crunchy graham crust, silky cheesecake, saucy apples, and crisp topping. Each bite hits sweet, tart, creamy, and crunchy at the same time, which feels like dessert multitasking in the best way.
“These Apple Crisp Mini Cheesecakes taste like a bakery special, but my kids thought I bought them at a fancy shop. ★★★★★”
Ingredients You Need
Crust
- 1 cup graham cracker crumbs
- Use about 8 full sheets; store-bought crumbs work great as a shortcut.
- 3 tablespoons granulated sugar
- 4 tablespoons unsalted butter, melted
- Salted butter works too; just reduce added salt later in the recipe.
Cheesecake Filling
- 12 ounces cream cheese, softened (brick style, not whipped)
- Use full-fat cream cheese for best texture; I like Philadelphia brand.
- 1/3 cup granulated sugar
- 1/4 cup sour cream (or plain Greek yogurt)
- 1 large egg, room temperature
- 1 teaspoon pure vanilla extract
- 1 tablespoon all-purpose flour
- This helps the mini cheesecakes set nicely and not crack.
Apple Layer
- 2 medium apples, peeled, cored, and finely diced
- Use firm, tart apples like Granny Smith or Honeycrisp for best flavor.
- 1 tablespoon unsalted butter
- 2 tablespoons brown sugar, packed
- 1 teaspoon ground cinnamon
- 1 teaspoon lemon juice
- Pinch of salt
Crisp Topping
- 1/3 cup old-fashioned rolled oats
- 1/3 cup all-purpose flour
- 1/3 cup brown sugar, packed
- 1/2 teaspoon ground cinnamon
- 1/4 teaspoon salt
- 3 tablespoons cold unsalted butter, cubed
Optional Garnishes
- Whipped cream or whipped topping
- Caramel sauce (bottled or homemade)
- Extra cinnamon for dusting
Equipment
- 12-cup muffin tin
- Paper cupcake liners (foil-lined liners peel away easiest)
- Mixing bowls (at least 3)
- Hand mixer or stand mixer
- Small saucepan or skillet
- Measuring cups and spoons
- Rubber spatula
- Spoon or small cookie scoop
Quick Tips & substitutions
- Use room temperature cream cheese and egg so the filling blends smooth and creamy.
- Line the muffin tin with paper liners so the crust and cheesecake release cleanly.
- Press the crust firmly with the bottom of a small glass or measuring cup to avoid crumbling.
- Dice the apples small so they soften quickly and sit neatly on top of the cheesecake.
- Swap graham crackers with vanilla wafers or gingersnaps for a flavor twist.
- Use Greek yogurt instead of sour cream if that already sits in your fridge.
- Choose gluten-free oats and gluten-free cookies for the crust if you need a gluten-free version.
- Use coconut oil in the crisp topping instead of butter for a dairy-light option, but chill the topping so it clumps.
- Chill the baked cheesecakes at least 2 hours so the texture turns velvety and slice-clean.
- Drizzle caramel right before serving so the topping stays crisp.
How to Make Apple Crisp Mini Cheesecakes Recipe
Step 1: Prep the Pan and Oven
Preheat the oven to 325°F (163°C). Line a 12-cup muffin tin with paper liners and set it aside. Pull the cream cheese and egg out of the fridge so they warm slightly while you prep.
Step 2: Mix and Press the Crust
Stir the graham cracker crumbs, sugar, and melted butter in a bowl until the mixture looks like wet sand. Scoop about 1 to 1 1/2 tablespoons of crust mixture into each muffin liner. Press the crumbs firmly into an even layer with your fingers or the bottom of a small glass.
Bake the crusts for 5–6 minutes until they look set and smell toasty. Remove the pan from the oven and let the crusts cool while you mix the filling. Keep the oven on.
Step 3: Cook the Apple Layer
Melt the butter in a small skillet over medium heat. Add the diced apples, brown sugar, cinnamon, lemon juice, and a pinch of salt. Stir and cook for 5–7 minutes until the apples soften and the juices thicken slightly.
Turn off the heat and let the apples cool for a few minutes so they do not melt the cheesecake filling. If the mixture looks very wet, stir it another minute over low heat so it thickens more. Set aside.
Step 4: Make the Cheesecake Filling
Beat the softened cream cheese with a hand mixer on medium speed until smooth and creamy, about 1–2 minutes. Add the sugar and beat again until the mixture turns fluffy and no lumps remain. Scrape down the sides of the bowl.
Mix in the sour cream and vanilla until combined. Add the egg and beat on low speed just until the mixture blends; do not overmix. Sprinkle the flour over the top and mix on low speed until no streaks remain.
Step 5: Fill the Muffin Cups
Spoon the cheesecake filling over the cooled crusts, using about 2 tablespoons per cup. Smooth the tops gently with the back of a spoon. Leave a little space at the top of each liner for the apple layer and crisp topping.
Step 6: Add the Apple Layer
Divide the cooked apples evenly over the cheesecake filling. Spoon a small mound of apples in the center of each mini cheesecake. Press the apples down gently so they nestle into the filling without sinking all the way to the crust.
Step 7: Mix the Crisp Topping
Stir the oats, flour, brown sugar, cinnamon, and salt in a bowl. Add the cold butter cubes and rub them into the dry ingredients with your fingers or a pastry cutter. Stop when the mixture forms clumps and looks crumbly.
Sprinkle the crisp topping generously over the apples on each cheesecake. Press the topping lightly so it sticks but still keeps a craggy, crumbly texture.
Step 8: Bake the Mini Cheesecakes
Bake the Apple Crisp Mini Cheesecakes for 18–22 minutes at 325°F. The edges should look set, and the centers should jiggle slightly when you nudge the pan. The topping should look golden and crisp.
Remove the pan from the oven and let the cheesecakes cool in the pan on a wire rack for about 30 minutes. Then transfer the pan to the fridge and chill the cheesecakes for at least 2 hours, or up to overnight.
Step 9: Chill, Garnish, and Serve
Once chilled, peel away the liners gently. Top each mini cheesecake with a swirl of whipped cream and a drizzle of caramel sauce if you like extra sweetness. Dust with a pinch of cinnamon for a bakery-style finish.
Serve the Apple Crisp Mini Cheesecakes slightly chilled or close to room temperature so the flavors shine. Watch them disappear faster than you can say “save me one.”
Recipe Variations
- Gluten-free: Use gluten-free graham crackers or cookies and certified gluten-free oats.
- Vegan: Use dairy-free cream cheese, coconut yogurt, plant-based butter, and a flax egg (1 tablespoon ground flax + 3 tablespoons water).
- Low carb: Use almond flour instead of graham crumbs, a low-carb sweetener instead of sugar, and skip the oats in the topping.
- Extra spice: Add nutmeg and cloves to the apple layer for a stronger fall flavor.
- Nutty crunch: Add chopped pecans or walnuts to the crisp topping.
- Caramel apple version: Swirl a teaspoon of caramel into the cheesecake batter before baking.
- No-bake shortcut: Use a no-bake cheesecake filling and bake only the crust and crisp topping, then assemble and chill.
Ways to Serve Apple Crisp Mini Cheesecakes Recipe
- Serve chilled with a dollop of whipped cream and a drizzle of caramel.
- Plate with warm cinnamon apples on the side for extra fruit.
- Pair with hot coffee, chai, or spiced tea for a cozy dessert break.
- Add to a dessert board with sliced apples, pretzels, and chocolate pieces.
- Pack in lunchboxes as a special treat, kept in a small container to protect the topping.
Storage Success
Store leftover Apple Crisp Mini Cheesecakes in an airtight container in the fridge for up to 4 days. Keep them in a single layer so the topping stays intact and does not crush. If you want to freeze them, place them on a baking sheet to freeze solid, then wrap each one tightly and store in a freezer bag for up to 2 months. Thaw in the fridge overnight, then add fresh whipped cream and caramel right before serving to keep the texture crisp and creamy.
Leave a Reply