
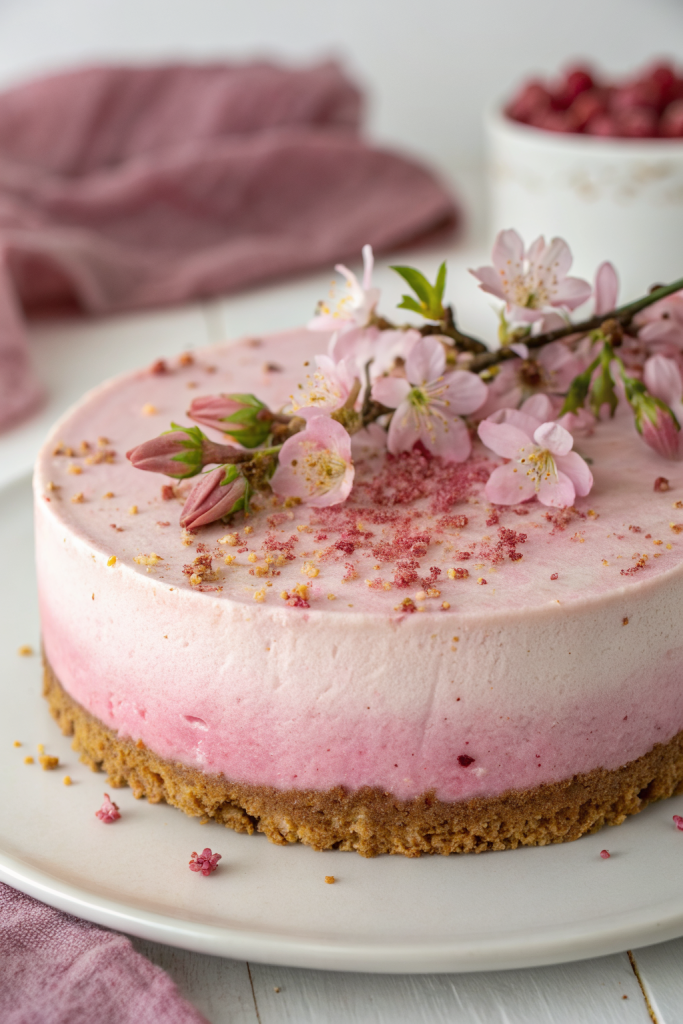
Cherry Blossom Japanese Sakura Cheesecake Recipe tastes like a cloud of vanilla cheesecake kissed with floral cherry blossom and a gentle hint of tart cherry, perfect for spring or any time you crave something pretty and delicate. It suits bakers who enjoy Japanese style light cheesecakes and want a showstopper dessert in about 4 hours total, including chilling. I tested this version after a cherry blossom festival trip, and my family now requests it every spring.
Why You Should Try This Cherry Blossom Japanese Sakura Cheesecake Recipe
This cheesecake feels lighter than classic New York style, so you can enjoy a full slice without needing a nap afterward. The sakura flavor adds a soft floral note that pairs with creamy cheese and a subtle cherry swirl, so the dessert tastes elegant without turning into perfume.
The pale pink color and cherry blossom decorations make it perfect for birthdays, baby showers, or a cozy weekend treat with tea. You also bake it in a water bath, which keeps the texture silky and smooth, even if you do not bake often.
“This Cherry Blossom Japanese Sakura Cheesecake Recipe tastes like spring on a plate, with a melt-in-your-mouth texture and gentle floral sweetness that feels special without being fussy. ★★★★★”
Ingredients You’ll Need
Cheesecake base
- 1 cup (100 g) graham cracker crumbs
- Use digestive biscuits or plain tea biscuits if you live outside the US.
- 3 tablespoons unsalted butter, melted
- Salted butter works in a pinch; skip extra salt if you use it.
- 1 tablespoon granulated sugar
Cheesecake filling
- 12 ounces (340 g) cream cheese, softened to room temperature
- Use full-fat block style cream cheese; tubs often contain more water.
- 1/2 cup (120 g) sour cream, room temperature
- Greek yogurt works as a substitute; pick full-fat for best texture.
- 1/2 cup (120 ml) whole milk, room temperature
- 3 large eggs, room temperature
- 2/3 cup (135 g) granulated sugar
- 2 tablespoons cake flour, sifted
- All-purpose flour works too; the cake just turns slightly denser.
- 1 teaspoon pure vanilla extract
- 1/4 teaspoon fine sea salt
Sakura and cherry flavor
- 1 to 1 1/2 teaspoons sakura extract or cherry blossom flavoring
- Start with 1 teaspoon, taste the batter, then add more if you like a stronger floral note.
- 1 to 2 tablespoons sakura syrup or cherry blossom syrup
- Use a good quality Japanese brand if possible; Monin style cherry blossom syrup also works.
- 2 to 3 drops pink gel food coloring (optional)
- Gel color keeps the batter thick; liquid color can thin it out.
- 1/4 cup (60 ml) cherry syrup or thick cherry juice concentrate
- You can use syrup from jarred sour cherries or a reduced cherry juice.
Topping and decoration
- 1/2 cup (120 ml) heavy whipping cream, cold
- 1 tablespoon powdered sugar
- 1/2 teaspoon vanilla extract
- Candied sakura blossoms or food-safe dried sakura petals (optional but very pretty)
- Extra cherry syrup for drizzling
Equipment
- 7 or 8 inch round springform pan
- Large roasting pan or deep baking dish for the water bath
- Parchment paper
- Aluminum foil
- Mixing bowls
- Hand mixer or stand mixer
- Rubber spatula
- Measuring cups and spoons
- Small saucepan (if you reduce cherry juice)
- Cooling rack
Tips & Tricks
- Line the bottom of the springform pan with parchment and wrap the outside with two layers of foil so water does not seep in.
- Bring cream cheese, eggs, sour cream, and milk to room temperature so the batter mixes smoothly without lumps.
- Mix the batter on low to medium speed and stop once it looks smooth; this keeps extra air out and prevents cracks.
- Taste the batter after you add 1 teaspoon of sakura extract and adjust slowly; floral flavors turn strong quickly.
- Swirl cherry syrup gently with a skewer so you keep a marbled look instead of mixing it fully into the batter.
- Bake at a low temperature and keep the water bath hot to keep the texture soft and custardy.
- Cool the cheesecake in the oven with the door cracked open so the top does not crack from sudden temperature change.
- Chill the cheesecake at least 3 hours, but overnight gives the sakura and cherry flavors time to deepen.
How to Make Cherry Blossom Japanese Sakura Cheesecake Recipe
Prep the pan and oven
- Preheat your oven to 320°F (160°C).
- Line the bottom of your springform pan with a round of parchment paper.
- Wrap the outside of the pan with two large sheets of aluminum foil, covering the bottom and sides up to the rim.
- Set a kettle of water to heat for the water bath and place your roasting pan on the middle oven rack.
Make the crust
- Stir graham cracker crumbs, sugar, and melted butter in a bowl until the mixture looks like wet sand.
- Pour the mixture into the springform pan and press it firmly into an even layer on the bottom using the back of a spoon or a flat-bottomed glass.
- Bake the crust for 8 to 10 minutes until it smells toasty and feels set, then remove it and let it cool while you mix the filling.
Mix the cheesecake filling
- Beat the softened cream cheese in a large bowl on medium speed until it turns very smooth and creamy, about 2 minutes.
- Add sugar and salt, then beat again until the mixture looks fluffy and no gritty sugar bits remain.
- Add sour cream and vanilla, then mix on low speed until combined.
- Add the milk and mix again, scraping the sides and bottom of the bowl with a spatula.
- Add eggs one at a time, mixing on low after each addition until just combined so you do not whip in too much air.
- Sift cake flour over the bowl and fold it in gently with a spatula until no streaks remain.
Add sakura flavor and color
- Stir in sakura extract and sakura syrup, starting with the smaller amounts.
- Taste a small spoonful of batter and add a bit more extract or syrup if you want a stronger floral note.
- Add 2 to 3 drops of pink gel food coloring and fold gently until the color looks even and pale pink.
Assemble with cherry swirl
- Pour about two thirds of the sakura cheesecake batter over the cooled crust in the springform pan.
- Drizzle half of the cherry syrup over the surface in thin lines.
- Spoon the remaining batter on top, then drizzle the rest of the cherry syrup in a spiral or zigzag pattern.
- Drag a skewer or toothpick lightly through the top in small loops to create a cherry blossom style swirl.
Bake in a water bath
- Place the foil wrapped springform pan in the center of the roasting pan in the oven.
- Carefully pour hot water into the roasting pan until it reaches about halfway up the sides of the springform pan.
- Bake at 320°F (160°C) for 45 to 55 minutes, until the edges look set and the center still jiggles slightly like soft jelly.
- Turn off the oven, crack the door open a few inches, and leave the cheesecake inside for 30 minutes so it cools gently.
Cool and chill
- Remove the roasting pan from the oven and lift the springform pan out of the water.
- Peel away the foil and place the cheesecake on a cooling rack until it reaches room temperature.
- Cover the pan with plastic wrap and chill the cheesecake in the fridge for at least 3 hours, or overnight for best flavor and texture.
Whip the topping and decorate
- Beat cold heavy cream, powdered sugar, and vanilla in a chilled bowl until soft to medium peaks form.
- Run a thin knife around the inside edge of the springform pan, then release the sides and transfer the cheesecake to a serving plate.
- Spread or pipe the whipped cream around the edges or in small rosettes on top.
- Add candied sakura blossoms, dried petals, or a light drizzle of cherry syrup for a cherry blossom effect.
What to Serve with Cherry Blossom Japanese Sakura Cheesecake Recipe
Serve this cheesecake cold or slightly chilled so the texture stays light and airy. Pair slices with hot green tea, matcha latte, jasmine tea, or a simple glass of cold milk. Fresh berries like strawberries, raspberries, or sliced cherries balance the floral sweetness and add color. A small scoop of vanilla or cherry ice cream on the side turns it into a full dessert plate that still feels gentle and not too heavy.
Storage Options
- Store leftover cheesecake covered in the fridge for up to 4 days; keep it in an airtight container so it does not pick up fridge smells.
- Chill slices uncovered for 20 minutes to firm up the topping, then cover them loosely with plastic wrap so the whipped cream stays neat.
- Freeze individual slices without whipped cream by wrapping each piece tightly in plastic, then in foil, and freeze for up to 1 month.
- Thaw frozen slices in the fridge overnight, then add fresh whipped cream and toppings just before serving for the best texture.