
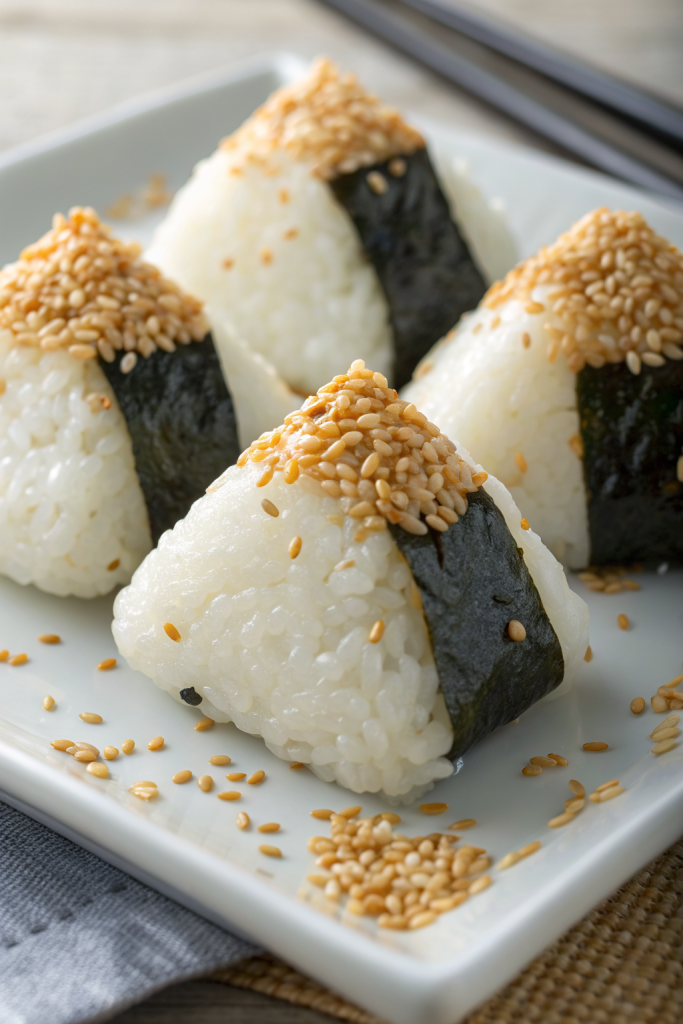
How to Make Tuna Mayo Onigiri Recipe tastes creamy, savory, and a little bit nostalgic, perfect for anyone who loves Japanese convenience store snacks but wants them fresh at home in about 45 minutes. This recipe works well for busy parents, students, or meal-preppers who need grab-and-go lunches that still feel cozy and homemade. I used to pack these for my own work lunches, and they always disappeared faster than anything else in the break room.
Why Make This How to Make Tuna Mayo Onigiri Recipe at Home
Homemade tuna mayo onigiri tastes fresher, holds its shape better, and lets you control the seasoning and quality of the tuna. You also save money compared to store-bought rice balls, especially if you already keep canned tuna and rice in your pantry.
You can adjust the filling to your taste, from extra creamy to extra spicy, and shape them into triangles, balls, or logs. Kids usually love the mild flavor, and adults can add a little heat or extra crunch.
“This How to Make Tuna Mayo Onigiri Recipe tastes just like a good Japanese convenience store onigiri, only fresher and more generous with the filling, ★★★★★”
Ingredients You Need
For the rice:
- 2 cups uncooked Japanese short-grain rice (sushi rice or Calrose style)
- 2 1/4 cups water, plus extra for rinsing
- 2 to 3 tablespoons rice vinegar (unseasoned or seasoned)
- 1 teaspoon fine sea salt
- 1 teaspoon sugar (optional, helps balance the vinegar)
For the tuna mayo filling:
- 1 can tuna in oil or water (5 to 6 ounces), well drained
- Oil-packed tuna gives richer flavor, water-packed tastes lighter.
- 3 to 4 tablespoons Japanese mayonnaise (Kewpie gives the most classic flavor, regular mayo works too)
- 1 to 2 teaspoons soy sauce, to taste
- 1 teaspoon rice vinegar or lemon juice
- 1 to 2 teaspoons sesame oil (optional but tasty)
- 1 tablespoon finely chopped green onion or chives (optional)
- 1 teaspoon toasted sesame seeds (optional)
- A small pinch of black pepper
For shaping and wrapping:
- 4 to 6 sheets nori (roasted seaweed), cut into strips or rectangles
- A small bowl of water for wetting your hands
- A small bowl of salt for seasoning your hands and the rice surface
Optional add-ins and toppings:
- Japanese furikake seasoning for sprinkling on the rice
- Shichimi togarashi or chili flakes for a spicy kick
- Finely diced cucumber or pickles for crunch
Equipment list:
- Rice cooker, Instant Pot, or a medium saucepan with a lid
- Fine mesh strainer for rinsing rice
- Mixing bowls
- Rice paddle or spatula
- Clean kitchen towel
- Measuring cups and spoons
- Optional onigiri mold (triangle mold) if you prefer not to shape by hand
Tips & Mistakes
-
Rinse the rice until the water runs almost clear so the grains cook fluffy instead of gummy.
-
Let the cooked rice rest covered for 10 minutes so the steam redistributes and the texture evens out.
-
Season the rice while it stays warm, but avoid smashing the grains; fold gently with a rice paddle.
-
Use slightly warm or room temperature rice; cold rice cracks and hot rice burns your hands.
-
Drain tuna very well; extra liquid makes the filling runny and hard to seal inside the rice.
-
Taste the tuna mayo before filling; adjust salt, soy sauce, and mayo so it tastes slightly stronger than you want, since rice will mellow it out.
-
Wet your hands lightly with water, then rub a pinch of salt between your palms to keep rice from sticking and to season the outside.
-
Do not overfill; use about 1 to 1 1/2 tablespoons of filling per onigiri so the rice still seals around it.
-
Pack the rice firmly but gently; squeeze too hard and you crush the grains, too soft and the onigiri falls apart.
-
Add nori just before eating if you want it crisp; wrap earlier if you like it soft and chewy.
-
Keep onigiri at cool room temperature for only a few hours; refrigerate or freeze for longer storage.
-
Use plastic wrap if you plan to pack them in a lunchbox to keep them from drying out and to hold the shape.
How to Make How to Make Tuna Mayo Onigiri Recipe
Step 1: Rinse and cook the rice
Measure the rice into a fine mesh strainer and rinse under cold water while you gently swirl it with your hand. Continue until the water turns mostly clear and no longer looks milky. Let the rice drain for 10 to 15 minutes so it does not water down the cooking ratio.
Transfer the rice to your rice cooker or saucepan and add the measured water. Cook according to your rice cooker instructions, or bring to a boil on the stove, then cover, lower the heat, and simmer for about 15 minutes. Turn off the heat and let the rice sit covered for another 10 minutes so it finishes steaming.
Step 2: Season the rice
In a small bowl, mix rice vinegar, salt, and sugar until the salt and sugar dissolve. Fluff the hot rice gently with a rice paddle and spread it in a wide bowl or a shallow dish.
Drizzle the vinegar mixture over the rice while you gently cut and fold with the paddle. Keep the motion light so you separate the grains without mashing them. Taste a small bite and adjust with a pinch more salt or vinegar if you want a brighter flavor.
Step 3: Mix the tuna mayo filling
Open the tuna can and drain it very well, pressing gently with the lid or a spoon to remove excess liquid. Add the tuna to a bowl and break it into small flakes with a fork.
Stir in Japanese mayonnaise, soy sauce, rice vinegar or lemon juice, sesame oil, green onion, sesame seeds, and black pepper. Mix until creamy and cohesive, not soupy. Taste and adjust with more mayo for creaminess, more soy sauce for salt, or a pinch of chili flakes if you like heat.
Step 4: Prep your shaping station
Set out a small bowl of clean water and a small dish of salt near your work area. Cut the nori sheets into strips or rectangles that fit around or under your onigiri.
Keep a clean kitchen towel nearby so you can wipe your hands and tools. Fluff the rice again gently if it clumps, and let it cool until it feels warm but comfortable to handle.
Step 5: Shape the rice balls
Wet your hands lightly with water, then tap your fingertips into the salt and rub your palms together. Scoop about 1/3 to 1/2 cup of rice into one hand and flatten it slightly into a thick disc.
Place about 1 to 1 1/2 tablespoons of tuna mayo in the center. Cup your other hand over the rice and gently fold the rice around the filling, covering it completely. Press the rice together so it seals, then start shaping into a triangle by cupping your hands and rotating the onigiri as you press the three corners.
If you use an onigiri mold, lightly wet and salt the inside, add a layer of rice, a spoonful of filling, then another layer of rice. Press with the lid until firm, then release the triangle and tidy the edges with your hands.
Step 6: Wrap with nori
Place a strip or rectangle of nori shiny side out on your work surface. Set the onigiri on top and wrap the nori around the bottom and sides, or just across the middle like a little handle.
If you plan to eat soon and want crisp nori, wrap right away. If you plan to pack them for later and want to keep the nori crisp, wrap each onigiri in plastic wrap and pack the nori separately to add right before eating.
Step 7: Taste and adjust batch seasoning
Try one onigiri while it still feels slightly warm. Notice if you want more salt on the outside, more tuna filling, or a touch more vinegar in the rice.
Adjust the next few onigiri based on that test, either by adding a tiny bit more salt to your hands, using a slightly bigger spoonful of filling, or sprinkling a bit of furikake on the rice before shaping. Small tweaks here make the whole batch taste just right.
Variations I've Tried
-
Spicy tuna mayo onigiri: Add sriracha or chili crisp to the tuna mayo, plus a little extra Kewpie to keep it creamy. This version works well for adults who like heat.
-
Cheesy tuna mayo onigiri: Tuck a small cube of mozzarella or mild cheddar into the center with the tuna; the cheese melts slightly when you reheat and tastes very comforting.
-
Tuna corn mayo onigiri: Mix a few tablespoons of canned or frozen corn into the tuna mayo for sweetness and texture; kids usually love this combo.
-
Tuna kimchi mayo onigiri: Chop kimchi finely and stir into the tuna mayo with a bit of sesame oil; this version tastes bold and punchy.
-
Tuna avocado mayo onigiri: Mash ripe avocado into the tuna mayo and reduce the mayo slightly; this gives a rich, creamy filling with healthy fats.
-
Tuna shiso onigiri: Add finely sliced shiso leaves or fresh basil to the tuna filling for a bright herbal note.
-
Brown rice tuna mayo onigiri: Use short-grain brown rice and cook it slightly softer than usual; the texture feels heartier but still holds a triangle shape.
How to Serve How to Make Tuna Mayo Onigiri Recipe
Serve tuna mayo onigiri slightly warm or at room temperature with miso soup, sliced cucumbers, and a simple salad for a light meal. Pack them in lunchboxes with carrot sticks, edamame, and fruit for a balanced bento-style lunch. You can also serve them as a snack platter with different fillings, cut in half so everyone can sample. Kids often enjoy them with green tea or cold barley tea, and they also pair nicely with simple iced water or flavored sparkling water.
How to store
- At room temperature: Keep tuna mayo onigiri at cool room temperature for up to 4 hours only, since the filling contains mayo and seafood.
- In the fridge: Wrap each onigiri tightly in plastic wrap, place in an airtight container, and refrigerate for up to 2 days; add nori right before eating for best texture.
- In the freezer: Wrap each onigiri in plastic wrap, then place in a freezer bag, squeeze out excess air, and freeze for up to 1 month; freeze without nori and add it after reheating.
- Reheating: Remove plastic wrap, cover the onigiri with a slightly damp paper towel, and microwave in short bursts until just warm; then wrap with fresh nori and eat soon after.