
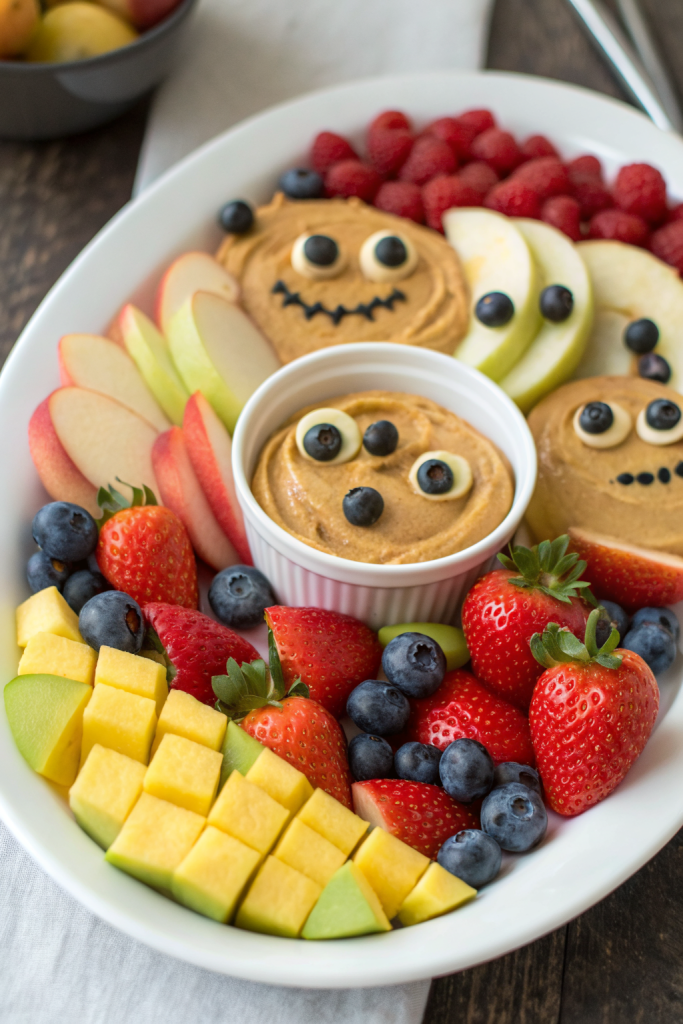
Halloween Fruit Platter Idea tastes bright, juicy, and just spooky enough to thrill kids and adults without a sugar crash. It works perfectly for busy parents, party hosts, and snack lovers who want a Halloween party tray on the table in about 25–30 minutes. I tested this platter on my own family movie night, and the fruit ghosts disappeared faster than the popcorn.
Why Halloween Fruit Platter Idea Is Worth It
This Halloween Fruit Platter Idea gives you all the fun of a themed dessert board without a mountain of frosting and candy. You still get color, cute shapes, and a big wow factor, but everything tastes fresh, light, and juicy.
You can prep most of it ahead, which saves stress on party day. Kids can help with the easy parts, so you turn snack time into a quick activity instead of another solo kitchen job.
“This Halloween Fruit Platter Idea disappeared from the table in minutes and even the ‘I don’t like fruit’ kid went back for seconds. ★★★★★”
Ingredients You Need
Here’s a flexible list so you can build a big, colorful Halloween fruit tray. Mix and match based on what your store carries and what your family likes.
Base fruits (for color and volume):
- Seedless green grapes – great for “monster eyes” and filling gaps.
- Seedless red or black grapes – darker color adds Halloween vibes.
- Strawberries – choose medium berries for easy dipping or decorating.
- Blueberries – perfect for eyeball centers and tiny gaps.
- Pineapple – fresh rings or chunks; canned rings in juice work in a pinch.
- Cantaloupe or honeydew – slice into wedges or cubes.
- Apple slices – Honeycrisp or Gala hold crunch; toss in lemon juice to prevent browning.
- Orange segments – clementines or mandarins peel easily and look like mini pumpkins.
Halloween “characters” and accents:
- Bananas – for banana ghosts; choose just-ripe so they hold shape.
- Kiwi – peel and slice for green “monster skin.”
- Blackberries – add dark, moody color and great texture.
- Pomegranate arils – look like spooky jewels or “monster seeds.”
- Mini chocolate chips – for ghost faces and jack-o’-lantern eyes.
- Regular chocolate chips or small chocolate candies – for bigger eyes or mouths.
- Mini marshmallows – for eyes or teeth on fruit monsters.
- Pretzel sticks – for pumpkin “stems” on clementines.
- Fresh mint leaves – optional, but they add a nice pop of green and a fresh smell.
Optional dips and sauces:
- Vanilla Greek yogurt – thick, creamy, and high protein; great as a base dip.
- Honey or maple syrup – to sweeten yogurt dip lightly.
- Peanut butter or almond butter – for a richer dip; thin with a splash of milk.
- Chocolate hazelnut spread – fun for a dessert-style dip.
- Store-bought caramel dip – quick shortcut if you want a caramel apple vibe.
Pantry shortcuts and brand notes:
- Use pre-cut fruit trays from the store when you feel short on time, then just rearrange and decorate.
- Canned pineapple rings in juice work well when fresh pineapple costs more or looks pale.
- Use mini chocolate chips from any brand; they all work for tiny ghost faces.
- Choose thicker Greek yogurt (Fage, Chobani, or store brand) so the dip holds shape in a bowl.
Equipment list:
- Large serving board, tray, or baking sheet (lined with parchment if you want easy cleanup).
- Sharp paring knife and chef’s knife.
- Small cookie cutters (pumpkin, bat, ghost, star) if you own them.
- Toothpicks or small skewers for mini fruit kebabs.
- Small bowls or ramekins for dips and tiny fruits like pomegranate arils.
- Paper towels for patting fruit dry so it doesn’t slide around.
Quick Tips & substitutions
- Pat fruit dry before arranging so the pieces stay put and don’t leak juice all over the tray.
- Toss apple slices and banana pieces in a mix of lemon juice and water to slow browning.
- Use dairy-free yogurt for the dip if you want a vegan Halloween fruit platter.
- Swap mini chocolate chips with dairy-free chocolate chips to keep everything plant-based.
- Use toothpicks to secure eyes or small decorations on slippery fruit pieces.
- Build the platter directly on a parchment-lined baking sheet if you need to cover and chill it.
- Use melon, pineapple, or firm mango instead of apples if you worry about browning at a long party.
- Skip fruits with lots of seeds (like seeded grapes) so kids snack safely and easily.
- Add a few non-fruit items like pretzels or popcorn in small bowls if you want more crunch.
- Keep shapes simple if you feel rushed; basic ghosts, pumpkins, and eyeballs still impress everyone.
How to Make Halloween Fruit Platter Idea
Step 1: Wash, dry, and prep the fruit
Rinse all fruit under cool water and dry it well with clean towels. Pull grapes off the stems so guests can grab them easily. Hull strawberries, peel clementines, and slice pineapple, melons, and apples into bite-size pieces.
Peel bananas and cut them in half or thirds, depending on how tall you want the banana ghosts. Peel kiwi and slice into rounds or half-moons. Keep a small bowl nearby for scraps so you keep your cutting board clear.
Step 2: Mix a simple fruit dip (optional)
Spoon Greek yogurt into a small bowl. Stir in a drizzle of honey or maple syrup and a tiny splash of vanilla extract if you like. Taste and adjust sweetness so it pairs well with tart fruit.
If you want a nutty dip, mix equal parts peanut butter and Greek yogurt with a spoonful of honey. Add a splash of milk to thin it to dipping consistency. Place the dip bowl on the tray first so you can build fruit around it.
Step 3: Make banana ghosts
Stand each banana piece upright on the cut side. Press two mini chocolate chips into the front for eyes and one for a mouth. Push gently so they stick without splitting the banana.
If the chips slide, pat the banana dry with a paper towel first. Set the banana ghosts on a small plate or directly on the tray, but keep them away from juicy fruits so they hold shape longer. Chill them while you prep other decorations if your kitchen feels warm.
Step 4: Make clementine “pumpkins”
Peel clementines or mandarins and remove as much white pith as you can. Break pretzel sticks into short pieces. Push one pretzel piece into the top center of each clementine to form a stem.
Add a tiny mint leaf next to the pretzel stem if you want a leafy pumpkin look. Line these mini pumpkins along one side of the platter or group them together in a “pumpkin patch.” Kids love to help with this step because it feels like fruit arts and crafts.
Step 5: Build spooky eyeballs and monster bites
Place banana slices, kiwi rounds, or apple rounds flat on a plate. Add a small dollop of yogurt or nut butter in the center, then press a blueberry or chocolate chip into it to form an eyeball. Use mini marshmallows as teeth along one edge of an apple slice if you want fruit “monster mouths.”
Stick these eyeballs and monster bites on toothpicks if you want easy grab-and-go snacks. Arrange them in clusters on the tray so guests notice the details. Mix in a few plain fruit pieces nearby so the decorated ones stand out.
Step 6: Arrange the platter base
Place your dip bowl (if using) slightly off-center on the tray. Add clusters of grapes, berries, and melon around it in loose sections. Aim for pockets of color instead of strict lines so the Halloween fruit platter feels full and inviting.
Tuck pineapple chunks and kiwi slices between the bigger clusters. Add orange segments in one area to balance the color. Keep a little space open for your ghosts and pumpkins so they sit on top and stay visible.
Step 7: Add the Halloween characters
Place banana ghosts in a small group, almost like a little ghost family. Set the clementine pumpkins together in a patch or line them along the edge of the tray. Add the eyeball slices and monster bites in a few spots so guests discover them as they snack.
Sprinkle pomegranate arils and blueberries into gaps like edible confetti. Add mint leaves here and there for a fresh pop of green. Step back and adjust anything that looks crowded or hidden.
Step 8: Chill and serve
Cover the platter loosely with plastic wrap or a large, clean kitchen towel. Chill it in the fridge until party time, ideally within 1–2 hours of serving. Pull the tray out about 10 minutes before guests arrive so the fruit tastes juicy, not icy cold.
If the party runs long, rotate in a few extra banana ghosts from the fridge or swap them with more stable fruits like grapes and berries. Keep extra fruit in containers so you can refill empty spots. Snap a quick photo before everyone dives in, because this tray disappears fast.
Recipe Variations
- Gluten-free: Use gluten-free pretzel sticks or skip pretzels and use small celery sticks for pumpkin stems.
- Vegan: Use dairy-free yogurt for dips and dairy-free chocolate chips for faces and eyes.
- Nut-free: Skip peanut butter and almond butter; use sunflower seed butter or just sweetened yogurt.
- Low carb: Focus on berries, kiwi, and melon; skip bananas, pineapple, and pomegranate.
- High protein: Serve with Greek yogurt dip and add a side of cottage cheese topped with berries.
- Extra spooky: Use mini cookie cutters to cut melon or pineapple into bats, ghosts, or stars.
- Chocolate lovers: Add a small bowl of dark chocolate chips or cocoa-dusted almonds near the fruit.
Ways to Serve Halloween Fruit Platter Idea
- Set it as the centerpiece on a Halloween snack table with popcorn, pretzels, and veggie sticks.
- Pack mini versions in lunchboxes with a few banana ghosts and clementine pumpkins.
- Serve it at a classroom party as the “fun but still healthy” option.
- Pair it with hot cocoa, apple cider, or flavored sparkling water for a cozy movie night.
- Bring it to a potluck on a large baking sheet so you can transport it easily.
Storage Success
Store leftover fruit in separate airtight containers so strong flavors do not mingle too much. Keep berries and grapes together, and store bananas and apples separately because they brown faster. Eat banana ghosts the same day, since bananas soften and darken in the fridge.
Keep the platter in the fridge until you serve it, and avoid leaving it at room temperature longer than two hours. If you plan ahead, chop sturdier fruits like melon and pineapple the night before, then slice bananas and apples right before you build the Halloween Fruit Platter Idea. This approach keeps everything bright, juicy, and party-ready.
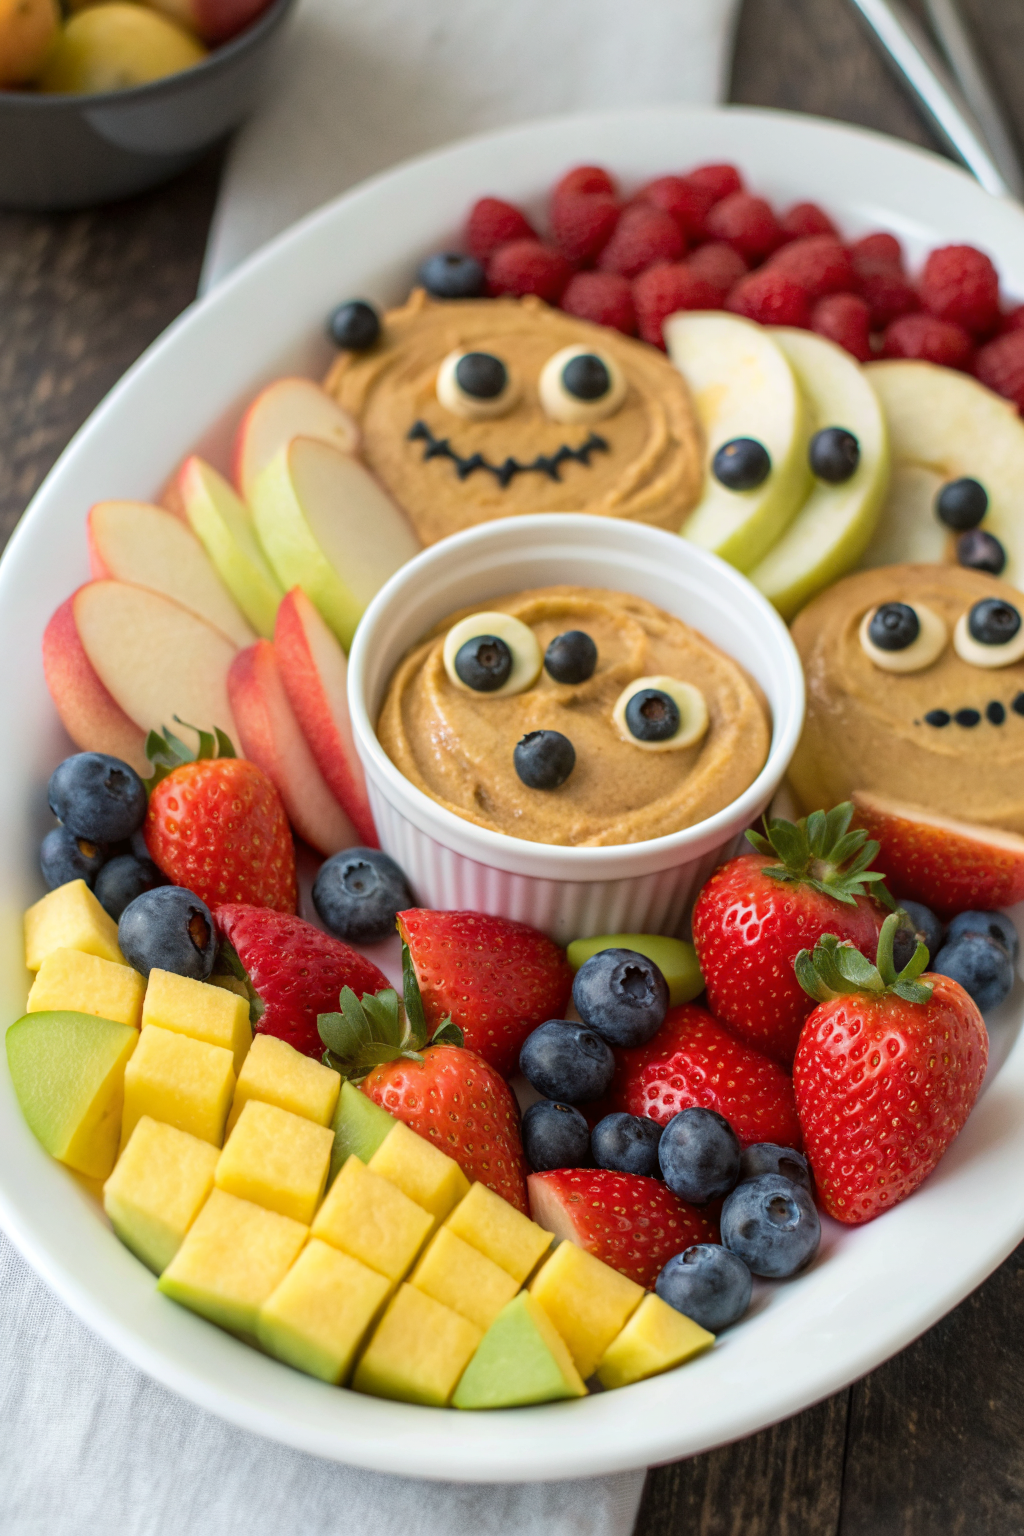
Halloween Fruit Platter Idea
Ingredients
Instructions
- Wash and dry all fruit thoroughly. Pull grapes from their stems, hull strawberries, peel clementines, and cut pineapple, melons, and apples into bite-size pieces. Toss apple slices in a little lemon water to slow browning. Peel and slice kiwi into rounds or half-moons.
- If using a yogurt dip, spoon Greek yogurt into a small bowl and stir in honey or maple syrup and vanilla extract to taste. For a nutty dip, mix equal parts peanut butter and Greek yogurt with a spoonful of honey, thinning with milk until smooth. Place the dip bowl on your serving tray slightly off-center.
- Make banana ghosts by peeling the bananas and cutting each into halves or thirds. Stand each piece upright on the cut side. Press two mini chocolate chips into the front for eyes and one for a mouth, patting the surface dry first if needed so they stick. Set aside on a plate or directly on the tray.
- Make clementine pumpkins by peeling the clementines and removing excess pith. Break pretzel sticks into short pieces and insert one into the top of each clementine as a stem. Add a small mint leaf beside the stem for a leafy look, if using.
- Build spooky eyeballs and monster bites by laying banana slices, kiwi rounds, or apple rounds flat. Add a small dollop of yogurt or nut butter in the center and press in a blueberry or chocolate chip to form an eyeball. For monster mouths, line mini marshmallows along the edge of an apple slice as teeth. Secure with toothpicks if desired.
- Arrange the platter by clustering grapes, berries, melon, pineapple, apples, and orange segments around the dip bowl, creating pockets of color. Leave open spaces so your decorated fruit characters sit on top and stay visible.
- Add the Halloween characters: group banana ghosts together, place clementine pumpkins in a small “patch,” and tuck eyeballs and monster bites around the tray. Sprinkle pomegranate arils and extra blueberries into gaps like edible confetti, and add mint leaves for fresh green pops.
- Chill the platter loosely covered in the refrigerator until serving time, ideally serving within 1–2 hours. Set out about 10 minutes before guests arrive so the fruit tastes juicy but not icy cold, and refill with extra fruit or ghosts as needed during the party.
Notes
Approximate per serving (about 1/10 of platter, without dips): 140–170 calories; fat 1 g; saturated fat 0 g; carbohydrates 36 g; fiber 4 g; sugars 29 g; protein 2 g; sodium 10 mg. Adding yogurt or nut-butter dips will increase protein, fat, and calories. Values will vary based on exact fruits, amounts, and brands used.