

Crispy Japanese Katsu Bowls Recipe brings crunchy panko-coated cutlets, glossy sauce, and steamy rice together in one ultra-satisfying bowl that tastes like a hug with a side of crunch. It works perfectly for busy weeknights because you can get it on the table in about 40–45 minutes, and it still feels special enough for a weekend treat. I first fell in love with katsu bowls in a tiny Tokyo station shop, and I’ve chased that perfect crispy bite in my own kitchen ever since.
Why Crispy Japanese Katsu Bowls Recipe Is Worth It
This katsu bowl hits every texture: shatteringly crisp cutlet, fluffy rice, crunchy cabbage, and silky sauce. The balance of savory, a little sweet, and a tiny tang from the sauce makes each bite feel complete.
You also cook most of it with simple pantry ingredients and basic equipment. Once you learn the method, you can swap proteins, change the toppings, and keep the same crunchy, saucy comfort on repeat.
“This Crispy Japanese Katsu Bowls Recipe tastes like takeout from your favorite spot but crunchier, hotter, and way more satisfying at home. ★★★★★”
Ingredients You Need
Protein & Coating
- 1 to 1 ½ pounds boneless chicken thighs or breasts
- Thighs stay juicier and more forgiving.
- Slice thick breasts in half horizontally to make thinner cutlets.
- 1 teaspoon kosher salt
- ½ teaspoon black pepper
- ½ teaspoon garlic powder (optional, not traditional but adds flavor)
- ½ cup all-purpose flour
- 2 large eggs, beaten
- 1 to 1 ½ cups panko breadcrumbs
- Use Japanese-style panko for the best crunch.
- Toast plain panko in a dry pan if it looks pale; it browns faster and stays crisp.
- Neutral oil for shallow frying (canola, vegetable, peanut, or avocado oil)
- Choose oil with a high smoke point.
Rice & Base
- 2 cups uncooked short-grain or medium-grain white rice
- Sushi rice or Calrose rice both work well.
- Use microwave rice packs as a shortcut on busy nights.
- 2 ½ cups water (or as your rice brand suggests)
- 1 teaspoon rice vinegar (optional, for a subtle tang in the rice)
- ½ teaspoon salt
Katsu Sauce
You can use a bottled tonkatsu sauce (Bulldog brand tastes great and stays close to restaurant flavor), or mix a quick version:
- 3 tablespoons ketchup
- 2 tablespoons Worcestershire sauce
- 1 tablespoon soy sauce
- 1 tablespoon oyster sauce or hoisin sauce
- 1 to 2 teaspoons sugar or honey, to taste
- ½ teaspoon Dijon or Japanese mustard (optional, for a little bite)
Veggies & Toppings
- 2 cups finely shredded green cabbage
- Use a bag of coleslaw mix as a shortcut.
- 1 small cucumber, thinly sliced
- 2 green onions, thinly sliced
- Toasted sesame seeds
- Japanese mayo (Kewpie) for drizzling (optional but highly recommended)
- Pickled ginger or takuan (yellow pickled daikon), if you have it
Equipment List
- Cutting board and sharp knife
- Meat mallet or rolling pin (to pound cutlets)
- 3 shallow bowls for breading
- Large skillet or frying pan (cast iron or heavy stainless works best)
- Tongs or chopsticks for flipping cutlets
- Paper towels and a wire rack or plate for draining
- Medium pot or rice cooker
- Small bowl for mixing sauce
Quick Tips & substitutions
- Pound chicken to even thickness so it cooks evenly and stays juicy.
- Pat chicken dry before seasoning so the coating sticks better.
- Use one hand for wet ingredients and one hand for dry during breading to avoid “panko mittens.”
- Chill breaded cutlets in the fridge for 10–15 minutes so the coating clings and fries crisp.
- Swap chicken with pork loin cutlets for a classic tonkatsu version.
- Use extra-firm tofu (pressed and patted dry) or thick cauliflower slices for a vegetarian katsu bowl.
- Choose gluten-free panko and tamari instead of soy sauce for a gluten-free version.
- Use air fryer at 390°F (200°C) for 10–14 minutes, flipping halfway, if you want less oil.
- Cook rice ahead and reheat with a splash of water in the microwave to save time.
- Use pre-shredded cabbage or coleslaw mix when you feel low on energy or time.
How to Make Crispy Japanese Katsu Bowls Recipe
Step 1: Cook the Rice
- Rinse the rice under cold water until the water runs mostly clear.
- Combine rice, water, and salt in a pot or rice cooker.
- Cook according to package or rice cooker directions.
- Fluff with a fork, then stir in rice vinegar if you like a subtle tang.
Step 2: Prep and Pound the Chicken
- Trim excess fat from the chicken.
- Place each piece between two sheets of plastic wrap or parchment.
- Pound gently with a meat mallet or rolling pin until about ½ inch thick.
- Season both sides with salt, pepper, and garlic powder.
Step 3: Set Up the Breading Station
- Place flour in one shallow bowl.
- Beat eggs in a second bowl.
- Add panko to a third bowl.
- Line a tray with parchment or a plate for the breaded cutlets.
Step 4: Bread the Cutlets
- Dredge each piece of chicken in flour and shake off excess.
- Dip into beaten egg and coat completely.
- Press into panko, covering every surface and pressing gently so crumbs cling.
- Place breaded cutlets on the tray and chill in the fridge for 10–15 minutes while you prep sauce and veggies.
Step 5: Mix the Katsu Sauce
- In a small bowl, stir together ketchup, Worcestershire, soy sauce, oyster or hoisin sauce, sugar or honey, and mustard.
- Taste and adjust sweetness or saltiness to your liking.
- Set the sauce aside so flavors meld while you fry.
Step 6: Prep Veggies and Toppings
- Finely shred the cabbage with a sharp knife or mandoline.
- Slice cucumber and green onions.
- Set toppings in small bowls so you can build bowls quickly.
- Toast sesame seeds in a dry pan over low heat until fragrant, then remove from heat.
Step 7: Fry the Katsu
- Pour about ¼ inch of oil into a large skillet and heat over medium to medium-high.
- Drop a breadcrumb into the oil; it should sizzle and turn golden in about 10 seconds.
- Lay cutlets gently into the hot oil, without crowding the pan.
- Fry 3–4 minutes per side, until the crust turns deep golden and the chicken cooks through.
- Transfer cutlets to a wire rack or paper towel–lined plate so they stay crisp.
- Fry in batches and let the oil return to temperature between batches.
Step 8: Slice the Katsu
- Let cutlets rest 3–5 minutes so juices settle.
- Slice each cutlet into strips about ½ to ¾ inch wide.
- Keep the slices in their original shape so you can fan them over the rice neatly.
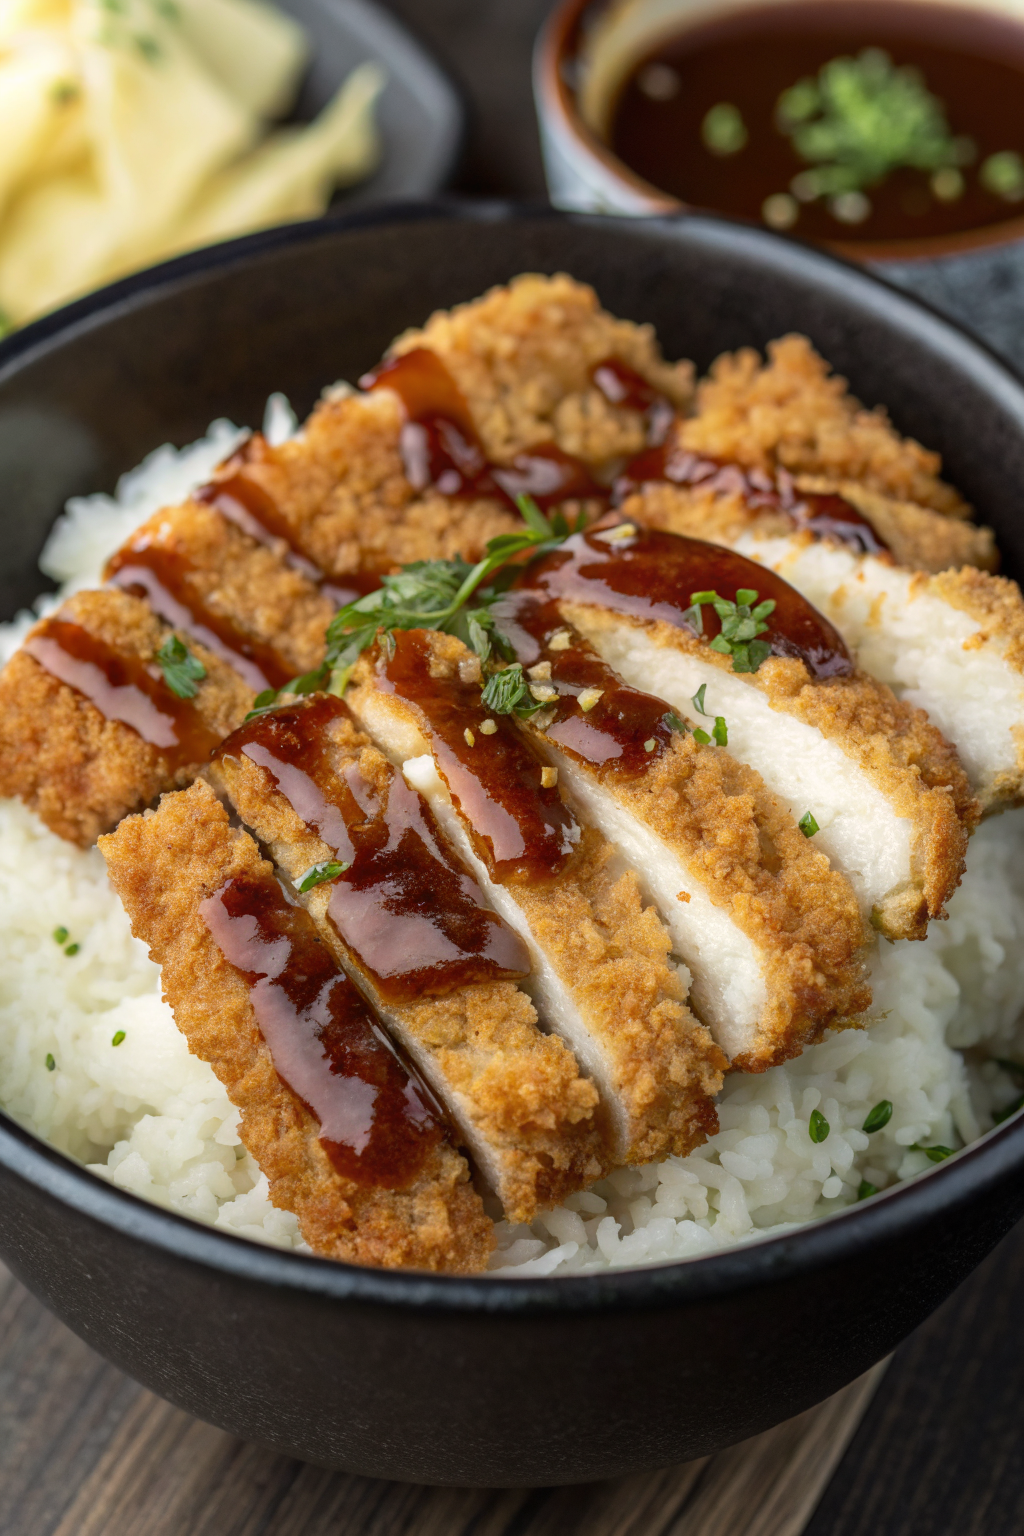
Step 9: Build the Bowls
- Scoop hot rice into each bowl.
- Add a handful of shredded cabbage and some cucumber on one side.
- Fan sliced katsu over the rice.
- Spoon katsu sauce generously over the cutlet.
- Drizzle with Japanese mayo if you like extra richness.
- Sprinkle with green onions and toasted sesame seeds, and tuck in pickled ginger or daikon on the side.
Recipe Variations
- Gluten-free: Use gluten-free panko, rice flour instead of wheat flour, and tamari instead of soy sauce.
- Vegan: Use pressed extra-firm tofu or thick eggplant slices; dip in plant-based milk and coat with panko; fry or air fry.
- Low carb: Serve over shredded cabbage or cauliflower rice instead of white rice, and use almond flour instead of regular flour.
- Spicy katsu: Add chili flakes or a little gochujang to the sauce, and drizzle with spicy mayo.
- Cheesy katsu: Top hot katsu with a slice of melty cheese and cover the pan briefly so it softens, then slice and serve.
- Katsu curry bowl: Serve katsu over rice with Japanese curry sauce instead of standard katsu sauce.
Ways to Serve Crispy Japanese Katsu Bowls Recipe
- Serve over hot steamed rice with shredded cabbage and cucumber for a classic katsu bowl.
- Add a soft-boiled or jammy egg on top for extra protein and richness.
- Pair with miso soup and a simple cucumber salad for a full Japanese-style meal.
- Pack leftovers into a bento-style lunch box with rice, sliced katsu, and sauce on the side.
- Serve katsu strips in lettuce cups with rice and sauce for a lighter handheld version.
Storage Success
Store leftover katsu and rice separately so the coating stays crisp. Keep sliced katsu in an airtight container in the fridge for up to 3 days, and store rice in a separate container for the same amount of time. Reheat katsu in an air fryer or oven at 375°F (190°C) until hot and crispy again, and warm rice in the microwave with a splash of water. Keep sauce and shredded veggies in separate containers so you can assemble fresh-feeling Crispy Japanese Katsu Bowls Recipe whenever you want.
Crispy Japanese Katsu Bowls
Ingredients
Instructions
- Season the pounded chicken breasts on both sides with salt and pepper.
- Place the flour, beaten eggs, and panko breadcrumbs into three separate shallow bowls.
- Dredge each piece of chicken in flour, shaking off any excess. Dip in the beaten eggs, then press into the panko breadcrumbs, coating evenly and pressing to help the crumbs adhere.
- Heat the oil in a large skillet over medium to medium-high heat until shimmering. Fry the breaded chicken in batches, 3 to 4 minutes per side, or until golden brown and cooked through to an internal temperature of 165°F (74°C). Transfer to a wire rack or paper towel–lined plate to drain and rest for a few minutes before slicing.
- In a small bowl, whisk together the ketchup, Worcestershire sauce, soy sauce, mirin, Dijon mustard, and sugar until smooth. Taste and adjust sweetness or saltiness as desired.
- Divide the warm cooked rice evenly among 4 serving bowls.
- Arrange shredded cabbage and carrots over the rice in each bowl.
- Slice the rested chicken katsu into strips and place on top of the vegetables and rice.
- Drizzle katsu sauce generously over the chicken. Garnish with sliced green onions and toasted sesame seeds if using.
- Serve immediately while the chicken is still crispy.
Notes
Approximate per serving (1/4 of recipe): 720 calories; fat 30 g; saturated fat 5 g; carbohydrates 78 g; fiber 3 g; sugars 13 g; protein 33 g; sodium 1350 mg. Values are estimates and will vary based on ingredient brands, exact measurements, and portion sizes.
Leave a Reply