
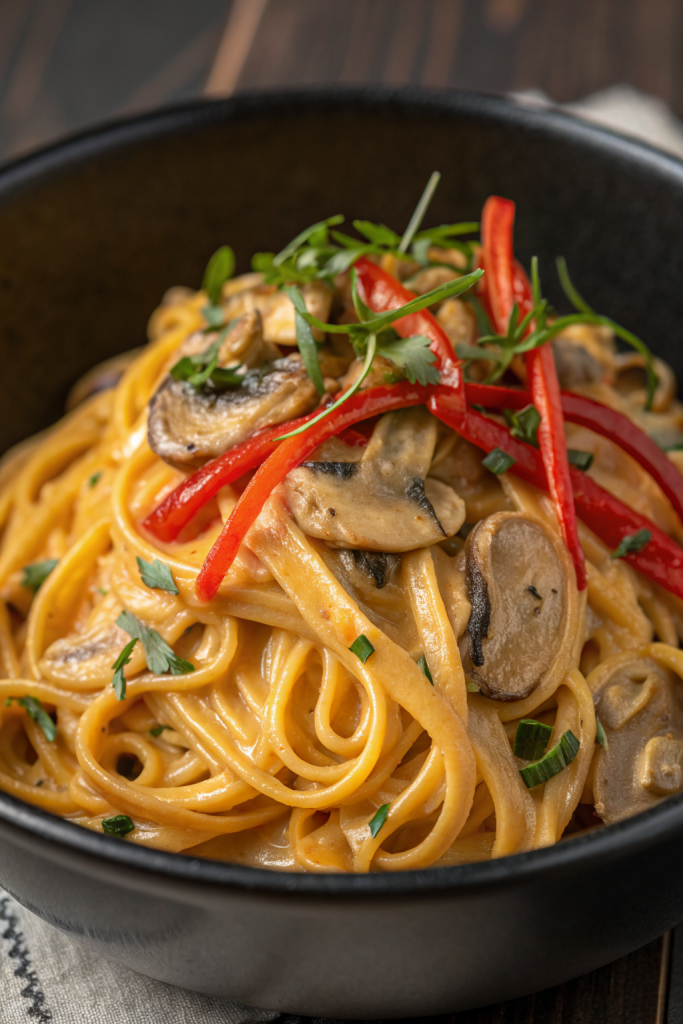
Creamy Miso Udon Recipe tastes like ultra-cozy, slurpable comfort with a rich, savory broth that hugs every noodle. It works perfectly for busy weeknights, date nights at home, or solo “I deserve something good” dinners, and you can get it on the table in about 20 minutes. I tested versions of this dish so often that my neighbors started “checking in” right around dinnertime.
Why You Should Try This Creamy Miso Udon Recipe
This Creamy Miso Udon Recipe hits that sweet spot between Japanese comfort food and easy weeknight pasta. The miso brings deep umami, the cream (or milk) softens the edges, and the chewy udon noodles turn every bite into a very satisfying slurp.
You cook everything in one pan, so cleanup stays simple. The recipe uses easy-to-find ingredients, and you can customize it with veggies or protein you already keep in your fridge.
“This Creamy Miso Udon Recipe tastes like restaurant-level comfort food that I pulled off in under 20 minutes at home. ★★★★★”
Ingredients You’ll Need
Udon & Base
-
2 portions frozen udon noodles
- I prefer frozen over dried, since they keep a bouncy, chewy texture.
- Shelf-stable udon works too, but cook it slightly under package time so it stays firm.
-
1 tablespoon neutral oil
- Use canola, vegetable, avocado, or grapeseed oil.
- Avoid strong oils like extra virgin olive oil, since they fight the miso flavor.
Aromatics & Flavor
- 2 cloves garlic, minced
- 1 teaspoon grated fresh ginger
- 2 green onions, thinly sliced, white and green parts separated
- 1 tablespoon unsalted butter
- Butter adds richness and helps the sauce cling to the noodles.
Miso & Sauce
-
2 to 2½ tablespoons white miso paste (shiro miso)
- White miso tastes mild and slightly sweet, perfect for a creamy sauce.
- If you only have red miso, use 1½ tablespoons and taste as you go, since it tastes stronger and saltier.
-
1 cup low-sodium vegetable broth or chicken broth
- I like low-sodium so I control the salt with miso and soy sauce.
-
½ cup heavy cream
- For a lighter version, use half-and-half or whole milk.
- For a non-dairy option, use unsweetened oat milk or soy milk and add 1 extra teaspoon of butter or vegan butter for richness.
-
1 to 2 teaspoons soy sauce
- Start with 1 teaspoon, then adjust at the end.
- Use tamari or coconut aminos if you need a gluten-free option.
-
½ teaspoon sugar or mirin
- This tiny bit of sweetness balances the salty miso.
Veggies & Add-ins
Pick a few of these or use what you already have.
- 1 cup sliced mushrooms (shiitake, cremini, or button)
- ½ cup thinly sliced onion or shallot
- 1 cup baby spinach or chopped bok choy
- ½ cup frozen peas or corn
- Optional protein:
- 1 soft-boiled egg per bowl
- ½ cup cubed tofu (firm or silken)
- Leftover cooked chicken, shrimp, or salmon, warmed at the end
Toppings
- Reserved green onion tops
- Toasted sesame seeds
- Chili crisp, shichimi togarashi, or a pinch of red pepper flakes
- A drizzle of toasted sesame oil for extra aroma
Pantry Shortcuts & Brand Notes
- Frozen udon: I grab brands like Shirakiku or Sanuki-style packs from the freezer section; they cook quickly and stay chewy.
- Miso paste: Any Japanese or Korean brand works; keep it in the fridge in a sealed container and it lasts for months.
- Broth: Boxed low-sodium broth works fine; I often use Better Than Bouillon paste with water for a quick base.
Equipment List
- Medium pot for boiling udon
- Large skillet or sauté pan for the sauce
- Small bowl and whisk or fork to mix miso slurry
- Tongs or chopsticks for tossing noodles in the sauce
- Ladle or measuring cup
Tips & Tricks
- Boil frozen udon just until it loosens, then drain it so the noodles stay chewy, not mushy.
- Whisk miso with a bit of warm broth in a small bowl before you add it to the pan, so it dissolves smoothly and does not clump.
- Keep the heat on low after you add miso and cream, since high heat can make the sauce split or taste harsh.
- Taste the sauce before you add extra soy sauce, because miso already brings salt.
- Stir the noodles in the sauce for a minute or two, so they soak up flavor instead of just sitting in it.
- Add tender veggies like spinach at the very end so they stay bright and do not turn soggy.
- If the sauce thickens too much, splash in a bit of broth or water until it looks silky again.
- Cook the noodles right before serving, since udon tastes best hot and freshly sauced.
How to Make Creamy Miso Udon Recipe
Step 1: Cook the Udon Noodles
- Bring a medium pot of water to a boil.
- Add the frozen udon blocks and gently stir to separate them.
- Cook 1 to 2 minutes, just until the noodles loosen and turn tender but still bouncy.
- Drain the noodles, rinse briefly with warm water to remove extra starch, and set them aside.
Step 2: Sauté Aromatics and Veggies
- Heat the neutral oil in a large skillet over medium heat.
- Add the white parts of the green onions, garlic, ginger, and sliced onion or shallot if you use it.
- Sauté 1 to 2 minutes until the aromatics smell fragrant and the onion softens slightly.
- Add mushrooms and cook 3 to 4 minutes until they soften and release some moisture.
Step 3: Build the Broth Base
- Add the butter to the skillet and let it melt into the veggies.
- Pour in the broth and stir, scraping up any browned bits from the bottom of the pan.
- Bring the mixture to a gentle simmer, not a hard boil.
- Add frozen peas or corn at this stage if you use them and cook 1 to 2 minutes.
Step 4: Mix the Miso Slurry
- Ladle a few tablespoons of the hot broth from the skillet into a small bowl.
- Add the miso paste to that bowl.
- Whisk until the miso dissolves completely and forms a smooth mixture.
- This step keeps the miso from clumping when you add it back to the pan.
Step 5: Make the Creamy Miso Sauce
- Lower the skillet heat to low.
- Stir in the miso slurry, then pour in the cream.
- Add 1 teaspoon soy sauce and the sugar or mirin, then stir until the sauce looks smooth and creamy.
- Taste the sauce and adjust with a bit more soy sauce or miso if you want a stronger flavor.
Step 6: Add Greens and Protein
- Add spinach or bok choy to the skillet and stir until the greens wilt, about 1 minute.
- If you use tofu or leftover cooked meat or seafood, add it now and warm it gently in the sauce.
- Keep the heat low so the sauce stays silky and the cream does not curdle.
Step 7: Toss in the Udon Noodles
- Add the drained udon noodles directly into the skillet.
- Use tongs or chopsticks to toss the noodles in the sauce until they soak up the creamy miso mixture.
- If the sauce looks too thick, splash in a bit more broth or water until it coats the noodles nicely.
- Cook 1 to 2 minutes, just until everything heats through and looks glossy.
Step 8: Plate and Garnish
- Divide the creamy miso udon between bowls.
- Top each bowl with green onion tops, toasted sesame seeds, and a small drizzle of toasted sesame oil.
- Add a soft-boiled egg on top if you like, and finish with chili crisp or shichimi togarashi for a little heat.
- Serve the Creamy Miso Udon Recipe hot while the noodles stay bouncy and the sauce tastes silky.
What to Serve with Creamy Miso Udon Recipe
Serve this Creamy Miso Udon Recipe with a simple cucumber salad dressed in rice vinegar, soy sauce, and a touch of sesame oil. A side of steamed edamame with a sprinkle of salt pairs nicely and adds extra protein. You can also add a small plate of roasted vegetables like broccoli, carrots, or snap peas for crunch and color. If you want a drink, pour iced green tea, barley tea, or a light citrusy sparkling water.
Storage Options
- Store leftover creamy miso udon in an airtight container in the fridge for up to 2 days.
- The noodles soak up sauce as they sit, so add a splash of water or broth before reheating.
- Reheat gently on the stove over low heat, stirring often, until hot and creamy again.
- You can freeze the sauce by itself for up to 1 month, but cook fresh udon when you plan to serve, since frozen cooked noodles lose their chewy texture.
Leave a Reply