

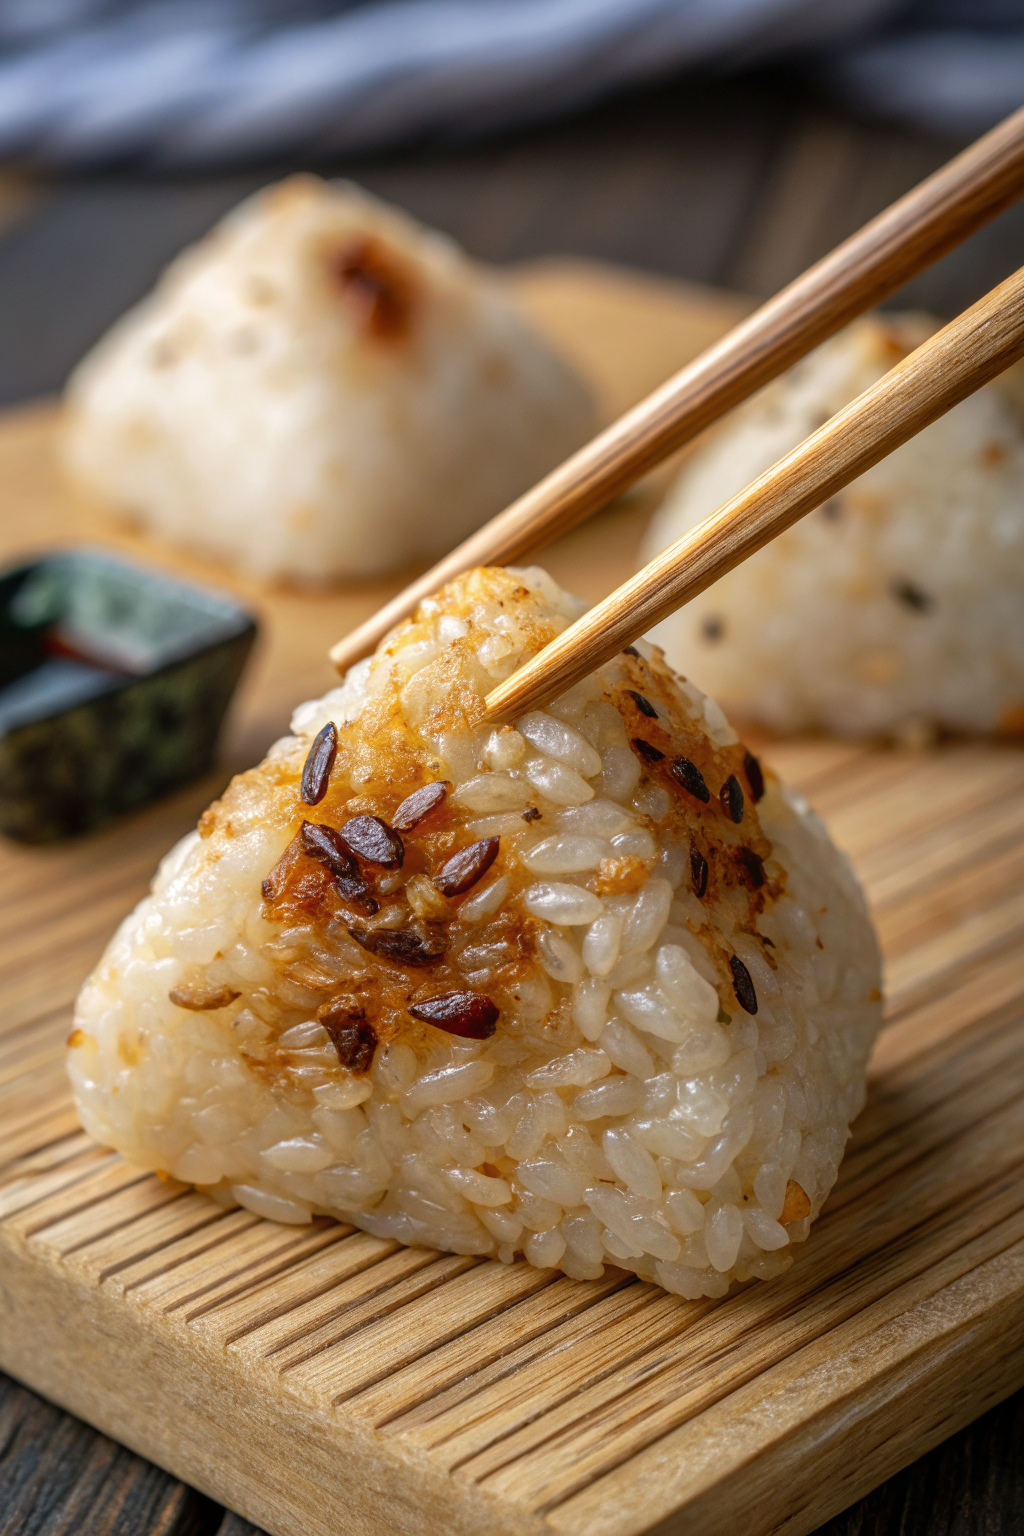
Yaki Onigiri Japanese Grilled Rice Balls Recipe tastes smoky, crispy on the outside, and tender and a little chewy inside, with a salty soy glaze that hits all the comfort-food buttons. It works perfectly for busy weeknights, meal prep, or snack attacks, and you can finish a batch in about 40 minutes. I still eat these over the sink sometimes like I did in my tiny first apartment, and they taste just as good.
Why Make This Yaki Onigiri Japanese Grilled Rice Balls Recipe at Home
Homemade yaki onigiri gives you that crisp, toasty crust that many store-bought versions lose while they sit. You control the salt, the fillings, and the glaze, so the rice balls match your taste and any dietary needs.
You also use leftover rice in a way that feels special, not like leftovers. Kids love them, adults snack on them, and they pack easily in lunch boxes or bento-style meals.
“These Yaki Onigiri Japanese Grilled Rice Balls taste smoky, crispy, and deeply comforting, and I could eat a whole tray by myself. ★★★★★”
Ingredients You Need
Rice
-
Japanese short-grain rice (sushi rice)
- Use proper Japanese short-grain rice, not long-grain or jasmine.
- Brands I like: Kokuho Rose, Nishiki, or any rice labeled “short-grain Japanese rice.”
- You need about 2 cups uncooked rice to yield enough for 8 to 10 medium rice balls.
-
Water
- Rinse the rice until the water runs mostly clear.
- Cook with the ratio on the bag or about 1:1.1 to 1:1.2 (rice:water by volume) for stovetop or rice cooker.
Seasoning & Glaze
-
Soy sauce
- Use regular Japanese-style soy sauce (shoyu).
- You need about 3 to 4 tablespoons for brushing.
- Use low-sodium soy sauce if you watch your salt.
-
Mirin (sweet rice wine seasoning)
- Adds mild sweetness and shine to the glaze.
- Use about 1 to 2 tablespoons.
- If you do not have mirin, mix 1 tablespoon sugar with 1 tablespoon water as a quick stand-in.
-
Neutral oil
- Use canola, vegetable, grapeseed, or avocado oil.
- You need 1 to 2 tablespoons to brush the pan or grill and lightly coat the rice balls.
-
Fine salt
- Lightly season the cooked rice with a pinch or two.
- Use kosher salt or sea salt.
Optional Fillings
You can keep yaki onigiri plain or tuck a little surprise in the center.
-
Umeboshi (pickled plum)
- Salty, sour, and classic.
- Remove the pit and use a small piece per rice ball.
-
Flaked salmon
- Use grilled or pan-seared salmon, then flake it and season lightly with salt.
- Canned salmon works if you drain it well.
-
Tuna mayo
- Mix canned tuna with a bit of Japanese mayo and soy sauce.
- Keep the filling small so it does not leak.
-
Seasoned kombu or furikake
- Furikake rice seasoning adds seaweed, sesame, and sometimes bonito flakes.
- Sprinkle it into the rice before shaping.
Optional Toppings & Garnishes
-
Toasted sesame seeds
- Sprinkle on top after grilling for nutty crunch.
-
Shredded nori (seaweed) or nori strips
- Wrap a small strip around the bottom or sprinkle thin shreds on top.
-
Scallions or chives, finely sliced
- Add a fresh, mild onion flavor.
Equipment
-
Rice cooker or heavy pot with lid
- A rice cooker gives the most consistent texture.
- A heavy pot with a tight lid also works.
-
Large bowl
- You will mix and cool the rice here.
-
Small bowl of salted water
- Dip your hands to prevent sticking while shaping.
-
Nonstick skillet, cast iron pan, or grill pan
- Any of these work for stovetop grilling.
- You can also use an outdoor grill with a fine grate.
-
Brush
- Use a pastry brush or silicone brush for soy glaze and oil.
-
Spatula
- A thin spatula helps you flip the rice balls gently.
Tips & Mistakes
- Shape the rice while it stays warm; cold rice crumbles and cracks.
- Wet your hands with salted water before handling rice so it does not glue itself to your fingers.
- Pack the rice firmly but gently; squeeze enough so it holds, but do not crush it into a dense brick.
- Aim for medium size (about 1/3 to 1/2 cup rice each) so the centers heat through and the outside crisps.
- Press flat sides on the rice balls so they grill evenly and do not roll around the pan.
- Preheat the pan or grill well; a hot surface helps the crust form and prevents sticking.
- Brush only a thin layer of oil on the pan and rice balls; too much oil makes them greasy instead of crisp.
- Start grilling the rice balls plain; add the soy glaze only after the crust sets so the sugar does not burn.
- Flip gently with a thin spatula and support the rice ball with your fingers if needed so it does not break.
- Do not drown the rice balls in soy sauce; light layers of glaze build flavor without turning them soggy or overly salty.
- Let the grilled rice balls rest 1 to 2 minutes before serving so the surface firms slightly and does not burn your mouth.
- If you use fillings, keep them small and centered so they do not leak out while grilling.
How to Make Yaki Onigiri Japanese Grilled Rice Balls Recipe
Step 1: Cook the Rice
Rinse 2 cups Japanese short-grain rice in cold water, swishing with your hand, and drain. Repeat until the water looks mostly clear. Cook the rice in a rice cooker or pot with the correct water ratio.
When the rice finishes, fluff it gently with a rice paddle or spatula. Spread it in a wide bowl so it cools slightly. You want it warm enough to shape but not steaming hot.
Step 2: Season the Rice Lightly
Sprinkle a small pinch of salt over the warm rice. If you use furikake, add 1 to 2 tablespoons now and fold it in gently. Avoid smashing the grains; lift and fold instead.
Taste a small bite and adjust the salt. The rice should taste lightly seasoned, not strongly salty. Keep the bowl covered with a clean towel while you set up the shaping station.
Step 3: Prepare Fillings and Glaze
If you use fillings, prep them now. Flake cooked salmon, pit and chop umeboshi, or mix tuna with a spoonful of mayo and a few drops of soy sauce. Keep the fillings in small bowls near your work area.
In another small bowl, mix 3 tablespoons soy sauce with 1 to 2 tablespoons mirin. Stir until it blends into a smooth glaze. Set a brush next to the bowl so you can apply the glaze while grilling.
Step 4: Shape the Rice Balls
Fill a small bowl with water and add a pinch of salt. Dip your hands in the salted water and rub them together. Scoop about 1/3 to 1/2 cup of warm rice into one hand.
If you add a filling, press a small dent in the center, add about 1 teaspoon of filling, then cover it with a bit more rice. Shape the rice into a triangle or round: press with both hands, turning the rice gently, and pack it so it holds together. Keep the sides flat so they grill nicely.
Set the shaped yaki onigiri on a tray or plate. Repeat with the remaining rice, wetting your hands again as needed. You should get about 8 to 10 rice balls.
Step 5: Preheat and Oil the Pan or Grill
Place a nonstick skillet, cast iron pan, or grill pan over medium heat. Let it heat until a drop of water sizzles and evaporates quickly. Brush the surface lightly with neutral oil.
Lightly brush or rub a tiny bit of oil on the flat sides of each rice ball. This step helps the crust turn golden and prevents sticking. Do not soak them; a thin sheen works best.
Step 6: Grill the Rice Balls Plain First
Arrange the rice balls in the hot pan with a little space between each one. Let them cook on the first side without moving them for about 3 to 4 minutes. You want a light golden crust to form.
Flip to the second side and cook another 3 to 4 minutes. Turn and grill the edges if you like a more all-over crust. At this stage, the rice balls should feel firmer and hold together easily.
Step 7: Brush with Soy Glaze
Lower the heat slightly to medium-low so the glaze does not scorch. Brush a thin layer of the soy-mirin mixture on the top side of each rice ball. Let that side cook about 1 to 2 minutes until it smells toasty and looks deeper brown.
Flip and brush the other side with glaze. Cook another 1 to 2 minutes. You can repeat with a second light layer if you want a stronger soy flavor, but keep the layers thin.
Step 8: Finish and Garnish
When the yaki onigiri look golden to deep brown with some charred spots, remove them to a plate. Sprinkle with toasted sesame seeds, sliced scallions, or shredded nori if you like. Let them rest a minute so you do not burn your tongue.
Serve them hot or warm. The outside should taste crisp and savory, and the inside should stay soft and steamy. Try not to eat them all while you “taste test” in the kitchen.
Variations I've Tried
-
Plain salted yaki onigiri
I season the rice lightly with salt and maybe a bit of furikake, then grill and glaze with just soy sauce. Simple and classic. -
Miso butter yaki onigiri
I mix softened butter with miso paste and a touch of sugar, then brush this on instead of soy glaze. The flavor turns rich and nutty, and the miso caramelizes beautifully. -
Cheesy yaki onigiri
I tuck a small cube of melty cheese in the center, then shape and grill. The cheese softens inside and gives a fun surprise when you bite in. -
Shiso and umeboshi
I chop shiso leaves and mix them into the rice, then add a tiny piece of umeboshi in the center. The combo tastes bright, herbal, and tangy. -
Garlic soy version
I add a small grated garlic clove to the soy-mirin glaze. The garlic browns on the surface and adds a punchy flavor that works great for snack platters.
How to Serve Yaki Onigiri Japanese Grilled Rice Balls Recipe
Serve yaki onigiri hot or warm as a snack, side dish, or light meal. Pair them with miso soup, a simple salad, or sliced cucumbers and tomatoes for a balanced plate. Kids enjoy them in lunch boxes with cut fruit and some edamame on the side. You can also serve them as part of a bigger Japanese-style spread with tamagoyaki, pickles, and steamed vegetables.
How to store
- Fridge: Cool the grilled rice balls completely, then wrap each one tightly in plastic wrap and place them in an airtight container. Store in the refrigerator for up to 3 days.
- Freezer: Wrap each rice ball in plastic wrap, then place them in a freezer bag and press out extra air. Freeze for up to 1 month.
- Reheating (microwave): Unwrap, place on a microwave-safe plate, cover with a damp paper towel, and heat in short bursts until hot in the center. Then finish in a lightly oiled skillet for a few minutes per side to crisp the exterior again.
- Reheating (from frozen): Thaw in the fridge overnight or microwave on low power until soft, then pan-grill with a touch of oil to bring back the crust.
Yaki Onigiri Japanese Grilled Rice Balls Recipe
Ingredients
Instructions
- Place the warm cooked rice in a bowl and sprinkle with salt. Gently fold to distribute without crushing the grains.
- With lightly dampened and salted hands, take about 1/2 cup of rice and press it firmly into a triangle or round rice ball, making sure it holds together well.
- Repeat to make 6–8 rice balls, depending on size. Set them on a plate.
- In a small bowl, mix together soy sauce, mirin, and sugar until the sugar is dissolved. Set aside.
- Heat a nonstick skillet or grill pan over medium heat and brush with neutral oil.
- Place the rice balls in the pan and cook 3–4 minutes per side, until a light crust forms and they are lightly golden.
- Brush one side of each rice ball with the soy glaze and flip; cook 1–2 minutes until fragrant and slightly charred. Repeat with the other side, brushing with more glaze as needed.
- Remove from the pan and let cool slightly. Garnish with toasted sesame seeds and shredded nori if desired, then serve warm.
Notes
Approximate per serving (1 of 4): 210 calories; fat 3 g; saturated fat 0 g; carbohydrates 42 g; fiber 1 g; sugars 3 g; protein 4 g; sodium 480 mg. Values will vary based on brands, add-ins, and portion size.
Leave a Reply