

Valentine's Day Cookie Mug Huggers Recipe tastes like a buttery sugar cookie with a hint of vanilla that literally hugs your mug and makes your hot cocoa feel fancy. It suits anyone who wants a cute, edible decoration for coffee, tea, or hot chocolate and needs a fun project that takes about 1 hour start to finish. I tested these while my kids judged each cookie like it competed on a baking show, so you can skip the trial-and-error and jump straight to the good batch.
Why Make This Valentine's Day Cookie Mug Huggers Recipe at Home
You shape these little cookies to hook over the rim of your mug, so they look adorable and also taste like a bakery-style vanilla sugar cookie. You control the sweetness, the thickness, and the decorations, which means you can keep them simple or go full glitter-bomb with sprinkles and royal icing.
You also avoid weird aftertastes from store-bought cookies and use pantry ingredients you already know. They travel well, so you can package them in little bags and hand them out with packets of hot cocoa or homemade chai mix.
“These Valentine’s Day cookie mug huggers turned my basic hot chocolate into a cozy little love story in under an hour.”
Ingredients You Need
Dry ingredients
-
2 1/4 cups all-purpose flour
- Use a standard unbleached flour like King Arthur or Gold Medal for consistent texture.
- You can swap up to 1/4 cup with almond flour for a slightly nutty flavor, but keep most of it all-purpose so the cookies hold their shape.
-
1/2 teaspoon baking powder
- This keeps the cookies tender without puffing too much.
- Avoid extra baking powder or the cookies puff and lose the mug-hugging slot.
-
1/2 teaspoon fine sea salt
- Table salt works in a pinch; just use a scant 1/2 teaspoon.
Wet ingredients
-
3/4 cup unsalted butter, softened to room temperature
- Use real butter, not margarine, so the cookies keep their structure and flavor.
- If you only have salted butter, reduce the added salt to a pinch.
-
3/4 cup granulated sugar
- White sugar keeps the color light and the edges clean.
- You can swap 2 tablespoons with light brown sugar for a slightly deeper flavor, but the color darkens a bit.
-
1 large egg, room temperature
- A room-temperature egg blends more easily and keeps the dough smooth.
-
1 1/2 teaspoons pure vanilla extract
- Use real vanilla, not imitation, since this recipe relies on vanilla for flavor.
- You can add 1/4 teaspoon almond extract for a bakery-style twist.
-
1/4 teaspoon almond extract (optional but tasty)
Decoration ingredients
-
Royal icing or thick powdered sugar icing
- Shortcut: Use store-bought royal icing mix and just add water.
- You can also use a simple mix of powdered sugar, a splash of milk, and vanilla for a softer icing.
-
Gel food coloring in red and pink
- Gel color keeps the icing thick and bright.
- Avoid liquid food color if possible, since it thins the icing too much.
-
Sprinkles, sanding sugar, or tiny heart sprinkles
- Choose sprinkles that handle heat if you bake them on the cookie.
- If you use delicate sprinkles, add them after baking with icing as glue.
Pantry shortcuts
-
Pre-made sugar cookie dough
- You can use a high-quality refrigerated sugar cookie dough if you feel short on time.
- Chill it very well and roll it with extra flour so the shapes stay sharp.
-
Store-bought royal icing in squeeze bottles
- These save time and mess, especially if you decorate with kids.
Equipment list
- Mixing bowls (one large, one medium)
- Hand mixer or stand mixer with paddle attachment
- Rubber spatula
- Measuring cups and spoons
- Rolling pin
- Heart-shaped cookie cutters in small and medium sizes
- Small sharp knife or mini rectangle cutter to cut the mug slot
- Baking sheets
- Parchment paper or silicone baking mats
- Cooling racks
- Small piping bags or zip-top bags for icing
- Toothpicks or a scribe tool for detail work
Tips & Mistakes
- Chill the dough at least 30 minutes so the cookies hold their shape and the mug slots stay clean.
- Roll the dough to about 1/4 inch thick so the cookies feel sturdy enough to hang on a mug without snapping.
- Dust the rolling pin and surface lightly with flour so the dough does not stick, but avoid heavy flour or the cookies turn dry.
- Cut the mug slot a little narrower than you think; the cookie spreads slightly and widens the opening.
- Test one cookie on your favorite mug before baking the whole tray so you confirm the slot size.
- Line the baking sheet with parchment so the cookies release easily and keep their edges sharp.
- Pull the cookies from the oven when the edges just start to look set and barely golden; overbaking makes them brittle.
- Let the cookies cool completely before icing or they melt the icing and lose detail.
- Use gel food coloring sparingly so the icing does not taste bitter or look neon unless you want that vibe.
- Store undecorated cookies separately from decorated ones so moisture from icing does not soften crisp cookies.
How to Make Valentine's Day Cookie Mug Huggers Recipe
Step 1: Mix the dough
Add softened butter and granulated sugar to a large mixing bowl. Beat with a hand mixer or stand mixer on medium speed until the mixture looks light and fluffy, about 2 to 3 minutes. Scrape down the bowl, then beat in the egg, vanilla extract, and almond extract until the mixture looks smooth.
In a separate bowl, whisk together flour, baking powder, and salt. Add the dry ingredients to the wet ingredients in two additions, mixing on low speed until the dough just comes together. Scrape the bowl and press the dough into a smooth ball with your hands.
Step 2: Chill and prep
Divide the dough into two equal portions and flatten each into a disk. Wrap each disk in plastic wrap or place in a reusable container. Chill the dough in the fridge for at least 30 minutes, or up to 24 hours.
Line two baking sheets with parchment paper or silicone baking mats. Lightly flour a clean work surface and your rolling pin so the dough rolls smoothly.
Step 3: Roll and cut the hearts
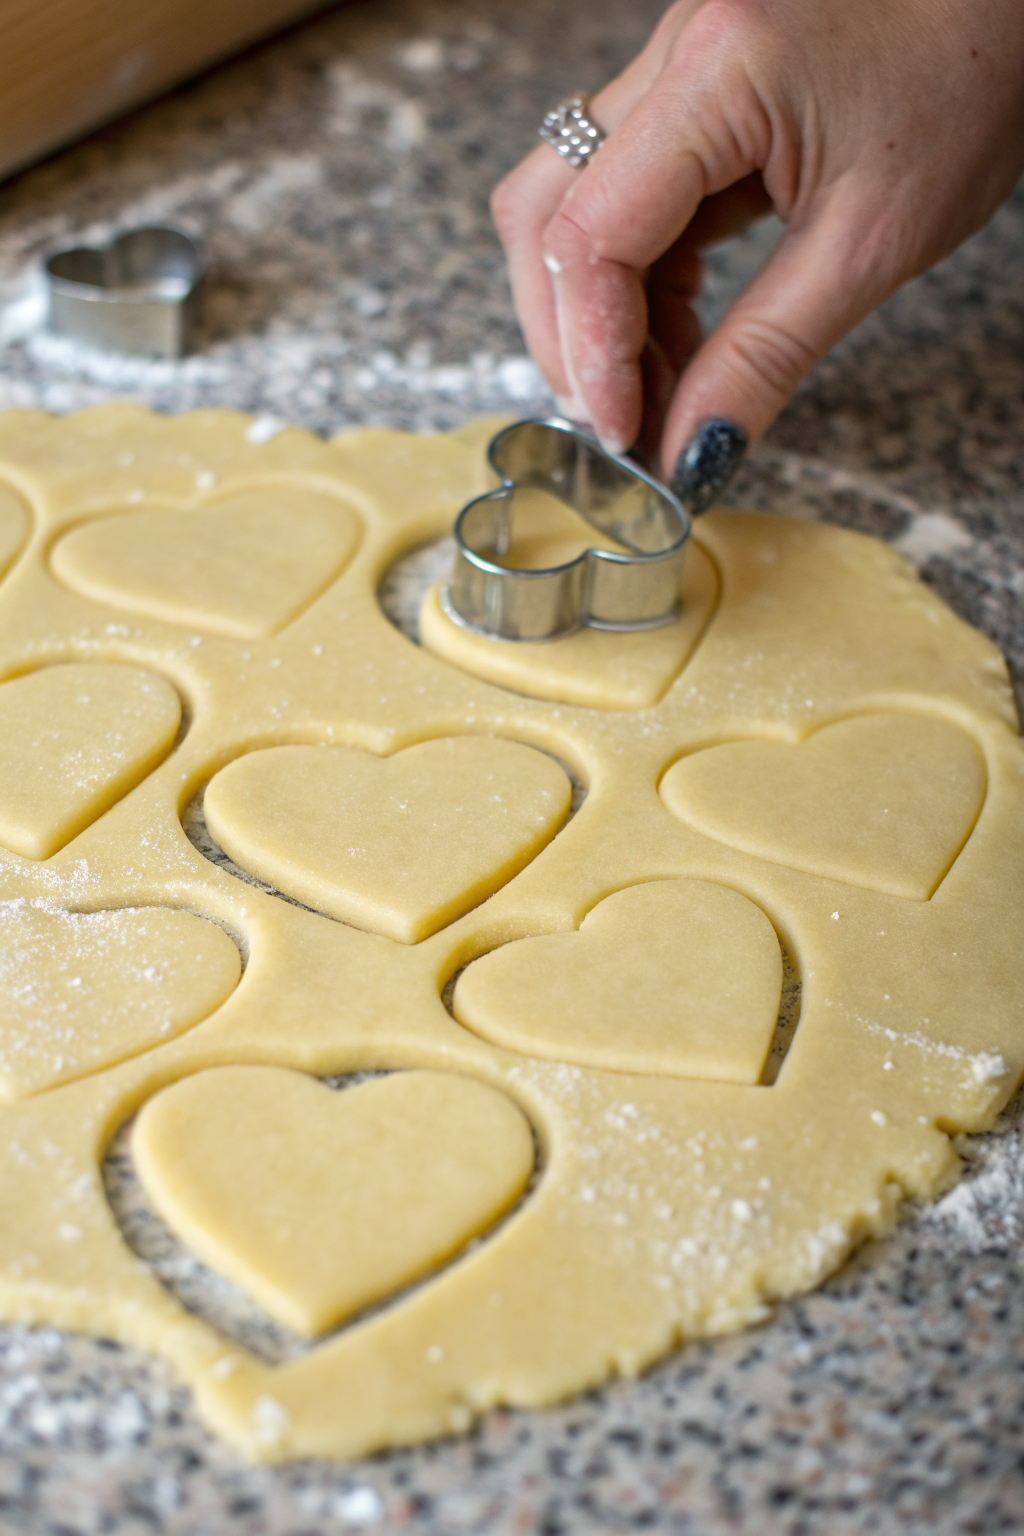
Unwrap one disk of dough and place it on the floured surface. Roll the dough to about 1/4 inch thickness, turning and lightly flouring as needed to prevent sticking. Use heart-shaped cookie cutters to cut out hearts in your preferred size.
Transfer the hearts to the prepared baking sheets, leaving a little space between each cookie. Keep the shapes tight but not touching so they bake evenly. Gather scraps, press them together, and re-roll once or twice so the dough stays tender.
Step 4: Cut the mug-hugger slots
Use a small sharp knife or mini rectangle cutter to cut a small notch near the bottom side of each heart. Aim for a rectangle about 1/4 inch wide and 1/2 inch tall, depending on your mug thickness. Angle the slot slightly upward so the cookie hooks over the rim and rests securely.
Test one raw cookie on an actual mug by gently placing it on the rim to check the slot size. Adjust the size on the rest of the cookies based on that test. Chill the shaped cookies on the baking sheet in the fridge for 10 to 15 minutes so they keep their shape in the oven.
Step 5: Bake the cookies
Preheat your oven to 350°F (175°C) while the cookies chill. Place one baking sheet in the center of the oven and bake 8 to 11 minutes, depending on cookie size. Watch for edges that look set and just barely golden while the centers still look pale.
Remove the tray from the oven and let the cookies cool on the sheet for 5 minutes. Transfer them to a cooling rack to cool completely. Repeat with the remaining tray.
Step 6: Mix and color the icing
While the cookies cool, mix your icing. If you use royal icing mix, follow the package directions and aim for a medium consistency that holds a line for a few seconds before it sinks back. If you use powdered sugar icing, mix powdered sugar with a splash of milk and vanilla until thick but pipeable.
Divide the icing into small bowls and tint each portion with gel food coloring in red, pink, or white. Stir gently so you do not whip in too much air. Transfer each color to a piping bag or zip-top bag fitted with a small tip or with a tiny corner snipped off.
Step 7: Decorate the mug huggers
Pipe outlines on the hearts and then fill in with slightly thinned icing if you want a smooth surface. Use a toothpick to nudge icing into corners and pop any air bubbles. Add polka dots, stripes, or tiny hearts with contrasting colors.
Sprinkle sanding sugar or heart sprinkles on top while the icing still feels wet so they stick. Set the cookies on a rack or tray and let the icing dry completely, which usually takes 2 to 4 hours depending on thickness. Test one cookie by gently touching the surface; it should feel firm and not tacky.
Step 8: Test the hug and serve
Hook a finished cookie over the rim of your favorite mug to confirm the slot fits. If the slot feels tight, gently wiggle the cookie on the rim; if it feels too loose, save that one for snacking and use the better-fitting ones for serving. Fill the mug with hot chocolate, coffee, or tea and perch the cookie on the side right before serving.
Variations I've Tried
- Chocolate sugar cookie mug huggers: Swap 1/4 cup of the flour with unsweetened cocoa powder and add an extra tablespoon of sugar. The result tastes like a soft chocolate shortbread that pairs perfectly with peppermint hot cocoa.
- Strawberry sugar cookie mug huggers: Add 2 to 3 tablespoons of freeze-dried strawberry powder to the dry ingredients and bump the vanilla down to 1 teaspoon. The cookies turn slightly pink and taste fruity without extra moisture.
- Sprinkle sugar cookie mug huggers: Fold in 2 to 3 tablespoons of rainbow or heart sprinkles at the end of mixing the dough. This version works great for kids or anyone who loves colorful cookies.
- Citrus twist mug huggers: Add 1 teaspoon of finely grated lemon or orange zest to the butter and sugar before you cream them. The zest brightens the flavor and pairs nicely with herbal tea or chamomile.
How to Serve Valentine's Day Cookie Mug Huggers Recipe
Hook one cookie over the rim of each mug right before you pour in hot cocoa, chai, or coffee so the cookie stays crisp. Pair them with homemade hot chocolate, peppermint cocoa, vanilla steamers, or a simple mug of warm milk with honey. You can also package a couple of cookies with a packet of hot cocoa mix and a cute mug as a small gift. Kids love to dunk them, so serve a few extra on a plate for enthusiastic snackers.
How to store
- Store undecorated cookies in an airtight container at room temperature for up to 5 days.
- Keep decorated cookies in a single layer or between sheets of parchment in a tin at room temperature for 3 to 4 days.
- Chill the dough tightly wrapped in the fridge for up to 3 days; let it sit at room temperature 10 to 15 minutes before rolling if it feels too firm.
- Freeze unbaked cookie shapes on a tray until solid, then transfer to a freezer bag and freeze up to 2 months; bake from frozen and add 1 to 2 minutes to the bake time.
- Freeze baked, undecorated cookies in an airtight container for up to 2 months; thaw at room temperature, then decorate.
- Reheat cookies very gently in a low oven at 275°F for 3 to 5 minutes if they lose crispness, and let them cool before you hang them on mugs.
Valentine's Day Cookie Mug Huggers Recipe
Ingredients
Instructions
- In a medium bowl, whisk together the flour, baking powder, and salt; set aside.
- In a large mixing bowl, beat the softened butter and granulated sugar until light and fluffy.
- Beat in the egg and vanilla extract until well combined.
- Gradually add the dry ingredients to the wet ingredients, mixing just until a soft dough forms. If the dough seems dry or crumbly, mix in the milk, 1 teaspoon at a time.
- Divide the dough into two disks, wrap in plastic, and chill for at least 30 minutes to make rolling easier.
- Preheat the oven to 350°F (175°C). Line baking sheets with parchment paper.
- On a lightly floured surface, roll out one disk of dough to about 1/4-inch thickness.
- Use a small heart or Valentine-themed cookie cutter to cut shapes. With a small knife, cut a narrow notch at the bottom or side of each cookie large enough to rest on the rim of a mug.
- Transfer the cut cookies to the prepared baking sheets, spacing them about 1 inch apart. Repeat with remaining dough, re-rolling scraps as needed.
- Bake the cookies for 8–10 minutes, or until the edges are just starting to turn light golden. Do not overbake.
- Remove from the oven and let the cookies cool on the baking sheet for 5 minutes, then transfer to a wire rack to cool completely.
- For the icing, whisk together powdered sugar and 2 tablespoons milk or cream until smooth and spreadable, adding more liquid a few drops at a time as needed. Flavor with vanilla or almond extract if desired.
- Divide and tint the icing with red and pink food coloring as desired. Pipe or spread the icing onto the cooled cookies and decorate with sprinkles or sanding sugar.
- Allow the icing to set completely before hanging the cookies on mugs filled with hot cocoa, coffee, or tea.
Notes
Approximate per cookie (1 of 24): 120 calories; fat 5 g; saturated fat 3 g; carbohydrates 18 g; fiber 0 g; sugars 10 g; protein 1 g; sodium 70 mg. Values are estimates and will vary based on exact ingredients, decorations, and portion size.
Leave a Reply