
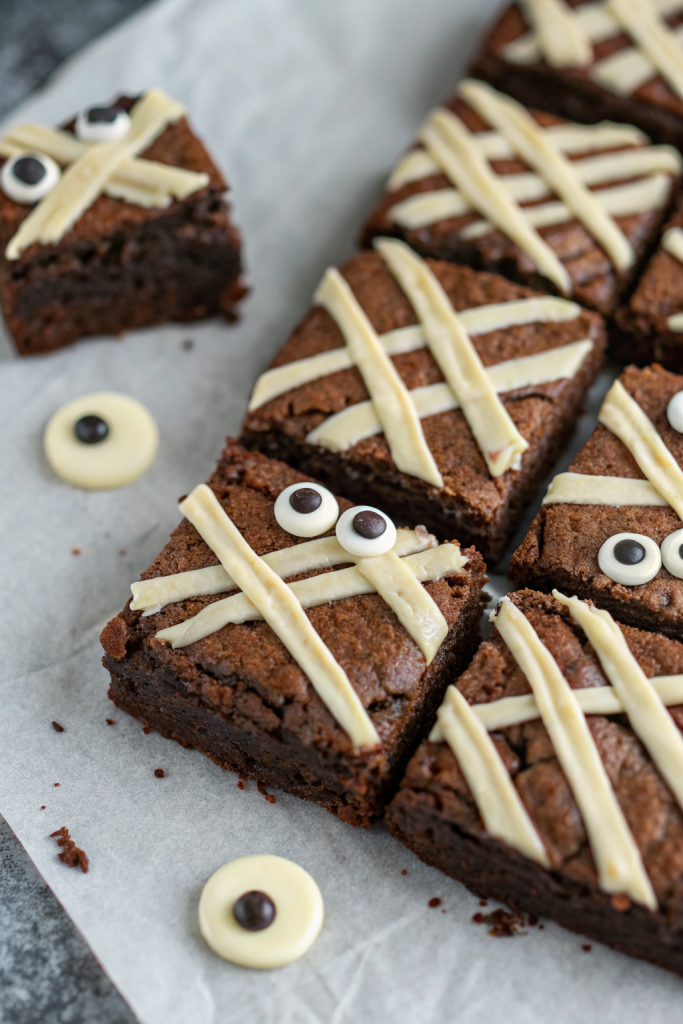
Spooky Mummy Brownies Recipe tastes like a super fudgy brownie hugged by sweet vanilla frosting, with just enough chocolate to satisfy every Halloween craving. It works perfectly for busy parents, classroom parties, or anyone who wants a cute dessert in about 45 minutes from start to finish. I first made these for my neighbor’s kids, and they still ask me every October if “the mummy brownies lady” will show up again.
Why Make This Spooky Mummy Brownies Recipe at Home
You control the ingredients, the sweetness level, and how spooky or silly the mummies look. Kids love to help drizzle the “bandages,” and adults secretly love how rich and chocolatey these brownies taste under all that frosting.
You also save money compared to store-bought themed treats, and you skip weird artificial flavors. Plus, when you bring a tray of mummy brownies to a party, people instantly assume you have your Halloween life together.
“These Spooky Mummy Brownies disappeared from the party table faster than any other dessert I brought, and everyone asked for the recipe! ★★★★★”
Ingredients You Need
Brownie Base
You can use your favorite boxed brownie mix or a homemade batter. I often use a boxed mix on busy nights and dress it up.
- 1 box brownie mix (18–19 ounce size), plus eggs, oil, and water listed on the box
- I like Ghirardelli or King Arthur for a rich, fudgy texture.
- Optional flavor boosters:
- 1 teaspoon vanilla extract
- 1/2 cup chocolate chips or chunks
- 1/4 teaspoon espresso powder to deepen the chocolate flavor
If you prefer homemade brownies, use a standard 8×8 or 9×9 pan recipe and bake them slightly under for extra fudgy texture.
Mummy Decoration
- 1 1/2 to 2 cups white chocolate chips or white candy melts
- Candy melts set a bit firmer and work great for clean mummy lines.
- 1 teaspoon neutral oil (coconut, vegetable, or canola) to thin the melted chocolate
- Candy eyeballs (about 24 to 30 pieces, depending on how many brownies you cut)
If you cannot find candy eyeballs, you can pipe tiny dots of melted dark chocolate or use mini chocolate chips as eyes.
Equipment List
- 8×8 or 9×9 inch baking pan
- Parchment paper
- Mixing bowl and whisk or electric mixer
- Microwave-safe bowl for melting chocolate
- Piping bag or zip-top bag (for mummy bandages)
- Small offset spatula or butter knife
- Toothpick or skewer (helpful for adjusting eyes)
Tips & Mistakes
- Line the pan with parchment and leave overhang so you lift the brownies out easily and cut neat squares.
- Do not overbake the brownies; pull them when the center looks set but still soft so they stay fudgy.
- Let the brownies cool completely before decorating or the mummy bandages will slide off.
- Cut the brownies into rectangles before you add the eyes and drizzle so each piece looks like its own mummy.
- Melt the white chocolate in short bursts in the microwave and stir often so it does not scorch.
- If the melted chocolate looks too thick, stir in 1/2 teaspoon oil at a time until it drizzles smoothly.
- Snip only a tiny corner off the piping bag or zip-top bag so you get thin, bandage-like lines.
- Press the candy eyes into the brownies before the drizzle sets so they stick firmly.
- Keep the decorations simple; avoid over-drizzling or you might cover the eyes completely.
- Store the brownies in a single layer or with parchment between layers so the bandages stay neat.
How to Make Spooky Mummy Brownies Recipe
Step 1: Prepare the Pan and Oven
Preheat your oven to the temperature on your brownie mix or homemade recipe, usually 325 to 350°F.
Line your baking pan with parchment paper and let it hang over two sides like handles.
Lightly grease the parchment and any exposed pan edges so the brownies release easily.
Step 2: Mix the Brownie Batter
In a mixing bowl, combine the brownie mix with the eggs, oil, and water listed on the box.
Stir until the batter looks smooth and glossy, but do not overmix.
Fold in vanilla, chocolate chips, and espresso powder if you use them.
Step 3: Bake the Brownies
Pour the batter into the prepared pan and spread it into an even layer.
Tap the pan on the counter a couple of times to pop any large air bubbles.
Bake according to package or recipe directions, usually 20 to 30 minutes, until a toothpick comes out with moist crumbs but not wet batter.
Step 4: Cool and Cut
Place the pan on a cooling rack and let the brownies cool completely.
Use the parchment handles to lift the cooled brownies out of the pan and place them on a cutting board.
Cut the slab into rectangles or squares; I like 3 rows by 4 rows for 12 good-sized mummy brownies.
Step 5: Melt the White Chocolate
Add the white chocolate chips or candy melts to a microwave-safe bowl.
Heat in 20 to 30 second bursts, stirring after each round, until almost melted.
Stir in the oil and keep mixing until the chocolate turns smooth and fluid.
Step 6: Add the Eyes
Spoon a small amount of melted white chocolate on the back of each candy eyeball.
Press two eyes onto the upper third of each brownie piece.
Let the eyes sit for a few minutes so the chocolate underneath starts to firm up.
Step 7: Pipe the Mummy Bandages
Transfer the rest of the melted white chocolate into a piping bag or a zip-top bag.
Snip a tiny corner off the bag and drizzle thin lines across each brownie, avoiding the eyes so they stay visible.
Crisscross the lines to mimic mummy bandages, and vary the angles so each brownie looks unique.
Step 8: Let Them Set
Place the decorated brownies on a tray and let them sit at room temperature until the white chocolate sets.
If your kitchen runs warm, place the tray in the fridge for 10 to 15 minutes to speed things up.
Once the bandages feel firm to the touch, arrange the brownies on a platter and serve.
Variations I've Tried
I swirl a few spoonfuls of peanut butter into the brownie batter before baking for a chocolate peanut butter mummy version.
I also mix orange food coloring into part of the white chocolate and drizzle a few orange bandages for extra Halloween flair.
Sometimes I bake the brownies in a 9×13 pan for thinner bars and cut them smaller for classroom parties.
I have also used gluten free brownie mix and dairy free chocolate chips, and the mummies still look adorable and taste rich.
How to Serve Spooky Mummy Brownies Recipe
Serve these Spooky Mummy Brownies on a big platter with plastic spiders or candy corn scattered around for a fun Halloween dessert table.
Kids love to pick out the brownie with the funniest eye placement, so lean into the silly factor.
Pair them with cold milk, hot cocoa, or apple cider for a cozy treat after trick-or-treating.
They also travel well in lunchboxes or treat bags if you pack them in a snug container.
How to store
- Room temperature: Store the brownies in an airtight container at room temperature for up to 3 days.
- Fridge: Keep them in a sealed container in the refrigerator for 4 to 5 days; let them sit at room temp for 15 to 20 minutes before serving so the texture softens.
- Freezer: Freeze undecorated brownie squares tightly wrapped for up to 2 months, then thaw and decorate before serving.
- Reheating: If you like a warm brownie, heat a piece in the microwave for 10 to 15 seconds, but add the mummy decorations after reheating so the bandages stay neat.
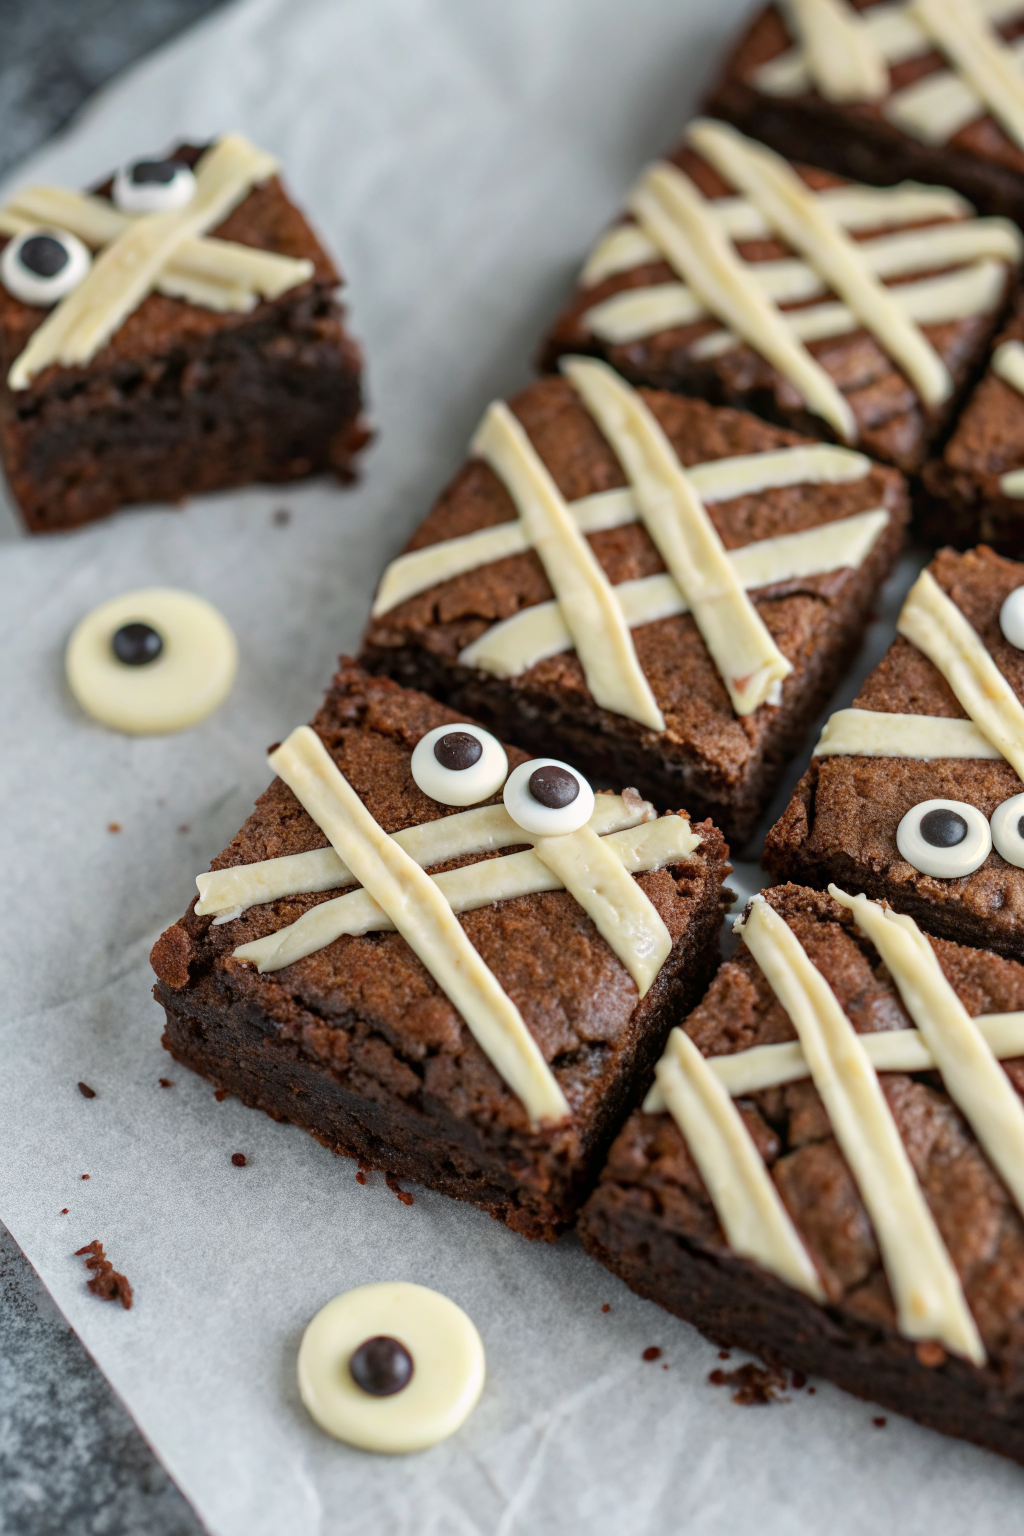
Spooky Mummy Brownies Recipe
Ingredients
Instructions
- Preheat the oven to the temperature on your brownie mix or homemade recipe, usually 325°F to 350°F. Line an 8x8 or 9x9 inch baking pan with parchment paper, leaving overhang on two sides like handles, and lightly grease the parchment and any exposed pan edges.
- In a mixing bowl, prepare the brownie batter according to the package directions, adding the eggs, oil, and water listed on the box. Stir just until the batter looks smooth and glossy without overmixing.
- Fold in the vanilla extract, chocolate chips or chunks, and espresso powder if using, then pour the batter into the prepared pan and spread it into an even layer. Tap the pan on the counter a couple of times to release any large air bubbles.
- Bake according to the package or recipe directions, usually 20 to 30 minutes, until the top looks set and a toothpick inserted near the center comes out with moist crumbs but not wet batter. Place the pan on a cooling rack and let the brownies cool completely in the pan.
- Once cool, use the parchment handles to lift the brownies from the pan onto a cutting board. Cut into rectangles or squares; 3 rows by 4 rows makes 12 good-sized mummy brownies.
- Add the white chocolate chips or candy melts to a microwave-safe bowl. Heat in 20 to 30 second bursts, stirring after each round, until almost melted. Stir in the neutral oil and continue stirring until the mixture is smooth and fluid.
- Spoon a tiny amount of melted white chocolate onto the back of each candy eyeball and press two eyes onto the upper third of each brownie piece. Let them sit for a few minutes so the chocolate underneath begins to firm up.
- Transfer the remaining melted white chocolate to a piping bag or zip-top bag and snip a very small corner off the bag. Drizzle thin lines of chocolate across each brownie, crisscrossing to mimic mummy bandages and avoiding the eyes so they stay visible.
- Place the decorated brownies on a tray and let them sit at room temperature until the white chocolate sets, or refrigerate for 10 to 15 minutes if your kitchen is warm. Once the bandages feel firm, arrange the mummy brownies on a platter and serve.
Notes
Approximate per 1 brownie (1/12 of recipe, prepared with standard boxed mix and white chocolate): 260–320 calories; fat 13–18 g; saturated fat 5–9 g; carbohydrates 35–42 g; fiber 1–2 g; sugars 26–32 g; protein 3–4 g; sodium 130–220 mg. Values will vary based on brownie mix brand, type and amount of chocolate used, and portion size. Storage: Store in an airtight container at room temperature for up to 3 days. Refrigerate for 4–5 days, bringing to room temperature before serving. For longer storage, freeze undecorated brownies for up to 2 months, thaw, then add the mummy decorations before serving.
Leave a Reply