
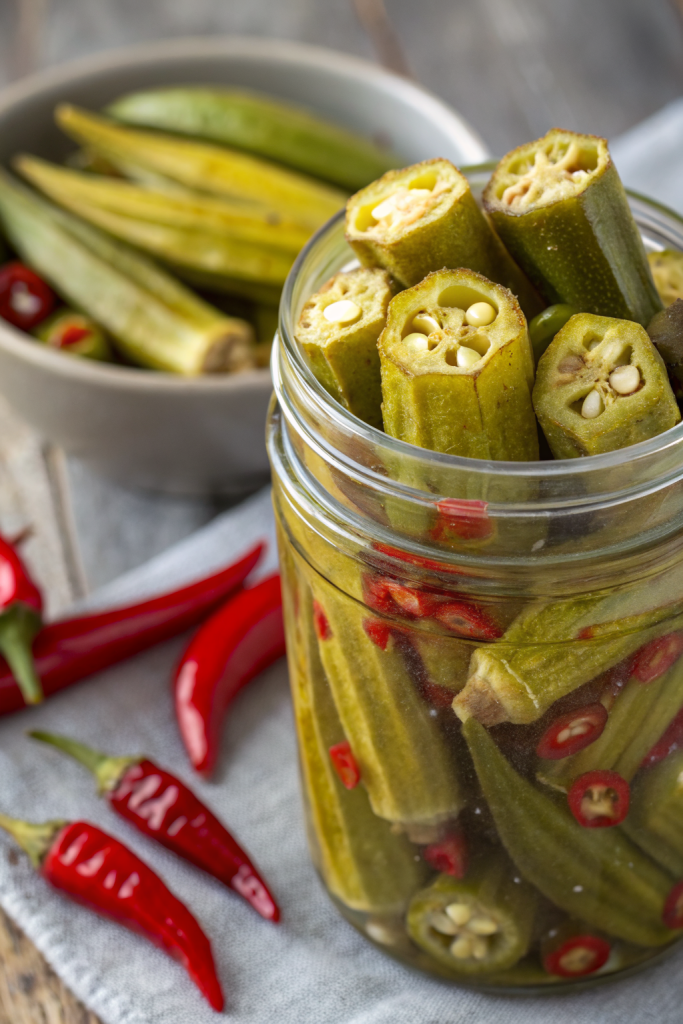
Quick Refrigerator Pickled Okra Recipe hits that perfect balance of tangy, garlicky, and just-spicy-enough crunch that keeps you going back to the jar. It works for busy home cooks who want a bold Southern-style snack or condiment in under 30 minutes of hands-on time. I grew up crunching on pickled okra at family cookouts, so this recipe feels like passing a jar across my own table to you.
Why You Should Try This Quick Refrigerator Pickled Okra Recipe
Quick Refrigerator Pickled Okra Recipe gives you crisp pods with a bright vinegar bite, a hint of heat, and a garlicky finish. The okra stays snappy, not slimy, and the brine tastes good enough to drizzle over salads or deviled eggs.
You skip canning equipment and long processing times, so you get small-batch pickles that fit real-life schedules. The recipe works beautifully for gardeners with a sudden okra explosion and for anyone who spots a bargain at the farmers market.
“This Quick Refrigerator Pickled Okra Recipe tastes like something from a Southern specialty shop, but it comes together in my tiny apartment kitchen in under half an hour. ★★★★★”
Ingredients You’ll Need
Fresh produce
- 1 pound fresh okra pods, small to medium, firm and unblemished
- Smaller pods stay more tender and crisp.
- 4 garlic cloves, peeled and lightly smashed
- 1 small yellow onion, thinly sliced (optional, but adds great flavor and bonus pickled onions)
- 2–3 fresh dill sprigs per jar or 1 teaspoon dried dill weed per jar
- 1–2 fresh hot chiles, such as serrano or jalapeño, sliced into rings
- Use fewer slices for mild heat or skip if you prefer no spice.
Brine ingredients
- 1 ½ cups distilled white vinegar (5% acidity)
- White vinegar keeps the brine clear and sharp; apple cider vinegar works too but tastes fruitier.
- 1 ½ cups water, filtered if your tap water tastes strongly of chlorine
- 2 tablespoons kosher salt or pickling salt
- Avoid iodized table salt; it can cloud the brine and taste harsh.
- 2 tablespoons granulated sugar
- This does not make sweet pickles; it simply balances the acidity.
Spices
Adjust these to taste; they build that classic Quick Refrigerator Pickled Okra Recipe flavor.
- 2 teaspoons mustard seeds
- 2 teaspoons black peppercorns
- 1 teaspoon coriander seeds (optional but highly recommended)
- ½ teaspoon crushed red pepper flakes per jar
- 2 bay leaves, one per jar
Pantry shortcuts and notes
- Pre-peeled garlic from the refrigerated section saves time, just choose firm cloves without green sprouts.
- Use pickling spice mix if you want a shortcut; use 1 to 1 ½ teaspoons per pint jar instead of the individual spices.
- If you prefer less bite, use half white vinegar and half rice vinegar for a softer tang.
Equipment
- 2 clean pint-size glass jars with tight-fitting lids
- Wide-mouth jars make packing okra easier.
- Small saucepan for the brine
- Measuring cups and spoons
- Small funnel (optional, but it keeps the counter cleaner)
- Tongs or clean hands for packing the jars
Tips & Tricks
- Choose small, firm okra pods; large pods often turn tough and fibrous in the jar.
- Rinse and dry the okra thoroughly so extra water does not dilute the brine.
- Pack the okra standing upright with tips pointing up; this helps fit more in each jar and keeps them from floating as much.
- Trim only the stem cap lightly and avoid cutting into the pod; once you expose the seeds, you invite slime.
- Heat the brine just until the salt and sugar dissolve; do not boil hard or you risk softer pickles.
- Let the jars cool to room temperature before refrigerating so you avoid thermal shock to the glass.
- Chill the pickles at least 24 hours before eating; the flavor deepens and the okra absorbs more tang.
- Taste a pod after a day; if you want more heat, tuck in extra chile slices and chill again.
- Label the lid with the date so you track freshness without guessing.
- Use the leftover brine in salad dressings, potato salad, or as a quick marinade for cucumbers or onions.
How to Make Quick Refrigerator Pickled Okra Recipe
Step 1: Prep the jars and okra
- Wash the jars and lids with hot soapy water, then rinse very well.
- Set the jars upside down on a clean towel to air dry while you prep the vegetables.
- Rinse the okra under cool water and pat it completely dry with a clean towel.
- Trim just the very tip of the stem so the cap looks neat, but keep the pod sealed so the seeds stay inside.
Step 2: Pack the jars
- Lay the jars on their sides and start stacking okra pods inside, tips toward the top of the jar.
- Stand the jars upright and tuck in any extra pods to fill gaps, still keeping them vertical as much as possible.
- Divide the garlic cloves, onion slices, dill, chile slices, mustard seeds, peppercorns, coriander seeds, crushed red pepper, and bay leaves between the jars.
- Leave about ½ inch of space at the top so the brine can cover everything without overflowing.
Step 3: Make the brine
- Add vinegar, water, kosher salt, and sugar to a small saucepan.
- Place the pan over medium heat and stir until the salt and sugar dissolve completely.
- Once the brine steams lightly and everything dissolves, turn off the heat.
- Taste a small spoonful and adjust; add a pinch more sugar if it tastes too sharp or a little more salt if it tastes flat.
Step 4: Add brine to the jars
- Use a small funnel if you have one and pour the hot brine over the okra in each jar.
- Fill until the brine covers the okra and reaches just below the rim, still leaving that ½ inch of headspace.
- Gently tap the jars on a towel-lined counter to release any air bubbles.
- If the level drops after the bubbles rise, top off with a bit more hot brine or a splash of equal parts vinegar and water.
Step 5: Cool and chill
- Wipe the rims of the jars with a clean, damp towel so no brine crusts on the edges.
- Screw on the lids until snug but not overly tight.
- Let the jars cool on the counter until they reach room temperature.
- Move the jars to the refrigerator and chill at least 24 hours before you open one, although 48 hours gives deeper flavor.
Step 6: Taste and adjust
- After a day, open a jar and taste one pod.
- If you want more heat, add extra chile slices and a pinch more red pepper flakes, then chill again.
- If you want more tang, add a splash of vinegar directly to the jar and gently swirl.
- Once you like the flavor, enjoy the okra within the storage window for the best crunch.
What to Serve with Quick Refrigerator Pickled Okra Recipe
Quick Refrigerator Pickled Okra Recipe pairs beautifully with classic Southern plates like fried chicken, grilled pork chops, or a big pot of red beans and rice. I love it on snack boards with sharp cheddar, pimento cheese, crackers, and fresh veggies. You can chop the pickled okra and stir it into tuna salad, egg salad, or potato salad for a tangy twist. It also works as a crunchy topper for burgers, hot dogs, grain bowls, and even simple avocado toast.
Storage Options
- Store the jars in the refrigerator and enjoy the Quick Refrigerator Pickled Okra Recipe within 3 to 4 weeks for peak crunch and flavor.
- Keep the okra submerged in brine at all times; if a pod pokes out, eat that one first.
- Do not freeze the pickled okra, since freezing ruins the texture and turns the pods mushy.
- Serve the okra straight from the fridge; you do not need to reheat it, but you can let it sit at room temperature for 10 minutes if you prefer a slightly less chilly bite.

Quick Refrigerator Pickled Okra Recipe
Ingredients
Instructions
- Wash the pint-size glass jars and lids with hot soapy water, then rinse very well.
- Set the jars upside down on a clean towel to air dry while you prep the vegetables.
- Rinse the okra under cool water and pat it completely dry with a clean towel.
- Trim just the very tip of each stem so the cap looks neat, keeping the pod sealed so the seeds stay inside.
- Lay each jar on its side and start stacking okra pods inside, tips pointing toward the top of the jar.
- Stand the jars upright and tuck in extra pods to fill gaps, keeping them as vertical as possible.
- Divide the garlic cloves, onion slices if using, dill, and chile slices between the jars.
- Divide the mustard seeds, black peppercorns, coriander seeds if using, crushed red pepper flakes, and bay leaves between the jars, leaving about 1/2 inch of space at the top.
- Add the vinegar, water, kosher salt, and sugar to a small saucepan.
- Place over medium heat and stir until the salt and sugar dissolve completely.
- Heat just until the brine steams lightly, then turn off the heat; do not boil hard.
- Taste a small spoonful and adjust with a pinch more sugar if too sharp or a little more salt if it tastes flat.
- Using a small funnel if you have one, pour the hot brine over the okra in each jar.
- Fill until the brine covers the okra and reaches just below the rim, maintaining about 1/2 inch of headspace.
- Gently tap the jars on a towel-lined counter to release any air bubbles.
- If the brine level drops after bubbles rise, top off with a bit more hot brine or an equal mix of vinegar and water.
- Wipe the rims of the jars with a clean, damp towel so no brine crusts on the edges.
- Screw on the lids until snug but not overly tight.
- Let the jars cool on the counter until they reach room temperature.
- Refrigerate the jars and chill at least 24 hours before opening, or 48 hours for deeper flavor.
- After a day, open a jar and taste one pod.
- For more heat, add extra chile slices and a pinch more crushed red pepper flakes, then return the jar to the refrigerator.
- For more tang, add a splash of vinegar directly to the jar and gently swirl to combine.
- Keep the okra submerged in brine and enjoy within the recommended storage time for best crunch.
Notes
Approximate per serving (1/8 pound okra and brine), about 16 servings total: 25 calories; fat 0 g; saturated fat 0 g; carbohydrates 5 g; fiber 1 g; sugars 2 g; protein 1 g; sodium 350 mg. Values are estimates and will vary based on exact jar size, produce size, and portion of brine consumed.
Leave a Reply