
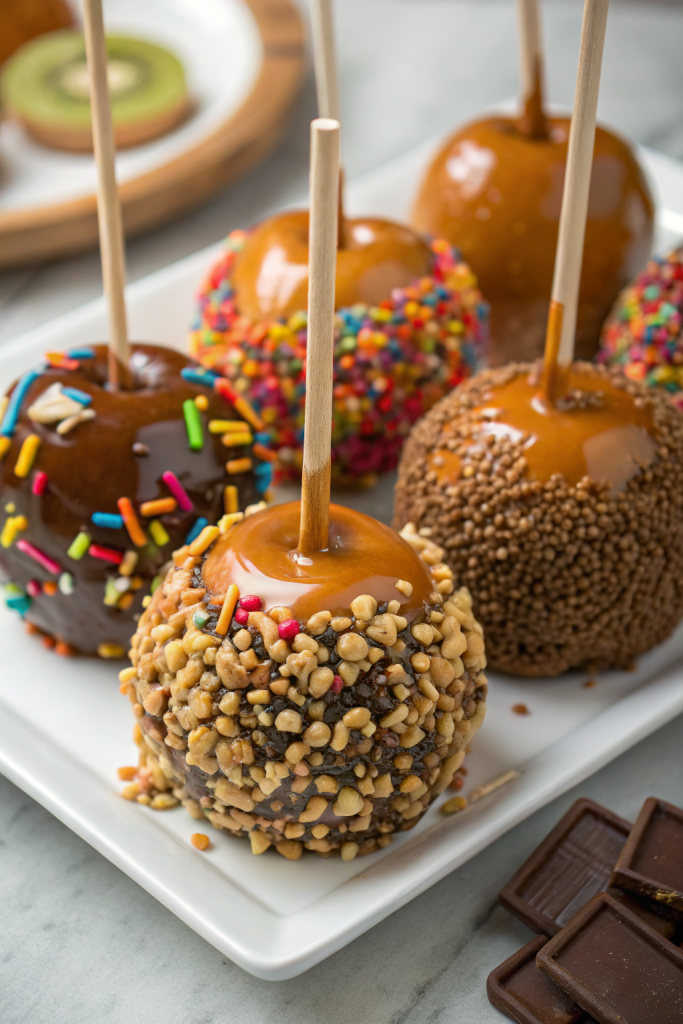
How to Make Caramel Apples tastes like a crisp fall day wrapped in buttery, chewy sweetness with just enough tart apple bite to keep things balanced. It works perfectly for busy families, bake sales, Halloween parties, or anyone who wants a fun dessert in about 45–60 minutes total. I still remember burning my first batch a decade ago, so you can skip that drama and jump straight to the glossy, gorgeous caramel apples.
Why How to Make Caramel Apples Is Worth It
You get that classic fair-style treat at home without mystery ingredients or a sticky mess on every surface. The caramel coats the apples in a thick, shiny layer that sets just firm enough to bite, while still staying soft and chewy.
You also control everything: the type of apple, the caramel thickness, and all the toppings. Kids love decorating them, adults love eating them, and your kitchen smells like a caramel shop.
“These homemade caramel apples beat anything from the store and vanish in minutes at our house.” ★★★★★
Ingredients You Need
You can make How to Make Caramel Apples with simple pantry staples and a few fresh ingredients. I’ll list the classic version first, then mention shortcuts and swaps.
Apples
- 8 small to medium apples
- Great choices: Granny Smith (tart), Honeycrisp (sweet-tart), Fuji or Gala (sweeter)
- Pick firm apples with no bruises. Smaller apples coat easier and feel less heavy to eat.
Caramel (from scratch)
- 1 cup (2 sticks / 226 g) unsalted butter
- 2 cups (400 g) packed light brown sugar
- 1 cup (240 ml) light corn syrup
- 1 can (14 oz / 396 g) sweetened condensed milk
- 1 teaspoon vanilla extract
- 1/4 teaspoon fine sea salt (add more to taste for salted caramel apples)
This combo gives a rich, buttery caramel that clings beautifully. I like Domino or C&H brown sugar because they melt evenly, but any fresh brown sugar works.
Caramel shortcut option
If you want a quicker route, use:
- 1 (14 oz) bag soft caramel candies, unwrapped
- 2 tablespoons heavy cream or half-and-half
Melt them together over low heat and stir until smooth. This version works great for weeknights or when kids help.
Toppings (optional but highly recommended)
Pick 3–5 options so everyone can customize:
- Chopped roasted peanuts or pecans
- Mini chocolate chips
- Crushed pretzels
- Crushed cookies or graham crackers
- Toasted shredded coconut
- Sprinkles
- Crushed candy bars
- Sea salt flakes
- Melted dark, milk, or white chocolate for drizzles
Sticks
- 8 wooden sticks, craft sticks, or sturdy skewers
- Popsicle sticks work well.
- If you use skewers, blunt the sharp end with a knife for safety.
Equipment
- Heavy-bottomed medium saucepan (3–4 quart)
- Candy thermometer (clip-on style makes life easier)
- Wooden spoon or heatproof silicone spatula
- Baking sheet lined with parchment paper or a silicone mat
- Small bowls or plates for toppings
- Clean dish towel or paper towels
- Large bowl for hot water (to prep apples)
Quick Tips & substitutions
- Use cold, firm apples so the caramel sets quickly and sticks better.
- Remove all wax from apples by dipping them in hot (not boiling) water, then drying them very well.
- Dry apples completely; any moisture makes caramel slide off.
- Use a heavy-bottomed pot so the caramel heats evenly and does not scorch.
- Clip on a candy thermometer and aim for about 235–240°F (soft-ball stage) for a chewy, not rock-hard, caramel.
- Stir gently and consistently so the caramel does not burn on the bottom.
- If the caramel thickens too much while you dip, warm it gently and stir until smooth again.
- Swap butter with vegan butter and use coconut milk plus coconut condensed milk for a dairy-free version.
- Use store-bought soft caramel candies if you want a faster method or cook with kids.
- Keep toppings finely chopped so they stick well and do not slide off.
How to Make How to Make Caramel Apples
Prep the apples
-
Wash and de-wax the apples.
- Fill a large bowl with very hot tap water.
- Dip each apple in the water for 10–15 seconds, then rub the skin with a clean towel to remove any wax.
- Dry the apples completely and set them on a towel.
-
Add the sticks.
- Twist off the stems.
- Push a wooden stick straight down through the top center of each apple, about halfway in.
- Make sure the stick feels snug so you can dip without wobbling.
-
Chill the apples.
- Place the apples on a parchment-lined baking sheet.
- Slide the tray into the fridge while you cook the caramel.
- Cold apples help the caramel cling and set faster.
Cook the caramel
-
Combine the caramel ingredients.
- Add butter, brown sugar, corn syrup, and sweetened condensed milk to your heavy saucepan.
- Set the pan over medium heat.
- Stir gently until the butter melts and the mixture looks uniform.
-
Heat to soft-ball stage.
- Attach a candy thermometer to the side of the pan.
- Stir constantly as the caramel bubbles and thickens.
- Cook until the thermometer reads 235–240°F, which usually takes 10–15 minutes.
-
Finish the caramel.
- Remove the pan from heat as soon as it hits temperature.
- Stir in vanilla and salt.
- Let the caramel sit for 3–5 minutes so it thickens slightly but still flows.
Set up the dipping station
-
Prep your workspace.
- Line a baking sheet with parchment or a silicone mat.
- Pour toppings into shallow bowls or small plates.
- Keep a spatula nearby to scrape caramel from the pan sides.
-
Check caramel thickness.
- Lift a spoonful and let it fall back into the pan.
- You want a thick, slow ribbon that still pours.
- If it runs like water, cool it a couple more minutes; if it clumps, warm it gently over low heat.
Dip the apples
-
Dip each apple.
- Hold an apple by the stick and tilt the pan slightly.
- Swirl the apple through the caramel, turning it so the caramel coats evenly up to the top.
- Lift and let excess drip back into the pan while you rotate the apple.
-
Scrape the bottom.
- Gently scrape the bottom of the apple along the pan edge.
- This step keeps caramel from pooling into a giant puddle.
- Place the coated apple on the lined baking sheet.
-
Add toppings quickly.
- While the caramel still feels warm and sticky, roll the apple in toppings or sprinkle them on.
- Press toppings in lightly with your hand so they adhere.
- Repeat with each apple, working steadily so the caramel does not cool too much.
Let the caramel apples set
-
Cool and set.
- Leave the tray at room temperature for 30–45 minutes until the caramel firms up.
- If your kitchen runs warm, slide the tray into the fridge for 15–20 minutes.
- Do not chill too long or condensation may form and soften the caramel.
-
Clean up the pan.
- Fill the caramel pan with hot water and let it sit.
- The caramel dissolves and wipes out easily.
- Your future self will thank you.
Recipe Variations
- Gluten-free: Use naturally gluten-free toppings like nuts, chocolate, and gluten-free cookies; check labels on sprinkles and candies.
- Vegan: Swap butter with vegan butter, use coconut condensed milk, and choose dairy-free dark chocolate and toppings.
- Low sugar / lower carb: Use smaller apples, a thinner caramel coating, and toppings like nuts and unsweetened coconut; use a sugar-free caramel recipe if you feel comfortable with alternative sweeteners.
- Salted caramel apples: Add extra flaky sea salt on top right after dipping.
- Chocolate-drizzled: After the caramel sets, drizzle melted dark or white chocolate over the apples.
- Candy-bar style: Roll in crushed chocolate bars, peanut butter cups, or toffee bits.
- “Trail mix” apples: Use a mix of chopped nuts, seeds, and a few mini chocolate chips.
Ways to Serve How to Make Caramel Apples
- Serve whole on a platter with labels for each topping combo.
- Slice apples into wedges with a sharp knife and serve on a plate for easier sharing.
- Pack individual apples in clear treat bags with a ribbon for parties or bake sales.
- Pair with hot cocoa, apple cider, or coffee for a cozy dessert spread.
- Cut into chunks and add to a dessert board with pretzels, plain apple slices, and extra caramel for dipping.
Storage Success
Keep finished caramel apples on a parchment-lined tray in the fridge for up to 3–4 days. Cover them loosely with plastic wrap or store each one in a treat bag to keep fridge smells away. Let them sit at room temperature for about 15 minutes before serving so the caramel softens slightly. Slice off any weepy or overly sticky spots if they sit a bit too long and enjoy the rest.
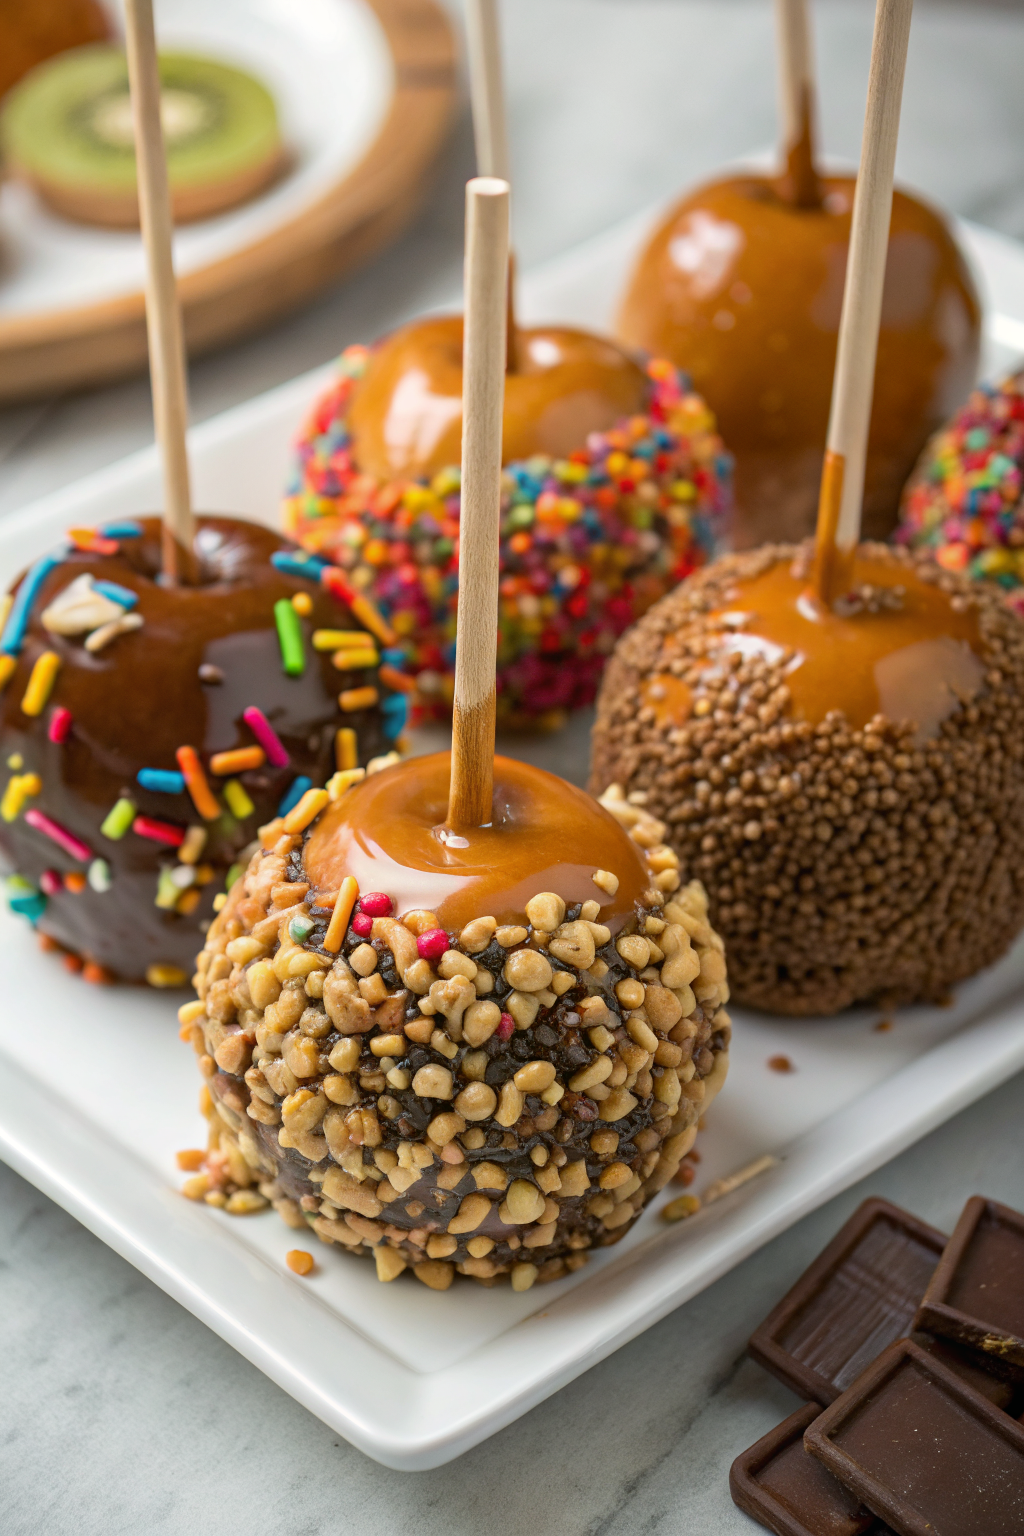
How to Make Caramel Apples
Ingredients
Instructions
- Fill a large bowl with very hot tap water. Dip each apple in the water for 10–15 seconds, then rub the skin with a clean towel to remove any wax. Dry the apples completely and set them on a towel.
- Twist off the stems, then push a wooden stick straight down through the top center of each apple, about halfway in, so the stick feels snug.
- Place the apples on a parchment-lined baking sheet and refrigerate while you prepare the caramel so they are cold when dipping.
- Add the butter, brown sugar, corn syrup, and sweetened condensed milk to a heavy-bottomed medium saucepan. Set over medium heat and stir gently until the butter melts and the mixture is uniform.
- Attach a candy thermometer to the side of the pan. Stir constantly as the caramel bubbles and thickens, cooking until the thermometer reads 235–240°F (soft-ball stage), about 10–15 minutes.
- Remove the pan from the heat as soon as it reaches temperature. Stir in the vanilla and salt, then let the caramel sit for 3–5 minutes so it thickens slightly while still flowing.
- For a shortcut caramel, combine the unwrapped soft caramel candies and heavy cream or half-and-half in a medium saucepan over low heat. Stir frequently until completely melted and smooth, then keep warm over very low heat for dipping.
- Line a baking sheet with parchment paper or a silicone mat. Pour desired toppings into shallow bowls or small plates and keep a spatula nearby for scraping the caramel from the sides of the pan.
- Check the caramel thickness by lifting a spoonful and letting it fall back into the pan. It should form a thick, slow ribbon that still pours. If it is too thin, let it cool a couple more minutes; if it is too thick, warm it gently over low heat while stirring.
- Hold an apple by the stick and tilt the caramel pan slightly. Swirl the apple through the caramel, turning so it coats evenly up to the top.
- Lift the apple and let the excess caramel drip back into the pan while rotating, then gently scrape the bottom of the apple along the edge of the pan to prevent pooling.
- Place the coated apple on the prepared baking sheet. While the caramel is still warm and sticky, roll the apple in toppings or sprinkle them on, pressing lightly so they adhere. Repeat with the remaining apples, working steadily so the caramel does not cool too much.
- Let the caramel apples sit at room temperature for 30–45 minutes, or refrigerate for 15–20 minutes, until the caramel has firmed. Avoid chilling too long to prevent condensation that can soften the caramel.
- Serve whole on a platter or slice into wedges with a sharp knife for easier sharing. Store leftovers covered in the refrigerator for up to 3–4 days.
Notes
Approximate per caramel apple (1 of 8), using the from-scratch caramel and no toppings: 430 calories; fat 20 g; saturated fat 12 g; carbohydrates 64 g; fiber 3 g; sugars 58 g; protein 4 g; sodium 190 mg. Values will vary based on apple size, toppings, and exact ingredients used.
Leave a Reply