
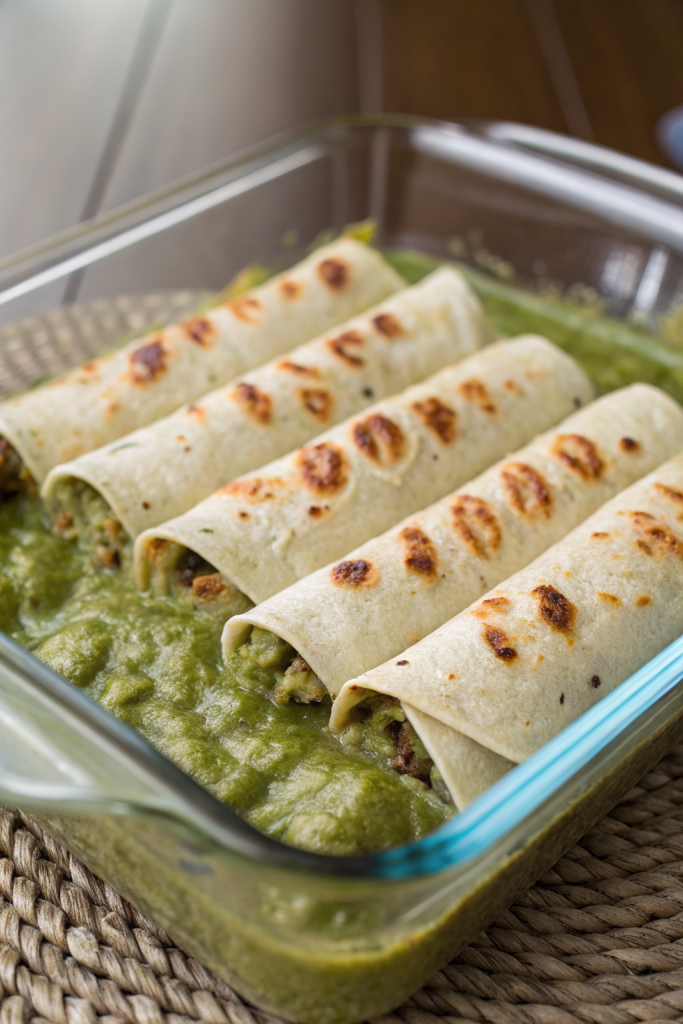
Hatch Green Chile Enchiladas Recipe hits that perfect spot between cozy comfort food and bright, smoky heat, and it comes together in about 1 hour start to finish. It works for busy weeknights, casual weekends, or feeding a hungry crowd that loves bold Southwestern flavor. I grew up in the Southwest and still plan my late-summer grocery runs around fresh Hatch chile season, so this one lives in heavy rotation at my house.
Why Make This Hatch Green Chile Enchiladas Recipe at Home
You control the heat level, the cheese pull, and the sauciness, which restaurant versions often miss. Fresh or frozen Hatch chiles give this enchilada sauce a deep roasted flavor that canned green sauce rarely matches.
You also stretch a relatively small amount of meat and cheese into a full pan that feeds a family or gives you leftovers for days. The recipe uses simple pantry items, so you skip mystery ingredients and still get that classic New Mexico style flavor.
“These Hatch Green Chile Enchiladas taste like a cozy New Mexico road trip baked into a pan, with perfect heat and cheesy comfort in every bite. ★★★★★”
Ingredients You Need
Hatch green chile sauce
- 2 tablespoons neutral oil (avocado, canola, or light olive oil)
- 1 small yellow onion, finely diced
- 3 cloves garlic, minced
- 1 ½ to 2 cups roasted Hatch green chiles, peeled, seeded, and chopped
- Use mild, medium, or hot chiles based on your heat tolerance.
- Frozen roasted Hatch chiles work great and save time.
- 1 teaspoon ground cumin
- 1 teaspoon dried oregano (Mexican oregano if you have it)
- ½ teaspoon smoked paprika (optional, but it deepens the roasted flavor)
- 2 tablespoons all purpose flour
- 2 cups low sodium chicken broth or vegetable broth
- ½ teaspoon kosher salt, plus more to taste
- ¼ teaspoon black pepper
- Juice of ½ lime (about 1 tablespoon), plus more to taste
Filling
- 2 cups cooked, shredded chicken
- Rotisserie chicken works perfectly and saves prep time.
- Use leftover grilled chicken for extra smoky flavor.
- 1 ½ cups shredded cheese, divided
- Use a mix of Monterey Jack and mild cheddar for great melt and flavor.
- Pre shredded cheese works, but fresh grated melts smoother.
- ½ cup sour cream or plain Greek yogurt
- ½ cup of the prepared Hatch green chile sauce
- ¼ cup chopped fresh cilantro (optional, but tasty)
- ¼ teaspoon kosher salt, or to taste
Tortillas and topping
- 10 to 12 corn tortillas (6 inch size)
- Use white or yellow corn. Slightly stale tortillas roll better.
- ½ to 1 cup extra Hatch green chile sauce for the bottom of the pan
- Remaining Hatch green chile sauce for topping
- Remaining shredded cheese for topping
- Optional toppings:
- Sliced green onion
- Extra cilantro
- Diced avocado
- Shredded lettuce
- Sliced jalapeño or extra roasted Hatch chiles
- Lime wedges
Pantry shortcuts and substitutions
- Use canned diced green chiles if you cannot find Hatch chiles, but expect milder flavor.
- Swap cooked black beans or pinto beans for some or all of the chicken for a vegetarian version.
- Use flour tortillas if your crew prefers them, but warm them well so they do not tear.
- Use a good quality jarred green enchilada sauce and stir in chopped Hatch chiles when you feel short on time.
Equipment
- 9×13 inch baking dish
- Medium saucepan
- Large skillet (optional but helpful for warming tortillas)
- Cutting board and sharp knife
- Mixing bowls
- Whisk and wooden spoon or spatula
- Foil to cover the pan during baking
Tips & Mistakes
- Warm the tortillas before rolling so they stay flexible and do not crack.
- Spread a thin layer of sauce on the bottom of the baking dish so the enchiladas do not stick or dry out.
- Taste the Hatch green chile sauce and adjust salt and lime before you assemble, because bland sauce leads to bland enchiladas.
- Avoid overfilling each tortilla so they roll easily and stay intact during baking.
- Use freshly grated cheese when possible, since it melts smoother and avoids that powdery coating from some bagged cheese.
- Keep the sauce slightly loose, not thick like gravy, so the tortillas soak it up and stay tender.
- Cover the pan with foil for the first part of baking so the cheese does not brown before the center heats through.
- Let the enchiladas rest 10 minutes after baking so they set up and slice cleanly instead of sliding apart.
How to Make Hatch Green Chile Enchiladas Recipe
Step 1: Roast or prep the Hatch green chiles
If you use fresh Hatch chiles, roast them under a broiler until the skins blister and char on all sides. Turn them every few minutes so they roast evenly.
Place the hot chiles in a bowl and cover them with a plate or plastic wrap so the steam loosens the skins. Peel off the skins, remove seeds and stems, then chop the flesh and set it aside.
If you use frozen roasted Hatch chiles, thaw them and drain off excess liquid. Chop them if they do not come pre chopped.
Step 2: Cook the Hatch green chile sauce
Heat the oil in a medium saucepan over medium heat. Add the diced onion and cook until it softens and turns translucent, about 4 to 5 minutes.
Stir in the garlic and cook 30 seconds until fragrant. Add the chopped Hatch chiles, cumin, oregano, and smoked paprika and stir, then cook 2 to 3 minutes so the spices bloom and the mixture smells toasty.
Sprinkle the flour over the mixture and stir until it coats everything and no dry flour remains. Cook 1 to 2 minutes so the flour loses its raw taste.
Slowly whisk in the broth while you stir so no lumps form. Bring the sauce to a gentle simmer and cook 5 to 8 minutes until it thickens slightly.
Turn off the heat and stir in the lime juice, salt, and pepper. Taste and adjust seasoning with more salt or lime until the flavor pops.
Step 3: Mix the filling
Add the shredded chicken to a mixing bowl. Pour in ½ cup of the Hatch green chile sauce and stir to coat the chicken.
Add 1 cup of the shredded cheese, sour cream, cilantro, and salt. Stir until the filling looks creamy and evenly mixed.
Taste the filling and adjust salt if needed. If you want extra heat, stir in a spoonful of chopped Hatch chiles.
Step 4: Warm the tortillas
Heat a dry skillet over medium heat. Warm each corn tortilla for about 20 to 30 seconds per side until it softens and becomes pliable.
Stack the warm tortillas on a plate and cover them with a clean kitchen towel to keep them soft. If a tortilla still cracks, warm it a little longer.
If you prefer, wrap the tortillas in a damp paper towel and microwave them for 30 to 45 seconds. Keep them covered so they do not dry out.
Step 5: Assemble the enchiladas
Preheat your oven to 375°F. Spread ½ to 1 cup of Hatch green chile sauce over the bottom of the 9×13 inch baking dish.
Place a warm tortilla on a plate or cutting board. Spoon 2 to 3 tablespoons of filling down the center of the tortilla.
Roll the tortilla snugly around the filling and place it seam side down in the sauced baking dish. Repeat with the remaining tortillas and filling, lining them up in rows.
Once you fill the dish, pour the remaining Hatch green chile sauce evenly over the rolled tortillas. Sprinkle the remaining shredded cheese over the top.
Step 6: Bake
Cover the baking dish loosely with foil so the cheese does not stick. Place the dish in the oven and bake 15 to 20 minutes until the sauce bubbles around the edges.
Remove the foil and bake another 8 to 10 minutes until the cheese melts fully and turns lightly golden in spots. The enchiladas should look bubbly and smell irresistible.
Take the pan out of the oven and let it rest 10 minutes. This short rest helps the enchiladas set so they slice and serve more neatly.
Step 7: Garnish and serve
Top the baked enchiladas with sliced green onion, extra cilantro, diced avocado, or shredded lettuce. Add sliced jalapeño or extra Hatch chiles if your crew loves spice.
Serve lime wedges on the side so everyone can squeeze fresh citrus over their plate. The lime brightens the rich cheese and sauce and keeps each bite lively.
Variations I've Tried
I swap the chicken for sautéed mushrooms, black beans, and corn when I cook for vegetarian friends, and the Hatch green chile flavor still shines. I also use leftover smoked turkey after holidays, which gives the enchiladas a fun twist and clears out the fridge.
Sometimes I stir a little cream cheese into the filling for an extra rich, almost dip like texture. I also switch to a verde breakfast version by stuffing the tortillas with scrambled eggs, potatoes, and Hatch chiles, then topping with the same sauce and cheese.
How to Serve Hatch Green Chile Enchiladas Recipe
Serve these Hatch Green Chile Enchiladas hot with a simple side of Mexican rice or cilantro lime rice and some refried or black beans. Add a crisp green salad with crunchy lettuce, cucumber, and tomato to balance the richness. A side of chips with salsa or guacamole always disappears fast, especially with kids at the table. Offer cold drinks like iced tea, sparkling water with lime, or a fruity agua fresca to cool the chile heat.
How to store
- Cool leftovers to room temperature, then cover the baking dish or transfer enchiladas to airtight containers and refrigerate up to 4 days.
- Store individual portions for easy lunches and spoon extra sauce over the top to keep them moist.
- Freeze cooled enchiladas tightly wrapped in a freezer safe container for up to 2 months, and label with the date so you do not lose track.
- Reheat in a covered baking dish at 350°F until hot in the center, about 20 to 25 minutes from the fridge or 35 to 40 minutes from frozen, and add a splash of broth if they look dry.
Leave a Reply