
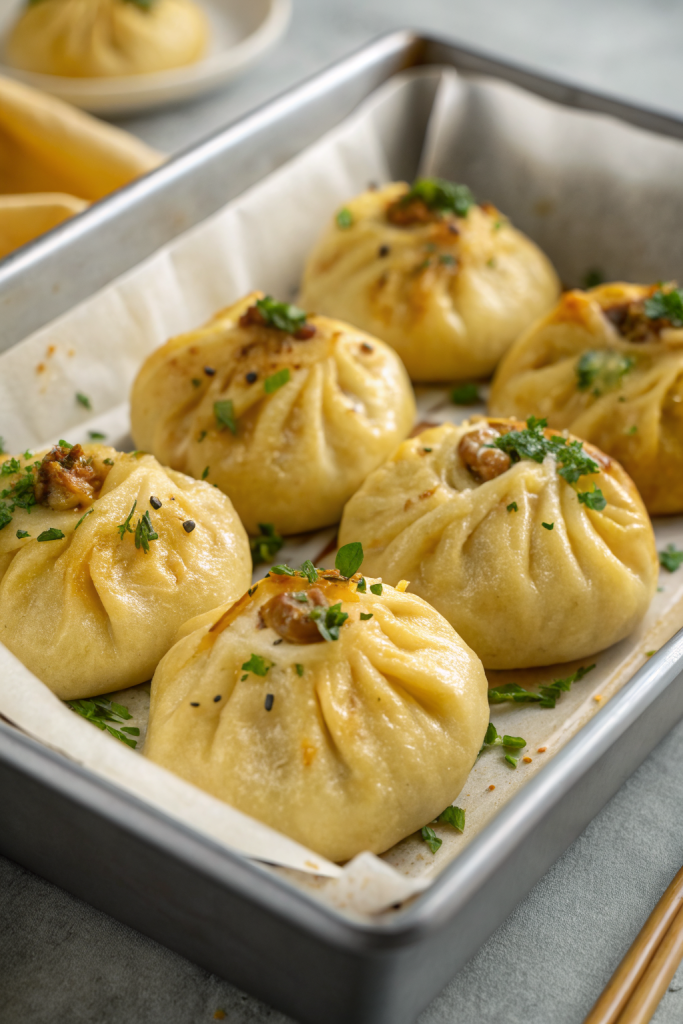
Fried Chicken Buns with Cheese taste like a mash-up of a crispy chicken sandwich and a cheesy stuffed bun, with soft bread hugging crunchy, juicy chicken and gooey melted cheese. This recipe works for busy weeknights, game days, or casual parties and takes about 1 hour from start to finish if you prep efficiently. I tested these while my neighbor “just happened to stop by” twice in one evening, so you know they hit the spot.
Why You Should Try This Fried Chicken Buns with Cheese
These Fried Chicken Buns with Cheese give you all the joy of fried chicken and cheesy sliders in one handheld package. The outside stays golden and crisp, the inside stays tender and juicy, and the cheese pulls in long strings that make everyone at the table cheer a little.
You can customize the spice level, the cheese type, and even the bun size. Kids love the cheesy center, adults love the crunchy coating, and the cook loves that the recipe uses simple pantry ingredients and basic equipment.
“These Fried Chicken Buns with Cheese taste like fair food and a good diner sandwich had a baby, and I would happily eat them every weekend. ★★★★★”
Ingredients You’ll Need
Chicken
- 1.5 pounds boneless, skinless chicken thighs, cut into 8 equal pieces
- Thighs stay juicier than breasts and handle frying better.
- 1 teaspoon kosher salt
- 1 teaspoon garlic powder
- 1 teaspoon onion powder
- 1 teaspoon smoked paprika or regular paprika
- 1/2 teaspoon black pepper
- 1/4 teaspoon cayenne pepper (optional, for heat)
Marinade
- 1 cup buttermilk
- Use whole-milk yogurt thinned with a little milk as a backup.
- 1 tablespoon hot sauce (optional but tasty)
Coating
- 1.5 cups all-purpose flour
- 1/2 cup cornstarch
- Cornstarch helps the crust stay extra crisp.
- 1 teaspoon kosher salt
- 1 teaspoon baking powder
- 1 teaspoon paprika
- 1/2 teaspoon garlic powder
- 1/2 teaspoon black pepper
Cheese & Buns
- 8 soft slider buns or small burger buns
- Potato buns or brioche buns work especially well.
- 8 slices cheese, cut to fit buns
- Use American cheese for classic melt, or try cheddar, provolone, or pepper jack.
- 2 tablespoons softened butter or mayonnaise, for toasting buns
Sauce & Toppings (Optional but recommended)
- 1/3 cup mayonnaise
- 2 tablespoons ketchup
- 1 tablespoon pickle juice or lemon juice
- 1 teaspoon Dijon mustard
- Shredded lettuce or cabbage
- Pickle slices or jalapeño slices
Oil
- Neutral frying oil, enough to reach about 1.5 inches in your pot
- Use canola, peanut, or vegetable oil. Avoid olive oil for this.
Equipment
- Heavy-bottomed pot or deep skillet for frying
- Wire rack set over a sheet pan
- Tongs
- Instant-read thermometer (for oil and chicken)
- Small bowl and whisk for sauce
- Shallow dish or pie plate for dredging
- Skillet or griddle for toasting buns
Tips & Tricks
- Pat the chicken dry before seasoning so the spices stick better.
- Marinate the chicken in buttermilk for at least 30 minutes; aim for 2 to 4 hours if you plan ahead.
- Use cornstarch in the flour mix to keep the crust light and crisp.
- Heat the oil to 350°F and keep it between 325°F and 350°F; adjust the burner as needed.
- Fry in batches so the oil temperature stays hot and the coating stays crunchy.
- Place fried chicken on a wire rack instead of paper towels so the bottom does not steam and soften.
- Toast the buns with a light smear of butter or mayo to add flavor and protect them from sogginess.
- Add cheese to the buns while the chicken rests so the heat from the chicken helps melt it.
- Slice the chicken pieces to fit the buns if needed; neat edges make stacking easier.
- Taste the sauce and adjust salt, sweetness, or tang before you assemble everything.
How to Make Fried Chicken Buns with Cheese
Season and Marinate the Chicken
- Lay the chicken thighs on a cutting board and trim any large pieces of fat. Cut them into 8 fairly even pieces that match the size of your buns.
- Sprinkle the chicken with salt, garlic powder, onion powder, paprika, black pepper, and cayenne. Rub the spices into all sides so each piece gets coated.
- In a bowl, whisk the buttermilk and hot sauce. Add the seasoned chicken, stir to coat, cover, and chill for at least 30 minutes while you prep everything else.
Mix the Coating
- In a shallow dish, whisk together the flour, cornstarch, salt, baking powder, paprika, garlic powder, and black pepper.
- Taste a pinch of the dry mix so you can adjust salt or spice before you coat the chicken.
- Set the dish near the stove so you can move from marinade to coating to hot oil in a smooth line.
Heat the Oil
- Pour oil into a heavy pot or deep skillet until it reaches about 1.5 inches up the sides.
- Clip on a thermometer if you have one and heat the oil over medium heat until it reaches 350°F.
- Adjust the heat so the temperature stays steady while you fry; small tweaks keep the crust from burning or turning greasy.
Dredge the Chicken
- Lift a piece of chicken from the buttermilk and let the excess drip off.
- Press the chicken into the flour mixture, turning and pressing so every surface gets a thick, shaggy coating.
- Place the coated chicken on a plate or rack while you coat the rest, and give the coating a minute to hydrate so it sticks better.
Fry the Chicken
- Gently lower a few pieces of coated chicken into the hot oil, leaving space between them.
- Fry each batch for about 5 to 7 minutes, turning once, until the crust looks deep golden and the internal temperature reaches 165°F.
- Transfer the cooked chicken to a wire rack set over a sheet pan so air can circulate and keep the crust crisp.
- Repeat with the remaining chicken, letting the oil come back to 350°F between batches.
Toast the Buns and Prep the Cheese
- While the last batch of chicken fries, heat a skillet or griddle over medium heat.
- Spread the cut sides of the buns with a thin layer of butter or mayonnaise.
- Place the buns cut side down in the skillet and toast until they turn golden and feel slightly crisp at the edges.
- Lay cheese slices on the bottom buns so they wait for the hot chicken.
Mix the Sauce
- In a small bowl, stir together mayonnaise, ketchup, pickle juice, and Dijon mustard.
- Taste and adjust with more pickle juice for tang or a pinch of sugar if you like a sweeter sauce.
- Keep the sauce nearby with your lettuce and pickles so you can assemble quickly while the chicken stays hot.
Assemble the Fried Chicken Buns with Cheese
- Place a hot piece of fried chicken on top of the cheese on each bottom bun. The heat from the chicken will start to soften the cheese.
- Spoon a little sauce over the chicken, then add shredded lettuce or cabbage and a few pickle slices.
- Cap each stack with the top bun and press gently so everything settles into place.
- Serve the Fried Chicken Buns with Cheese right away while the crust stays crisp and the cheese stays melty.
What to Serve with Fried Chicken Buns with Cheese
These Fried Chicken Buns with Cheese pair nicely with crunchy sides like coleslaw, potato wedges, or sweet potato fries. A simple green salad with a bright vinaigrette cuts through the richness and keeps the meal balanced. You can also serve them with corn on the cob, roasted vegetables, or a fruit salad for a lighter touch. Offer cold drinks like iced tea, lemonade, or sparkling water to keep everything refreshing.
Storage Options
- Cool leftover Fried Chicken Buns with Cheese completely, then store the chicken and buns separately in airtight containers in the fridge for up to 3 days.
- Keep the fried chicken pieces in a single layer on a plate or container lined with a paper towel, then cover loosely so the crust does not trap too much steam.
- Freeze the fried chicken on a sheet pan until solid, then move to a freezer bag and keep for up to 2 months; toast fresh buns and add cheese when you reheat.
- Reheat chicken in a 375°F oven or air fryer until hot and crisp, about 8 to 12 minutes, then assemble new buns with fresh toppings and sauce.
Leave a Reply