
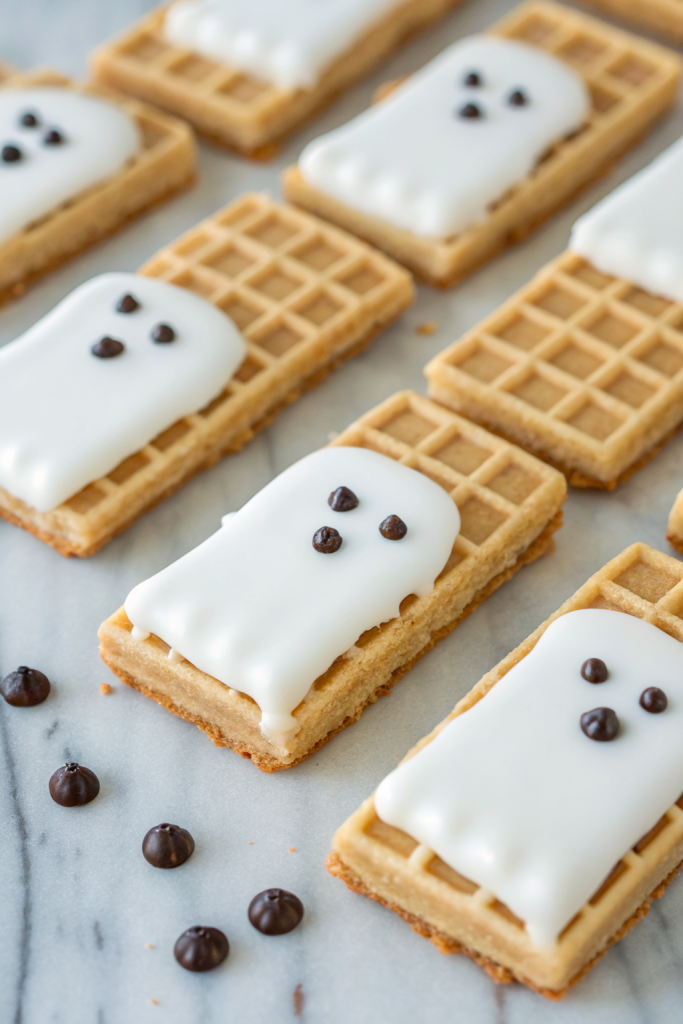
Chocolate Dipped Ghost Wafer Cookies Recipe tastes like a crunchy vanilla wafer hugged in silky chocolate with a sweet marshmallowy ghost on top, and it works perfectly for anyone who wants a cute Halloween dessert in about 30 minutes. This recipe fits busy parents, party hosts, and anyone who claims they “can’t bake” but still wants something that looks bakery-level. I tested these with my nieces last weekend, and they disappeared faster than the candy bowl on October 31st.
Why Make This Chocolate Dipped Ghost Wafer Cookies Recipe at Home
You get bakery-style Halloween cookies without turning on the oven or wrestling with complicated dough. The base uses store-bought vanilla wafers, so you only melt chocolate, pipe ghosts, and decorate.
You control the chocolate quality, the sweetness level, and the decorations, which helps if you have picky kids or food allergies in the house. These ghost wafer cookies also travel well, so they work great for school parties, potlucks, or office treat tables.
“These Chocolate Dipped Ghost Wafer Cookies vanished from our Halloween dessert table in under ten minutes, and everyone begged for the recipe! ★★★★★”
Ingredients You Need
Main ingredients
-
Vanilla wafer cookies
- Use classic rectangular vanilla wafers, not round ones.
- Any brand works, but I like Voortman or Keebler for consistent size and crunch.
-
Chocolate for dipping
- 1 ½ cups semi-sweet chocolate chips or melting wafers
- You can use milk chocolate if you prefer sweeter cookies or dark chocolate if you like more contrast.
- Candy melts give a smoother finish and set faster, especially in warm kitchens.
-
White chocolate or white candy melts
- 1 cup white chocolate chips or white melting wafers
- This forms the ghost bodies on top of the dipped wafers.
- Use candy melts if you struggle with white chocolate seizing.
-
Mini chocolate chips or black decorating gel
- You need these for the ghost eyes and mouths.
- Mini chips give a cute cartoon look, while gel gives more control for expressions.
-
Coconut oil or vegetable shortening (optional)
- 1 to 2 teaspoons to thin chocolate if it looks too thick.
- This helps the chocolate coat the wafers smoothly.
Optional decorations
- Halloween sprinkles
- Orange and black nonpareils
- Crushed Oreo crumbs for a “graveyard dirt” look
- Colored candy melts for drizzle (orange, purple, lime green)
Pantry shortcuts
- Use store-bought vanilla wafers instead of baking cookies from scratch.
- Use pre-colored candy melts instead of tinting white chocolate with food coloring.
- Use a disposable piping bag or a zip-top bag with the corner snipped instead of a fancy piping set.
Equipment list
- Microwave-safe bowls or a double boiler
- Baking sheet
- Parchment paper or silicone baking mat
- Small spatula or spoon
- Piping bag or zip-top bag
- Toothpick (for fixing ghost faces or popping air bubbles)
- Cooling rack (optional, but helps if your kitchen runs warm)
Tips & Mistakes
- Melt chocolate in short bursts in the microwave and stir often so it does not scorch.
- Dry wafers completely and keep them at room temperature so condensation does not cause chocolate to seize.
- Add ½ teaspoon coconut oil at a time if the chocolate looks too thick for dipping.
- Dip wafers only halfway or two-thirds of the way so you leave a clean edge to hold.
- Lay dipped wafers on parchment, not directly on a plate, so they release easily after the chocolate sets.
- Pipe ghosts while the chocolate still feels slightly soft so the white chocolate adheres well.
- Let white chocolate cool slightly before piping so it holds a puffy ghost shape instead of running off the sides.
- Press mini chocolate chips in gently for eyes and mouths before the white chocolate hardens.
- Chill the tray briefly in the fridge if your kitchen feels warm, but avoid long chilling times to prevent condensation later.
- Store finished cookies in a cool, dry spot so the chocolate stays shiny and the wafers stay crisp.
How to Make Chocolate Dipped Ghost Wafer Cookies Recipe
Step 1: Prep your workspace
Line a baking sheet with parchment paper or a silicone mat. Open the vanilla wafer packages and sort out any broken cookies for snacking or crumbling over ice cream. Keep the unbroken wafers in a single layer so you can grab them quickly once the chocolate melts.
Step 2: Melt the chocolate for dipping
Place semi-sweet chocolate chips or melting wafers in a microwave-safe bowl. Heat in 20 to 30 second bursts, stirring between each burst until the chocolate turns smooth and glossy. Stir in 1 teaspoon coconut oil if the chocolate looks too thick or clumpy.
Step 3: Dip the wafer cookies
Hold a vanilla wafer at one end and dip it about two-thirds of the way into the melted chocolate. Gently shake off excess chocolate and scrape the bottom edge lightly on the rim of the bowl so it does not pool too much. Lay the dipped wafer on the prepared baking sheet, chocolate side up.
Repeat with all the wafers, spacing them slightly apart so they do not touch. If the chocolate starts to thicken, warm it again for 10 to 15 seconds and stir until smooth. Work in batches if you feel more comfortable, especially on your first try.
Step 4: Melt the white chocolate for ghosts
Place white chocolate chips or white candy melts in a clean microwave-safe bowl. Heat in 15 to 20 second bursts, stirring each time, until smooth. Let the white chocolate sit for 1 to 2 minutes so it thickens slightly and holds shape when piped.
Step 5: Pipe the ghost bodies
Transfer the white chocolate to a piping bag or a zip-top bag and snip a small opening at the tip. Pipe a generous oval or teardrop shape near the top half of each dipped wafer, leaving a little chocolate border around the edges. Add a small tail or wavy bottom edge to give each ghost a bit of personality.
If any ghosts look lopsided, nudge the white chocolate gently with a toothpick while it still feels soft. Aim for plump shapes, since thin ghosts can crack once the chocolate sets.
Step 6: Add ghost faces
While the white chocolate still feels soft, press two mini chocolate chips into each ghost for eyes. Add a third chip for a mouth, or use black decorating gel to draw tiny ovals or “O” shapes. If you use gel, wait until the white chocolate sets completely so the gel does not slide.
You can tilt some eyes or make one eye bigger than the other to give each ghost a different expression. Kids love helping with this part, and the slightly messy faces often look the cutest.
Step 7: Decorate and set
Sprinkle Halloween sprinkles or nonpareils over the chocolate areas around the ghosts if you want extra color. Drizzle leftover colored candy melts across the wafers in thin zigzags for a bakery-style finish. Keep the drizzle light so it does not cover the ghost faces.
Let the cookies sit at room temperature until the chocolate sets and feels firm to the touch. If your kitchen runs warm, place the tray in the fridge for 10 to 15 minutes to speed things up.
Step 8: Serve or store
Once the chocolate sets, gently lift the cookies from the parchment and transfer them to a serving platter or airtight container. Handle them by the undipped end or the sides so you do not smudge the ghost faces. Keep them in a cool area until party time.
Variations I've Tried
-
Spooky cookies and cream ghosts
Dip wafers in white chocolate and sprinkle crushed Oreo crumbs over the bottom half. Pipe ghosts with semi-sweet chocolate instead of white, then add white chocolate chip eyes. This version tastes like cookies and cream candy bars with a Halloween twist. -
Peanut butter ghost wafers
Spread a thin layer of peanut butter on each wafer before dipping in chocolate. The peanut butter adds richness and makes the cookies taste like a candy bar. Check for peanut allergies if you share these at school or large gatherings. -
Caramel ghost crunch
Drizzle a little caramel sauce on the wafers, let it firm up slightly, then dip in dark chocolate. The caramel adds chew and a deeper flavor that pairs nicely with the crunchy wafer. Top with a light sprinkle of sea salt around the ghost for a sweet-salty combo. -
Colorful monster ghosts
Tint white candy melts with gel food coloring and pipe green, purple, or orange “ghosts” with goofy faces. Use candy eyes instead of mini chocolate chips for extra drama. Kids love decorating this version at Halloween parties.
How to Serve Chocolate Dipped Ghost Wafer Cookies Recipe
Serve these Chocolate Dipped Ghost Wafer Cookies on a big platter with candy corn, gummy worms, and popcorn for a fun Halloween snack board. They pair nicely with hot chocolate, warm apple cider, or cold milk. Add them to lunchboxes as a surprise treat or pack them in small cellophane bags with ribbon for party favors. If you host a movie night with family-friendly spooky films, stack these on a tray in the center of the coffee table and watch them disappear.
How to store
- Room temperature: Store cookies in an airtight container at cool room temperature for 4 to 5 days. Keep layers separated with parchment so the ghosts stay neat.
- Fridge: Chill in an airtight container for up to 1 week if your kitchen feels warm, but bring them to room temperature before serving so the chocolate softens slightly.
- Freezer: Freeze in a single layer on a baking sheet until solid, then transfer to a freezer bag or container for up to 1 month. Thaw in the fridge, then move to the counter so condensation forms on the container, not on the chocolate.
- Reheating: Do not reheat these cookies; they taste best at room temperature. If they feel too cold from the fridge or freezer, let them sit on the counter for 15 to 20 minutes before serving.
Chocolate Dipped Ghost Wafer Cookies Recipe
Ingredients
Instructions
- Line a baking sheet with parchment paper or a silicone baking mat. Open the vanilla wafer packages and set aside unbroken wafers in a single layer for easy access.
- Place the semi-sweet chocolate chips or chocolate melting wafers in a microwave-safe bowl. Microwave in 20–30 second bursts, stirring between each, until smooth and glossy. If the chocolate seems too thick, stir in 1/2 teaspoon of coconut oil or shortening at a time until it coats a spoon easily.
- Hold each vanilla wafer at one end and dip it about two-thirds of the way into the melted chocolate. Gently shake off excess and lightly scrape the bottom edge on the rim of the bowl so chocolate doesn’t pool. Lay the dipped wafers on the prepared baking sheet, chocolate side up, spacing them slightly apart. Re-warm the chocolate in short bursts if it thickens as you work.
- Place the white chocolate chips or white candy melts in a clean microwave-safe bowl. Heat in 15–20 second bursts, stirring each time, until melted and smooth. Let the melted white chocolate stand 1–2 minutes so it thickens slightly and will hold a puffy shape when piped.
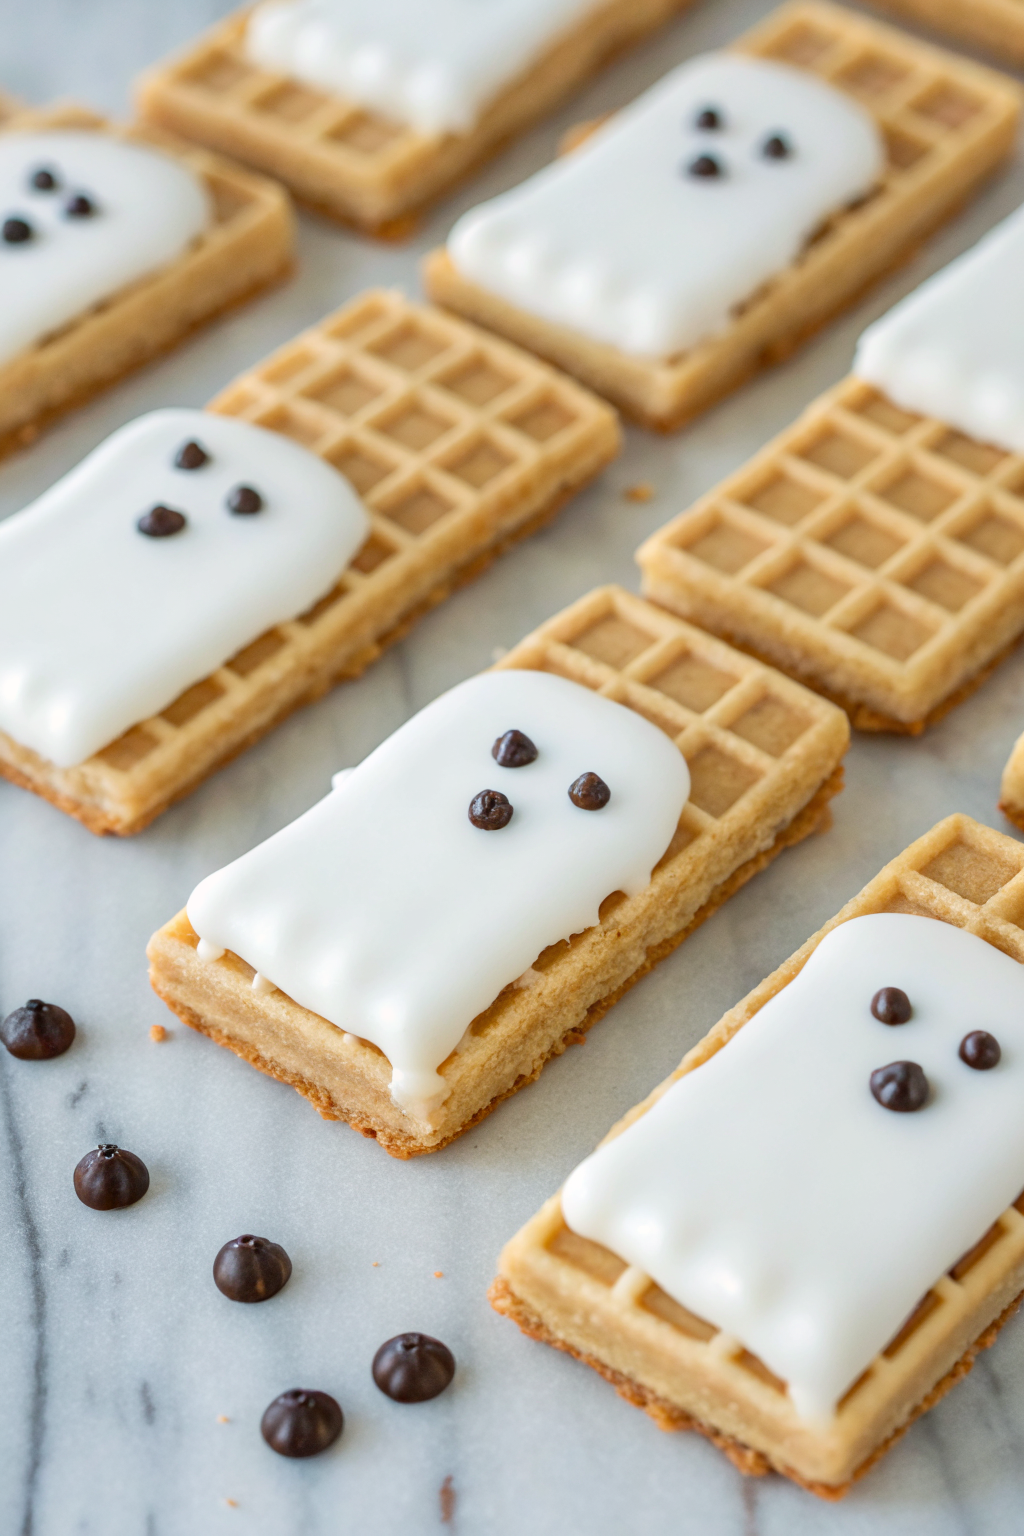
- Transfer the white chocolate to a piping bag or zip-top bag and snip a small opening. Pipe a plump oval or teardrop shape near the top half of each dipped wafer to form a ghost, leaving a border of dark chocolate around the edges. Add a small tail or wavy bottom edge for personality. Use a toothpick to gently nudge or smooth any lopsided ghosts while the white chocolate is still soft.
- While the white chocolate is still soft, press two mini chocolate chips into each ghost for eyes and, if desired, a third chip for a mouth. Alternatively, let the white chocolate set, then use black decorating gel to draw eyes and mouths. Tilt some eyes or vary the placement slightly to give each ghost a different expression.
- If desired, sprinkle Halloween sprinkles, nonpareils, or crushed chocolate sandwich cookies over the exposed chocolate areas around the ghosts. Drizzle any colored candy melts lightly over the wafers in thin zigzags, taking care not to cover the faces.
- Let the cookies sit at room temperature until the chocolate is completely set and firm to the touch. If your kitchen is warm, chill the tray in the refrigerator for 10–15 minutes to speed setting, then return to room temperature.
- Once set, carefully lift the cookies from the parchment and transfer to a serving platter or airtight container. Handle them by the undipped end or by the edges so you don’t smudge the ghost faces. Store in a cool, dry place until ready to serve.
Notes
Approximate per cookie (1 of 24): 130 calories; fat 7 g; saturated fat 4 g; carbohydrates 16 g; fiber 1 g; sugars 11 g; protein 2 g; sodium 55 mg. Values will vary based on brands, exact chocolate type, decorations used, and portion size.
Leave a Reply