
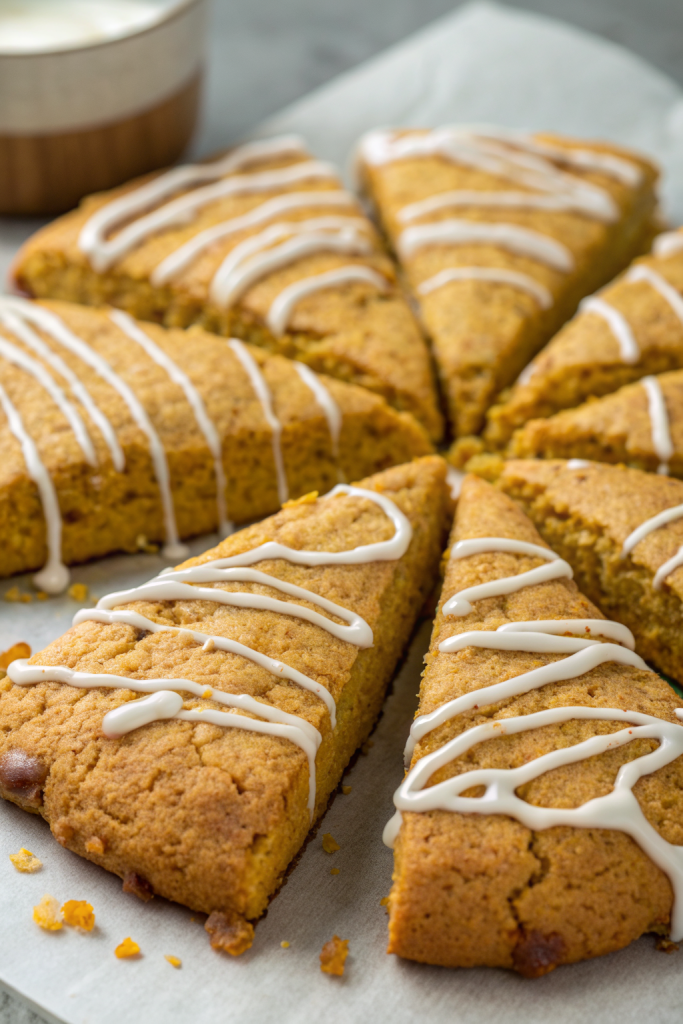
Tasty Mini Pumpkin Scones Recipe tastes like a cozy fall morning in pastry form, with warm spices, tender crumb, and a sweet vanilla glaze on top. It suits busy bakers who want a coffee shop style treat in about 35 minutes from start to finish. I test pumpkin recipes year-round in my tiny kitchen, and my neighbors never complain about the leftovers.
Why Make This Tasty Mini Pumpkin Scones Recipe at Home
You control the spice level, sweetness, and glaze thickness, so every batch fits your taste. The mini size keeps portions friendly and makes the scones perfect for brunch platters, lunch boxes, or quick snacks.
You also skip the coffee shop price tag and long lines. One batch of this Tasty Mini Pumpkin Scones Recipe costs about the same as a single bakery scone, and you get a whole tray of them.
“These mini pumpkin scones taste like a fancy bakery treat, but my kids devoured them faster than I could brew coffee. ★★★★★”
Ingredients You Need
Dry ingredients
- 2 cups all-purpose flour
- Use a standard unbleached flour like King Arthur or Gold Medal.
- 1/3 cup light brown sugar, packed
- Brown sugar adds moisture and a light caramel note.
- 2 teaspoons baking powder
- 1/4 teaspoon baking soda
- 1/2 teaspoon fine sea salt
- 1 1/2 teaspoons ground cinnamon
- 1/2 teaspoon ground ginger
- 1/4 teaspoon ground nutmeg
- 1/8 teaspoon ground cloves
- Use pumpkin pie spice instead: swap all the spices for 2 teaspoons pumpkin pie spice if you prefer a shortcut.
Cold ingredients
- 1/2 cup cold unsalted butter, cut into small cubes
- Use salted butter if needed and reduce added salt to a pinch.
- Keep the butter very cold so the scones bake up tall and flaky.
Wet ingredients
- 1/2 cup pumpkin puree
- Use canned 100% pumpkin, not pumpkin pie filling.
- Libby’s or store brand both work well.
- 1/3 cup heavy cream, plus more for brushing
- Substitute half-and-half in a pinch, though the texture turns slightly less rich.
- 1 large egg
- 1 teaspoon vanilla extract
Simple vanilla glaze
- 1 cup powdered sugar, sifted
- 2–3 tablespoons milk or cream
- 1/2 teaspoon vanilla extract
- Small pinch of salt
- Add a pinch of cinnamon for a spiced glaze if you like.
Optional toppings
- Coarse sugar for sprinkling before baking
- Extra cinnamon or pumpkin pie spice for dusting the glaze
- Mini chocolate chips or chopped toasted pecans to sprinkle on top while the glaze sets
Equipment list
- Large mixing bowl
- Medium mixing bowl
- Whisk
- Pastry cutter, two knives, or clean fingertips
- Rubber spatula
- Bench scraper or sharp knife
- Baking sheet
- Parchment paper or silicone baking mat
- Cooling rack
- Small bowl and spoon for the glaze
Tips & Mistakes
- Cut the butter into small cubes and chill it so it stays cold and gives you flaky layers.
- Handle the dough gently and stop mixing as soon as it comes together to avoid tough scones.
- Pat the dough into an even disc so the mini wedges bake at the same rate.
- Flour your hands and knife lightly so the dough does not stick and tear.
- Chill the shaped scones for 10–15 minutes before baking if your kitchen runs warm so they hold their shape.
- Use pumpkin puree, not pumpkin pie filling, so you control the sweetness and spices.
- Do not overbake; pull the scones when the edges turn lightly golden and the tops feel set.
- Let the scones cool slightly before glazing so the glaze clings instead of sliding off.
How to Make Tasty Mini Pumpkin Scones Recipe
Step 1: Prep the oven and pan
Preheat your oven to 400°F. Line a baking sheet with parchment paper or a silicone baking mat. This step keeps the mini pumpkin scones from sticking and makes cleanup easy.
Step 2: Mix the dry ingredients
In a large bowl, whisk together the flour, brown sugar, baking powder, baking soda, salt, cinnamon, ginger, nutmeg, and cloves. Break up any brown sugar clumps with your fingers or the whisk. You want an even mix so every bite tastes balanced.
Step 3: Cut in the cold butter
Add the cold butter cubes to the dry ingredients. Use a pastry cutter, two knives, or your fingertips to work the butter into the flour. Stop when you see pea-sized bits of butter coated in flour and the mixture looks slightly sandy.
Step 4: Whisk the wet ingredients
In a separate medium bowl, whisk together the pumpkin puree, heavy cream, egg, and vanilla extract. Whisk until the mixture looks smooth and uniform. This mixture brings moisture and flavor to the Tasty Mini Pumpkin Scones Recipe.
Step 5: Bring the dough together
Pour the pumpkin mixture into the flour and butter mixture. Use a rubber spatula to fold everything together gently. Stop as soon as the dough looks mostly combined and no big dry patches remain, even if it looks a little shaggy.
Step 6: Shape into mini scones
Lightly flour your work surface and your hands. Turn the dough out and gently pat it into a disc about 6 to 7 inches across and about 1 inch thick. Use a bench scraper or sharp knife to cut the disc into 8 mini wedges, like a small pizza.
Step 7: Prep for baking
Transfer the wedges to the lined baking sheet, leaving a little space between each one. Brush the tops lightly with cream to help them brown. Sprinkle coarse sugar on top if you want extra crunch and sparkle.
Step 8: Bake the mini pumpkin scones
Place the baking sheet on the middle rack of the oven. Bake for 12–15 minutes, until the scones puff up, the edges look lightly golden, and the centers feel set when you tap them. If your oven runs hot, start checking at 11 minutes.
Step 9: Cool before glazing
Move the baked scones to a cooling rack. Let them cool for at least 10–15 minutes so the glaze sets nicely on top. Warm scones help the glaze soak in a bit, which adds great flavor.
Step 10: Mix the vanilla glaze
In a small bowl, whisk together the powdered sugar, 2 tablespoons of milk or cream, vanilla, and a tiny pinch of salt. Add more milk a teaspoon at a time until the glaze reaches a thick but pourable consistency. It should ribbon off the spoon and slowly disappear back into the bowl.
Step 11: Glaze the scones
Drizzle the glaze over the cooled or slightly warm mini pumpkin scones. You can spoon the glaze across the tops or dip the tops directly into the bowl for a thicker coating. Sprinkle a little cinnamon, pumpkin pie spice, or chopped nuts on top if you want extra flair.
Variations I've Tried
- Maple glazed mini pumpkin scones: Swap the vanilla in the glaze for 1 tablespoon pure maple syrup and reduce the milk slightly. The maple flavor pairs perfectly with the pumpkin and spices.
- Chocolate chip mini pumpkin scones: Fold 1/2 cup mini chocolate chips into the dough right after you mix the wet and dry ingredients. The chocolate melts into little pockets of sweetness in every bite.
- Nutty pumpkin scones: Add 1/2 cup chopped toasted pecans or walnuts to the dough. The nuts add crunch and a toasty flavor that works well with the spices.
- Extra spiced version: Increase the cinnamon to 2 teaspoons and the ginger to 3/4 teaspoon if you love bold spice. I like this version when I serve the scones with plain yogurt or less sweet sides.
How to Serve Tasty Mini Pumpkin Scones Recipe
Serve these mini pumpkin scones slightly warm with a hot cup of coffee, tea, or cocoa. They fit nicely on a brunch board with fresh fruit, yogurt, and scrambled eggs. Pack them in lunch boxes as a sweet fall treat that still feels homemade and cozy. I also like to split them and add a thin layer of cream cheese or pumpkin butter for a little extra indulgence.
How to store
- Room temperature: Keep cooled scones in an airtight container at room temperature for up to 2 days.
- Fridge: Store in a sealed container in the refrigerator for up to 5 days. Let them come to room temperature or warm them briefly before serving.
- Freezer: Freeze baked and cooled scones on a tray, then move them to a freezer bag for up to 2 months.
- Reheating: Warm scones in a 300°F oven or toaster oven for 5–8 minutes until heated through, or microwave for 10–15 seconds if you feel impatient.
Tasty Mini Pumpkin Scones Recipe
Ingredients
Instructions
- Preheat the oven to 400°F (200°C). Line a baking sheet with parchment paper or a silicone baking mat.
- In a large bowl, whisk together the flour, brown sugar, baking powder, baking soda, salt, cinnamon, ginger, nutmeg, and cloves until evenly combined.
- Add the cold butter cubes to the dry ingredients. Use a pastry cutter, two knives, or your fingertips to work the butter into the flour until pea-sized bits remain and the mixture looks slightly sandy.
- In a medium bowl, whisk together the pumpkin puree, heavy cream, egg, and vanilla extract until smooth and uniform.
- Pour the pumpkin mixture into the flour and butter mixture. Gently fold with a rubber spatula until the dough just comes together and no large dry patches remain; it will look a bit shaggy.
- Lightly flour your work surface and hands. Turn the dough out and gently pat it into a disc about 6–7 inches across and about 1 inch thick.
- Use a bench scraper or sharp knife to cut the disc into 8 mini wedges, like a small pizza, and transfer them to the prepared baking sheet, leaving some space between each scone.
- Brush the tops lightly with cream. Sprinkle with coarse sugar if using.
- Bake on the middle rack for 12–15 minutes, until the scones puff up, the edges are lightly golden, and the centers feel set when gently tapped. Start checking at 11 minutes if your oven runs hot.
- Transfer the scones to a cooling rack and let cool for 10–15 minutes before glazing.
- For the glaze, whisk together the powdered sugar, 2 tablespoons of milk or cream, vanilla, and a pinch of salt in a small bowl. Add more milk a teaspoon at a time until the glaze is thick but pourable and ribbons off the spoon before slowly disappearing back into the bowl.
- Drizzle the glaze over the cooled or slightly warm scones, or dip the tops into the glaze for a thicker coating. Add a light dusting of cinnamon or pumpkin pie spice, or sprinkle mini chocolate chips or chopped toasted pecans on top if desired. Let the glaze set before serving.
Notes
Approximate per 1 mini scone (1 of 8, including glaze): 260 calories; fat 13 g; saturated fat 8 g; carbohydrates 33 g; fiber 1 g; sugars 14 g; protein 4 g; sodium 260 mg. Values will vary based on brands, exact measurements, and optional toppings.