
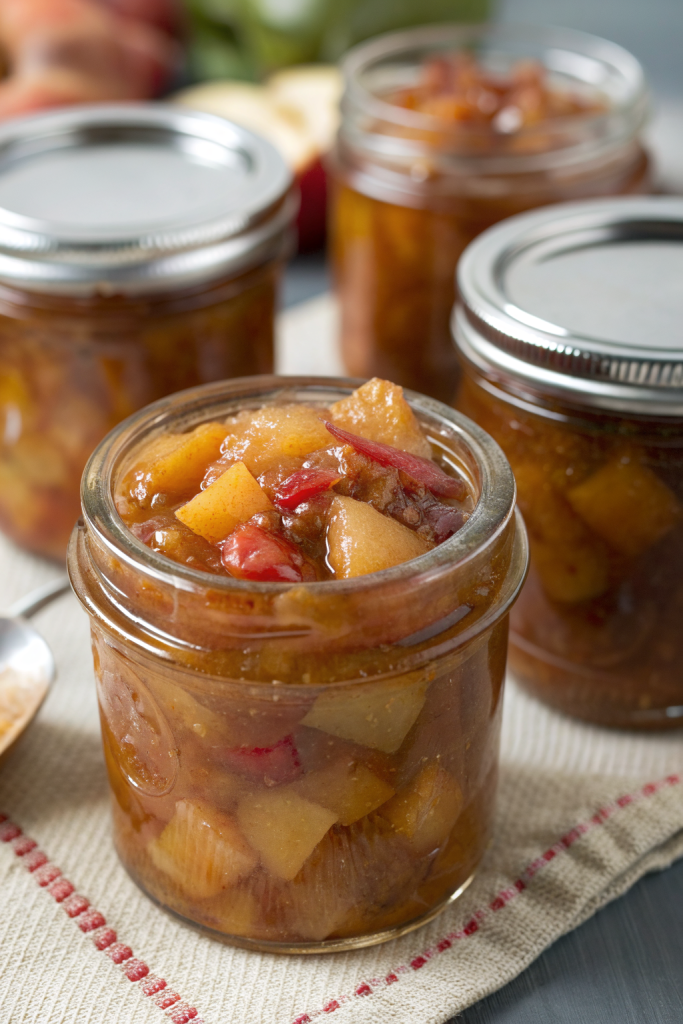
Homemade Apple Pie Jam Recipe tastes like a spoonable slice of warm apple pie, with cozy cinnamon, brown sugar, and soft apple chunks in every bite. It works perfectly for busy home cooks who want a fall-flavored spread in about 1 hour start to finish. I grew up in a small Midwestern kitchen where apple season meant sticky counters, bubbling pots, and at least one burnt fingertip every year… so you’re in good hands here.
Why Homemade Apple Pie Jam Recipe Is Worth It
This jam packs all the flavor of classic apple pie without crust drama or soggy bottoms. You get tender apple pieces, warm spices, and a glossy, thick spread that tastes like dessert but works at breakfast.
You control the sweetness, the spice level, and the texture, which beats any store-bought jar. You also use up extra apples before they go sad and wrinkly in the fruit bowl, which feels like a small kitchen victory.
“This Homemade Apple Pie Jam Recipe tastes exactly like apple pie filling on toast, and I ate it straight from the jar with a spoon. ★★★★★”
Ingredients You Need
Apples (about 3 pounds / 1.3 kg, before peeling)
- Use firm, tart apples like Granny Smith, Honeycrisp, Braeburn, or a mix.
- Mix sweet and tart apples for deeper flavor.
- Avoid mealy apples like Red Delicious, since they turn mushy and lose texture.
Sugar
- 3 cups granulated sugar.
- You can swap up to 1 cup with light brown sugar for a deeper, caramel-like flavor.
- Do not cut the sugar too much or the jam may not thicken well.
Lemon juice
- 1/4 cup bottled lemon juice (for consistent acidity and safe canning).
- Fresh lemon juice works for fridge jam, but bottled works better for canning.
Apple juice or apple cider
- 1 cup unsweetened apple juice or fresh apple cider.
- Avoid spiced cider since you already add spices.
Spices
- 2 teaspoons ground cinnamon.
- 1/4 teaspoon ground nutmeg.
- 1/4 teaspoon ground allspice (optional but tasty).
- 1 teaspoon vanilla extract, added at the end for aroma.
Pectin
- 1 box (1.75 oz / 49 g) powdered fruit pectin, “classic” or “regular.”
- Use a reliable brand like Sure-Jell or Ball; they set more predictably.
- Do not swap with liquid pectin in the same amount; it needs a different method.
Butter (optional but helpful)
- 1 teaspoon unsalted butter.
- This reduces foam on top of the jam while it boils.
Equipment List
- Large heavy-bottomed pot or jam pan (at least 6-quart capacity).
- Cutting board and sharp knife or apple peeler-corer-slicer.
- Measuring cups and spoons.
- Potato masher or sturdy spoon for breaking down apples.
- Long-handled heatproof spoon or spatula.
- Candy or instant-read thermometer (helpful but optional).
- Canning funnel, ladle, and clean jars with lids and bands (half-pint jars work best).
- Large pot or water-bath canner with rack, if you plan to can the jam.
- Clean kitchen towels and a heatproof surface or cooling rack.
Quick Tips & substitutions
- Use a mix of tart and sweet apples for the best apple pie jam flavor.
- Peel the apples completely so the jam stays smooth and spreads easily.
- Dice apples small (about 1/4-inch cubes) so they cook evenly and soften faster.
- Swap up to 1 cup of white sugar with brown sugar for a deeper, pie-like taste.
- Use bottled lemon juice if you plan to can the jam, since it keeps acidity consistent.
- Stir the jam often and scrape the bottom of the pot to prevent scorching.
- Add a splash more apple juice if the mixture looks too thick before it boils.
- Use vegan butter or skip butter entirely to keep the recipe fully dairy-free.
- Use low-sugar pectin if you want to cut sugar; follow the package directions for ratios.
- Skip allspice if you do not love strong spice; cinnamon alone still tastes amazing.
How to Make Homemade Apple Pie Jam Recipe
Step 1: Prep the apples
Peel all the apples, then core and dice them into small cubes, about 1/4 inch. Aim for even pieces so they cook at the same speed. Measure out about 8 cups of diced apples and add them to your large pot.
Pour in the apple juice or cider and the lemon juice. Stir to coat the apples so they do not brown while you prep the rest of the ingredients.
Step 2: Add pectin and spices
Sprinkle the powdered pectin over the apples and juice. Stir very well so the pectin dissolves and does not clump. Add cinnamon, nutmeg, and allspice.
Drop in the teaspoon of butter if you use it. Stir again so everything mixes evenly and the spices coat the apples.
Step 3: Cook the apple mixture
Place the pot over medium-high heat. Stir often as the mixture heats and the apples start to soften. Bring the mixture to a full rolling boil, where the bubbles do not stop when you stir.
Let the apples simmer for 3–5 minutes. Mash some of the apples gently with a potato masher if you want a more jammy texture, but leave some chunks for that apple pie filling vibe.
Step 4: Add sugar and boil hard
Pour in all the sugar at once while you stir constantly. The mixture will thin out at first as the sugar dissolves. Keep stirring until you do not feel any gritty sugar at the bottom.
Bring the mixture back to a full rolling boil over medium-high heat. Once it hits that strong boil, start timing and boil hard for 1–2 minutes while you stir non-stop. The jam will look glossy and thicker.
Step 5: Check the set
Turn off the heat and stir in the vanilla extract. To check thickness, spoon a little jam onto a chilled plate and wait 30 seconds. Push it with your finger; if it wrinkles slightly and holds a soft mound, it set well.
If it runs like syrup, return the pot to the heat and boil another 1–2 minutes. Test again with a clean chilled plate until you like the texture. Keep in mind that jam thickens more as it cools.
Step 6: Skim foam and get jars ready
Skim any foam from the top of the jam with a spoon. The butter usually keeps foam low, but a little still shows up. Foam does not hurt anything; it just looks less pretty in jars.
If you plan to can the jam, keep your clean jars hot in simmering water and keep lids warm as well. If you plan to store the jam in the fridge only, clean dry jars work fine at room temperature.
Step 7: Fill the jars
Use a canning funnel and ladle to fill jars with hot jam. Leave about 1/4 inch of headspace at the top of each jar. Wipe the rims with a clean damp cloth so the lids seal well.
Place lids on the jars and screw on the bands until fingertip tight. Do not crank them super hard; snug works best.
Step 8: Water-bath can (optional but handy)
Place the filled jars on the rack in a large pot or water-bath canner. Cover them with at least 1–2 inches of hot water. Bring the water to a strong boil.
Process half-pint jars for 10 minutes (adjust a bit longer if you live at high altitude, based on standard canning charts). When time ends, turn off the heat, remove the lid, and let jars sit in the water for 5 minutes. Lift jars out and place them on a towel to cool, then leave them undisturbed for 12–24 hours.
Step 9: Cool, check seals, and label
After the jars cool, press the center of each lid. A sealed lid does not flex up and down. If a lid pops, store that jar in the fridge and use it first.
Label each jar with the name “Homemade Apple Pie Jam Recipe” and the date. Store sealed jars in a cool, dark place. Enjoy the jam within about 12–18 months for best flavor.
Recipe Variations
- Gluten-free: The base recipe already uses gluten-free ingredients; just confirm your pectin and vanilla label.
- Vegan: Skip the butter or use a plant-based butter; everything else already fits a vegan diet.
- Low sugar: Use a low-sugar pectin and follow the package for sugar amounts; add more spices to keep flavor bold.
- Extra chunky: Dice apples a bit larger and mash less, so the jam feels more like pie filling.
- Caramel twist: Swap 1–1.5 cups of white sugar with brown sugar and add a pinch of sea salt.
- Spice boost: Add ground ginger or a pinch of cloves for a stronger spice profile.
- No pectin version: Cook apples longer and use more sugar, then reduce until thick; this gives a softer, more rustic spread.
Ways to Serve Homemade Apple Pie Jam Recipe
- Spoon over warm toast, English muffins, or biscuits.
- Swirl into oatmeal, overnight oats, or yogurt for a fall breakfast.
- Use as a filling for crepes, pancakes, or French toast.
- Spread between cake layers or on top of cheesecake.
- Stir into plain Greek yogurt with granola for a quick snack.
- Use as a filling for hand pies or thumbprint cookies.
- Serve over vanilla ice cream or frozen yogurt as a quick dessert sauce.
Storage Success
Store Homemade Apple Pie Jam Recipe jars that did not go through a water bath in the fridge and use them within 3–4 weeks. Keep sealed, properly processed jars in a cool, dark cupboard or pantry for up to 12–18 months. Once you open a jar, refrigerate it and use it within about a month.
Always use a clean spoon when you scoop jam so you avoid introducing crumbs or bacteria. If you notice off smells, mold, or strange bubbling, toss the jar and open a fresh one.
Homemade Apple Pie Jam Recipe
Ingredients
Instructions
- Peel, core, and dice the apples into 1/4-inch cubes. Measure about 8 cups of diced apples and add them to a large heavy-bottomed pot.
- Pour in the apple juice or cider and the bottled lemon juice. Stir to coat the apples so they do not brown.
- Sprinkle the powdered pectin evenly over the apples and juice. Stir very well so the pectin dissolves and does not clump. Add the cinnamon, nutmeg, and allspice, if using, and stir again. Drop in the butter to reduce foam, if using.
- Place the pot over medium-high heat. Cook, stirring often, until the mixture reaches a full rolling boil that does not stop when stirred and the apples begin to soften. Simmer 3–5 minutes, then lightly mash some of the apples with a potato masher, leaving some chunks for texture.
- Add all of the sugar at once, stirring constantly until the sugar fully dissolves and you no longer feel granules on the bottom of the pot.
- Return the mixture to a full rolling boil over medium-high heat. Boil hard for 1–2 minutes, stirring continuously, until the jam looks glossy and slightly thickened.
- Remove the pot from the heat and stir in the vanilla extract. To check the set, place a spoonful of jam on a chilled plate and let it sit 30 seconds. Push it with your finger; if it wrinkles and holds a soft mound, it is ready. If it is still runny, return the pot to the heat and boil another 1–2 minutes, then test again.
- Skim off any foam from the surface of the jam with a spoon. Prepare clean jars; keep them hot in simmering water if you plan to can, or use clean dry jars if refrigerating only.
- Using a canning funnel and ladle, fill the hot jars with jam, leaving about 1/4 inch of headspace. Wipe jar rims with a clean damp cloth, place lids on, and screw bands on until fingertip tight.
- For water-bath canning (optional), place jars on a rack in a large pot or canner, cover with 1–2 inches of hot water, and bring to a full boil. Process half-pint jars for 10 minutes (adjust for altitude as needed). Turn off heat, remove the lid, and let jars rest in the water for 5 minutes. Lift out and cool on a towel for 12–24 hours.
- When jars are cool, check seals by pressing the center of each lid; it should not flex up and down. Refrigerate any unsealed jars and use first. Label sealed jars with the name and date and store in a cool, dark place for 12–18 months. Refrigerate after opening and use within about 1 month.
Notes
Approximate per 2-tablespoon serving (about 1/16 of the batch): 90 calories; fat 0 g; saturated fat 0 g; carbohydrates 23 g; fiber 1 g; sugars 21 g; protein 0 g; sodium 0 mg. Values are estimates and will vary based on exact apple variety, sugar mix, and portion size. Storage: Refrigerate jars that are not water-bath processed and use within 3–4 weeks. Properly processed, sealed jars keep in a cool, dark place for 12–18 months; refrigerate after opening and use within about a month.