
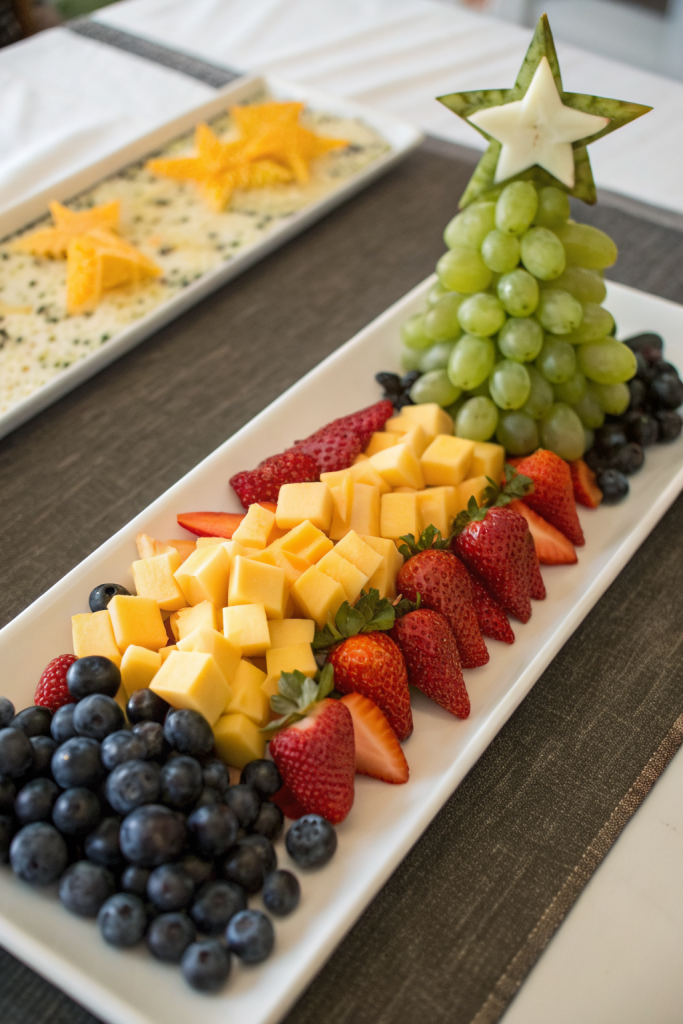
Christmas Tree Shaped Charcuterie Recipe tastes like a greatest-hits platter of salty, creamy, crunchy, and sweet bites in every branch of the tree. It works perfectly for busy hosts who want a showstopper appetizer in about 30 to 40 minutes with zero cooking. I first made this for a neighborhood party, and my kids guarded the star-shaped cheese like it was actual gold.
Why Christmas Tree Shaped Charcuterie Recipe Is Worth It
This Christmas Tree Shaped Charcuterie Recipe turns simple meats, cheeses, and fruit into a centerpiece that people photograph before they touch. You get a lot of flavor variety with very little actual cooking, which keeps holiday stress lower and counters less messy.
You can scale it up for a crowd or shrink it for a cozy movie night. It also works with whatever you already have in the fridge, so you avoid a long and expensive specialty shopping trip.
“This Christmas Tree Shaped Charcuterie Recipe disappeared faster than the cookies at our party, and everyone asked for the how-to. ★★★★★”
Ingredients
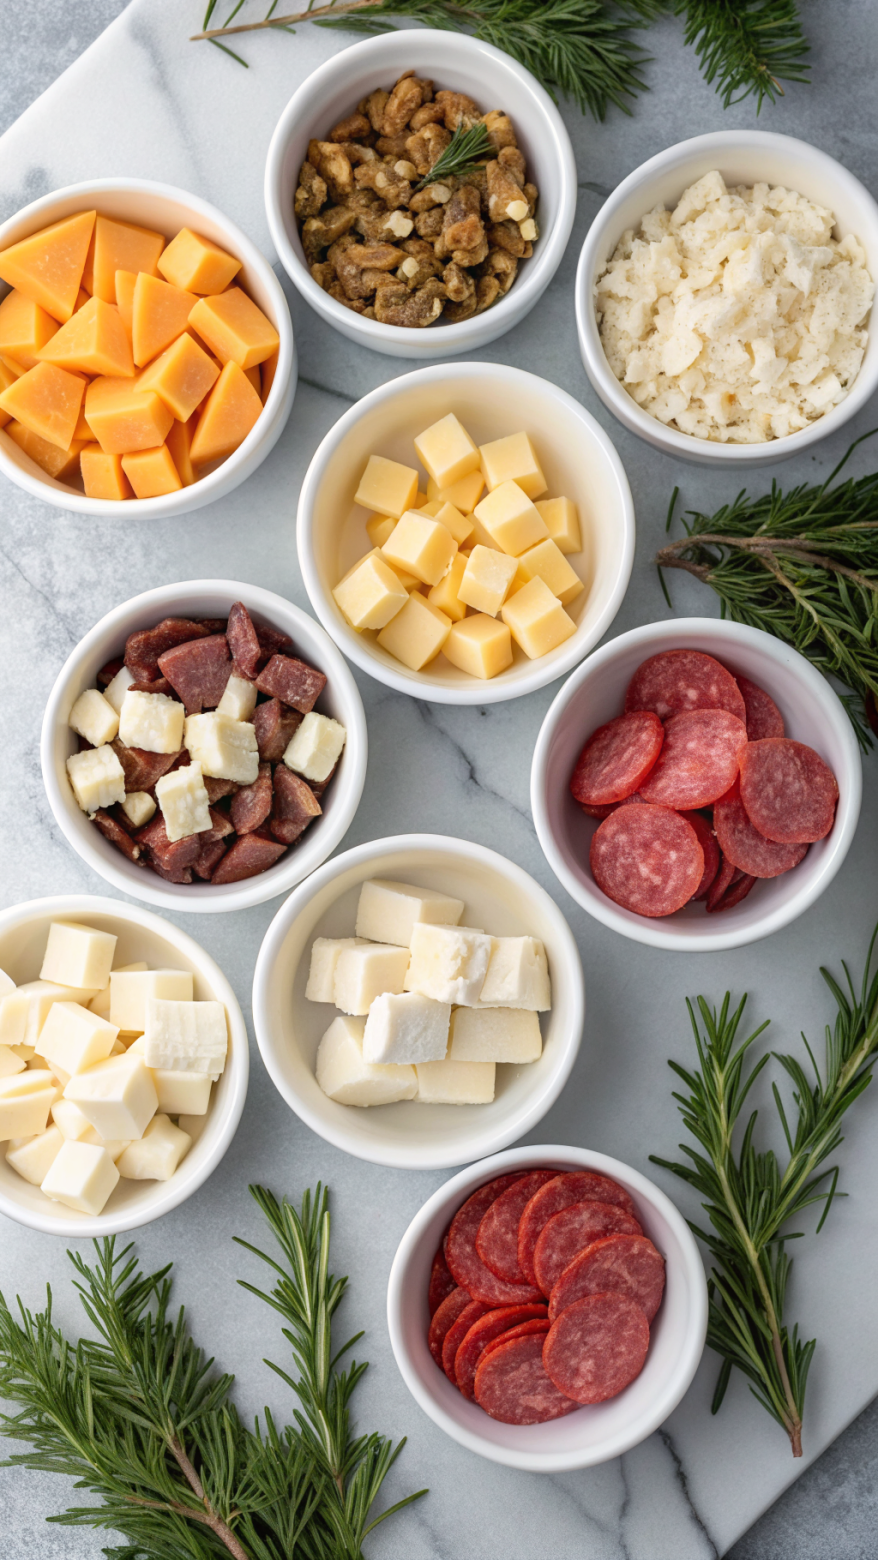
Base & structure
- 1 large wooden board or slate board
- At least 18 inches tall so the tree shape looks clear.
- 1 small ramekin or tiny bowl
- Use this at the bottom as the “tree trunk” for nuts or olives.
- Parchment paper or wax paper
- Optional, but it helps with cleanup and keeps juicy items from staining wood.
Meats
Use 3 to 4 types for variety. Choose thinly sliced meats that fold easily.
- 4 ounces salami, thinly sliced
- Genoa or soppressata work well.
- 4 ounces prosciutto
- I like pre-sliced packs from Trader Joe’s or Aldi for convenience.
- 4 ounces pepperoni, small rounds
- Mini pepperoni saves time and fits nicely in smaller “branches.”
- Optional: 3 ounces turkey or chicken deli slices
- Great for guests who prefer lighter meats.
Cheeses
Pick a mix of soft, semi-soft, and firm cheeses. Use pre-cut cubes or slices as a shortcut.
- 4 ounces sharp cheddar, cut into small cubes
- 4 ounces pepper jack or Colby Jack, cut into cubes
- 4 ounces brie or camembert, cut into small wedges
- 3 ounces fresh mozzarella balls (ciliegine or pearls)
- 2 ounces gouda or smoked cheese, sliced or cubed
- 2 ounces firm cheese for the star
- Use cheddar or gouda and cut with a small star cookie cutter.
- If you do not own a cutter, slice a rough star with a sharp knife and call it rustic.
Fresh fruit & veggies
These add color and freshness and help outline the tree shape.
- 1 cup green grapes, washed and dried
- 1 cup red grapes, washed and dried
- 1 cup strawberries, hulled and halved
- 1 small cucumber, sliced into rounds or half-moons
- 1 cup cherry tomatoes
- 1 small bunch fresh rosemary
- Use as “branches” and garnish.
- Optional: 1 small red bell pepper, diced or cut into tiny squares
- Works as “ornaments” and adds bright color.
Crunchy elements
- 1 to 2 cups crackers
- Use a mix: water crackers, whole wheat, and gluten-free crackers if needed.
- 1 cup breadsticks or pretzel sticks
- Pretzel sticks look cute as extra “branches.”
- 1 cup nuts
- Almonds, pistachios, or cashews. Use roasted and salted for more flavor.
Sweet bites & extras
- 1/2 cup dried fruit
- Apricots, cranberries, or figs.
- 1/4 cup chocolate covered nuts or chocolate pieces
- Keep these away from juicy fruit so they stay crisp.
- 1/4 cup cornichons or small pickles
- 1/4 cup olives, mixed colors
- Use pitted olives so guests do not juggle pits and tiny plates.
Spreads & dips
- 1/3 cup fig jam or apricot jam
- 1/3 cup honey
- 1/3 cup grainy mustard or Dijon mustard
- Optional: 1/3 cup hummus or herbed cream cheese
- Great for kids and non-meat eaters.
Equipment list
- Large serving board or tray
- Small bowls or ramekins for wet items
- Small star cookie cutter for cheese star
- Sharp knife and small cutting board
- Toothpicks or mini skewers for easy grabbing
- Small spoons for jams, honey, and mustard
Quick Tips & substitutions
- Use pre-cut cheese cubes and pre-sliced meats to cut prep time in half.
- Sketch a quick triangle on paper so you know how tall and wide you want the tree before you start.
- Build the outline of the tree with green grapes, cucumber slices, or rosemary, then fill inside with meats and cheeses.
- Swap salami or prosciutto with turkey or chicken slices for a lighter board.
- Use gluten-free crackers or sliced cucumbers instead of regular crackers for gluten-free guests.
- Replace nuts with seeds like pumpkin or sunflower if you need a nut-free option.
- Use dairy-free cheeses and hummus in place of regular cheese for vegan guests.
- Keep juicy fruit like strawberries and tomatoes in small bowls so they do not soak crackers.
- Prep meats and cheeses ahead, store them separately in the fridge, and assemble the tree just before serving.
- If the board looks crowded, pull a few items off and serve refills on a side plate so the tree shape stays clear.
How to Make Christmas Tree Shaped Charcuterie Recipe
Step 1: Prep the board and ingredients
Lay parchment or wax paper on your board if you want easier cleanup. Wash and dry all fruit and veggies very well so extra moisture does not sog up crackers. Cut cheeses into cubes, slices, and wedges, then cut one thicker slice into a star for the top.
Fold salami and pepperoni into halves or quarters so they stack nicely. Gently fold prosciutto into loose ribbons so it looks fluffy and full. Place jams, honey, mustard, olives, and pickles into small bowls or ramekins.
Step 2: Outline the Christmas tree shape
Visualize a tall triangle that fills most of your board. Start at the top and place the cheese star where you want the tip of the tree. Use green grapes, cucumber slices, or rosemary sprigs to mark the sides of the triangle.
Work your way down, widening the triangle as you go to mimic tree branches. Leave a small space at the bottom for the “trunk” bowl. This outline gives you a guide so the Christmas Tree Shaped Charcuterie Recipe looks like a tree and not a random snack mountain.
Step 3: Build the trunk
Place a small ramekin or bowl at the bottom center of the triangle. Fill it with nuts, olives, or small pickles to act as the tree trunk. This anchors the design and gives guests something savory at the base.
If you use pretzel sticks, you can tuck a few around the bowl to look like roots. Keep the trunk narrower than the tree so the proportions look right. Step back and check the shape before you fill the rest.
Step 4: Add cheese layers as branches
Start just under the star and lay a short row of cheese cubes or slices. Use one type of cheese per row so the pattern looks clean. Make each row slightly wider as you go down, following the triangle outline.
Alternate colors and textures so the tree looks festive. For example, use cheddar near mozzarella, then brie wedges, then pepper jack. Leave small gaps between rows for meats and fruit.
Step 5: Tuck in meats between cheese rows
Fold salami into halves or quarters and stack them in a row under a cheese row. Use prosciutto ribbons in another row, then pepperoni in the next. Keep the rows horizontal so they read as branches.
Alternate meat and cheese rows as you move down the tree. Use more meat near the center and bottom, since guests often reach there first. Keep a little extra meat on a side plate so you can refill without wrecking the tree shape.
Step 6: Add fruit, veggies, and “ornaments”
Fill small gaps between rows with grapes, strawberries, cherry tomatoes, and cucumber slices. Use red grapes, strawberries, and tiny bell pepper squares as “ornaments” that pop against the green and beige tones. Place them in small clusters rather than single pieces so they look intentional.
Tuck rosemary sprigs along the edges and between rows to mimic evergreen branches. Keep juicy items away from crackers and breadsticks or place them in tiny bowls. Step back and adjust colors so you see a nice mix from top to bottom.
Step 7: Place crackers, breadsticks, and nuts
Line crackers along the base of the tree or fan them out on one or both sides of the board. You can also create a short “garland” of crackers across the tree, but keep it light so the shape stays clear. Add breadsticks or pretzel sticks near the trunk or along the sides.
Scatter nuts in small pockets around the tree or keep them in a bowl if you want a tidier look. If you serve guests with allergies, keep nuts in a separate bowl off the main board. Make sure every section of the tree has something crunchy nearby.
Step 8: Add dips, jams, and finishing touches
Nestle small bowls of fig jam, honey, mustard, and hummus near the edges of the tree so they do not break the shape. Add small spoons to each bowl so guests can serve themselves easily. Drizzle a tiny bit of honey over one cheese row if you like a sweet touch.
Finish with a few extra rosemary sprigs and a last check for color balance. Wipe any smears from the board edges so the Christmas Tree Shaped Charcuterie Recipe looks clean and photo ready. Keep the board chilled until guests arrive, then set it out at room temperature for serving.
Recipe Variations
- Gluten-free: Use only gluten-free crackers and breadsticks, and add more cucumber slices and bell pepper strips as dippers.
- Vegan: Use dairy-free cheeses, hummus, and bean dips, and skip the meats in favor of marinated tofu cubes or roasted chickpeas.
- Low carb: Swap most crackers with cucumber rounds, celery sticks, bell pepper strips, and extra nuts and olives.
- Kid-friendly: Add mild cheeses, turkey slices, mini pretzels, and fun shapes cut from cheese and cucumber.
- Sweet-focused: Use more fruit, dried fruit, chocolate pieces, yogurt-covered pretzels, and a couple of mild cheeses.
- Spicy: Add spicy salami, pepper jack, pickled jalapeños, and a spicy mustard or chili jam.
Ways to Serve
- Set the Christmas Tree Shaped Charcuterie Recipe in the center of the table and surround it with stacks of small plates and napkins.
- Pair it with a big pot of hot cocoa or cider for a cozy snack station.
- Serve it before a holiday dinner as a light appetizer so guests do not hover in the kitchen.
- Bring it to a potluck on a sturdy cutting board and assemble final touches at the host’s house.
- Use it as a movie night centerpiece with extra fruit and crackers on the side for easy refills.
Storage Success
Store leftover meats and cheeses in separate airtight containers in the fridge and eat them within 3 to 4 days. Keep crackers and breadsticks in sealed bags or containers at room temperature so they stay crisp. Move juicy fruit and veggies into their own containers so they do not soften other items.
If you want to prep ahead, cut cheeses and wash fruit earlier in the day, store them separately, and assemble the Christmas Tree Shaped Charcuterie Recipe just before serving. This keeps textures fresh and the tree shape sharp and festive.
Christmas Tree Shaped Charcuterie Recipe
Ingredients
Instructions
- Lay parchment or wax paper on your serving board if desired. Wash and dry all fruit and vegetables very well. Cut cheeses into cubes, slices, and wedges, and cut a thicker slice of firm cheese into a star for the top of the tree.
- Fold the salami and pepperoni into halves or quarters so they stack neatly. Gently fold prosciutto into loose ribbons. Place jams, honey, mustard, olives, and pickles into small bowls or ramekins.
- Visualize a tall triangle filling most of the board. Place the cheese star at the top where you want the tip of the tree. Use green grapes, cucumber slices, or rosemary sprigs to mark the two sides of the triangle, widening as you move downward and leaving room at the bottom for the trunk.
- Set a small ramekin or bowl at the bottom center of the triangle outline to form the tree trunk. Fill it with nuts, olives, or pickles. Add a few pretzel sticks around the bowl if you like the look of roots, keeping the trunk narrower than the tree above it.
- Just under the cheese star, arrange a short horizontal row of cheese cubes or slices. Continue down the triangle, creating rows of cheese that grow slightly wider as you move toward the base, using one type of cheese per row and alternating colors and textures.
- Tuck folded salami, prosciutto ribbons, pepperoni rounds, and any turkey or chicken slices in horizontal rows between the cheese rows, keeping them even so they read like branches. Use more meat toward the center and bottom where guests tend to reach first.
- Fill gaps between rows with grapes, strawberries, cherry tomatoes, and cucumber slices. Use red grapes, strawberries, and small pieces of red bell pepper as ornament-like pops of color. Tuck rosemary sprigs around the edges and between layers to mimic evergreen branches, keeping wet or juicy items away from crackers and breadsticks.
- Arrange crackers along the base of the tree or fanned out along the sides of the board. Add breadsticks or pretzel sticks near the trunk or sides, and scatter nuts in small pockets around the tree or keep them contained in bowls if you prefer a neater look.
- Nestle bowls of jam, honey, mustard, and any hummus or cream cheese around the outside edges of the tree so they do not disrupt the shape. Add small spoons for serving, adjust any colors or spacing, and chill the board until guests arrive. Serve at room temperature.
Notes
Approximate per serving (1 of 12): 380 calories; fat 25 g; saturated fat 10 g; carbohydrates 22 g; fiber 2 g; sugars 10 g; protein 16 g; sodium 930 mg. Values will vary based on exact meats, cheeses, crackers, and extras used, as well as portion size.